
Chromatic Aberration | A Major Pet Peeve!
Chromatic Aberration is no fault of your own in the lovely world of photography. It is a natural occurrence in lenses where the wavelengths of light are not captured correctly. The result is a green/purple or magenta/cyan fringe around the edges of high to low contrast areas. They are not your fault, however, they are a technical flaw that if overlooked become the bane of your existence!
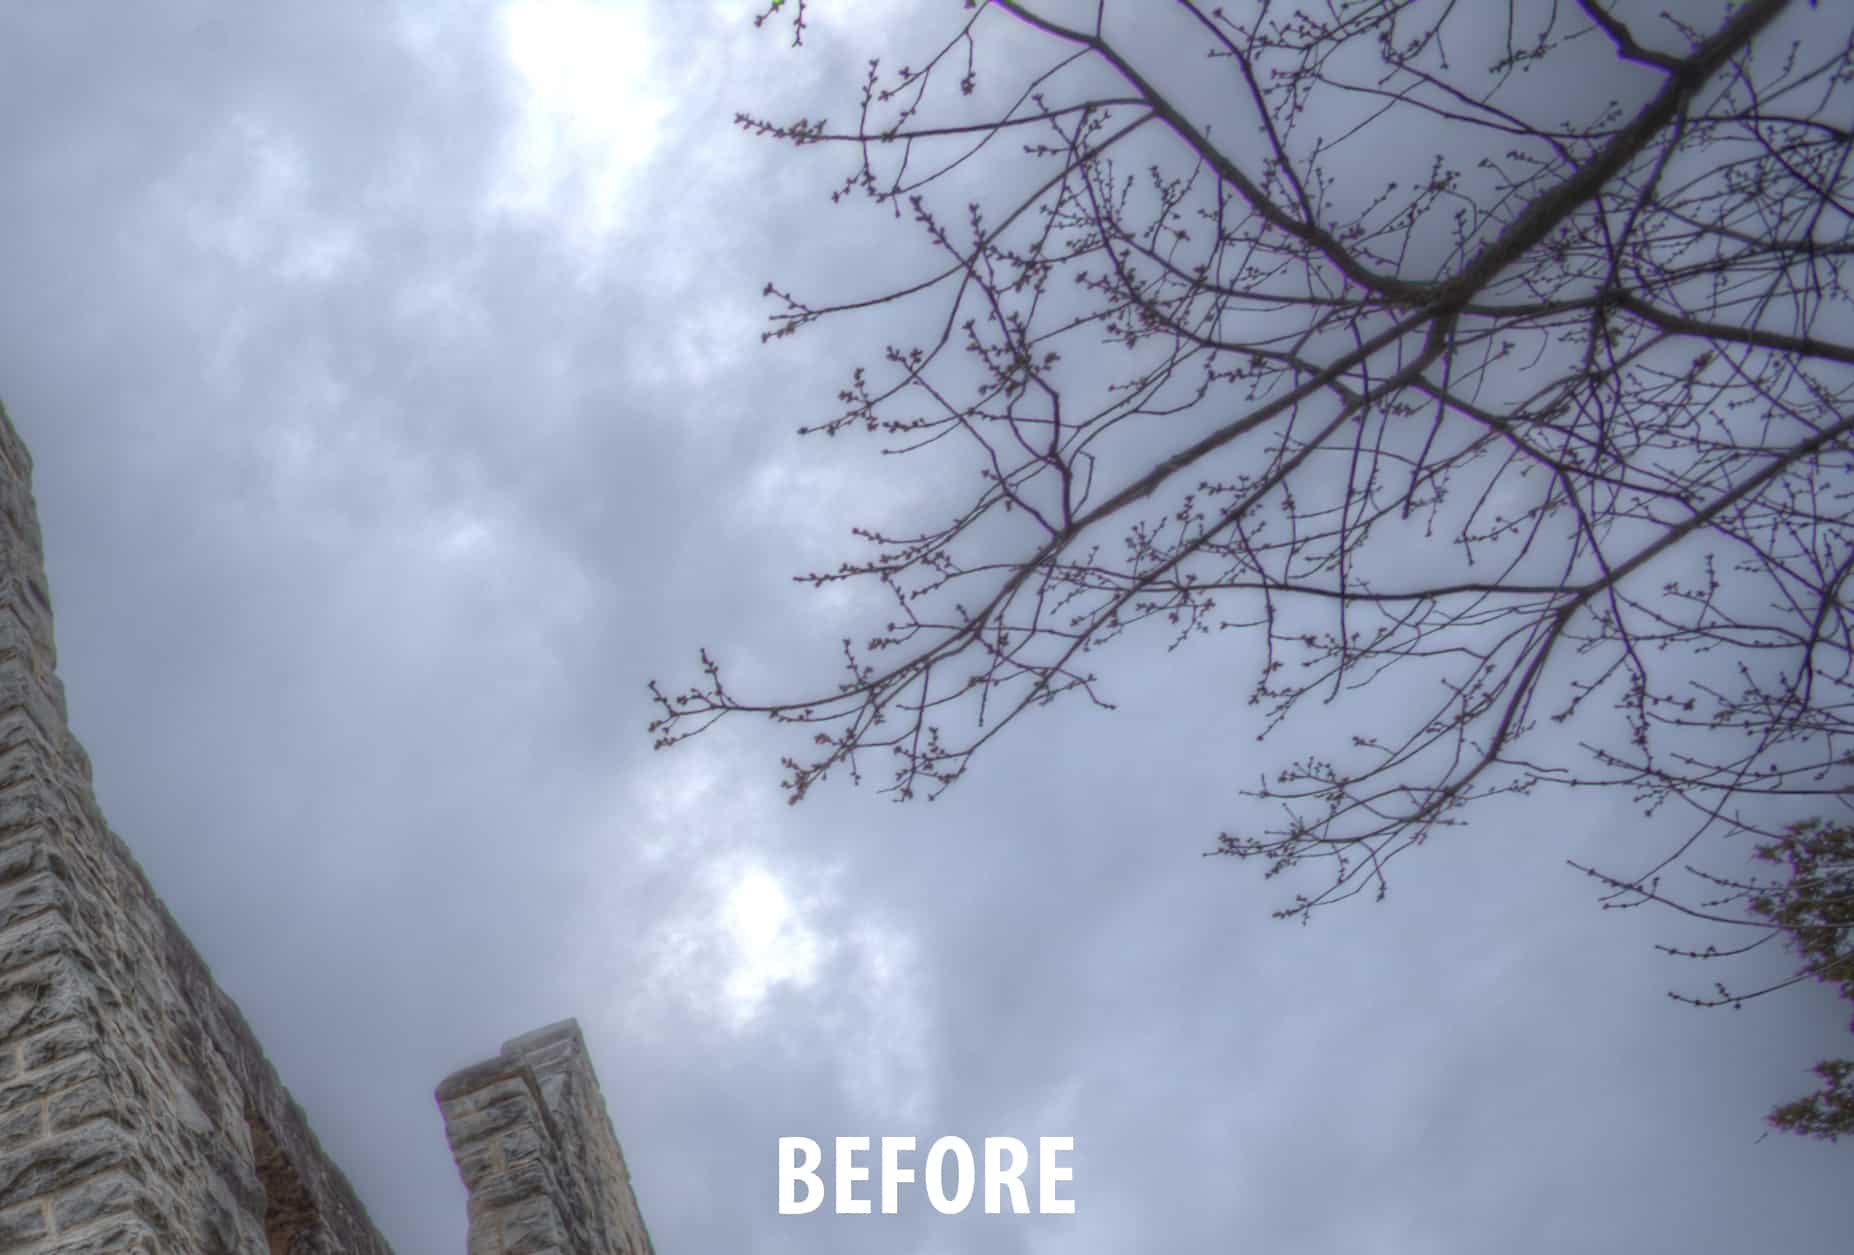
These Chromatic Aberrations will pretty much always happen on the Canon 17-40 lens at a focal length of 17. You will typically find this problem occurs at the minimum focal length of a zoom lens, it is much less apparent in prime lenses. Such is the nature of the beast for us landscape photographers out there.
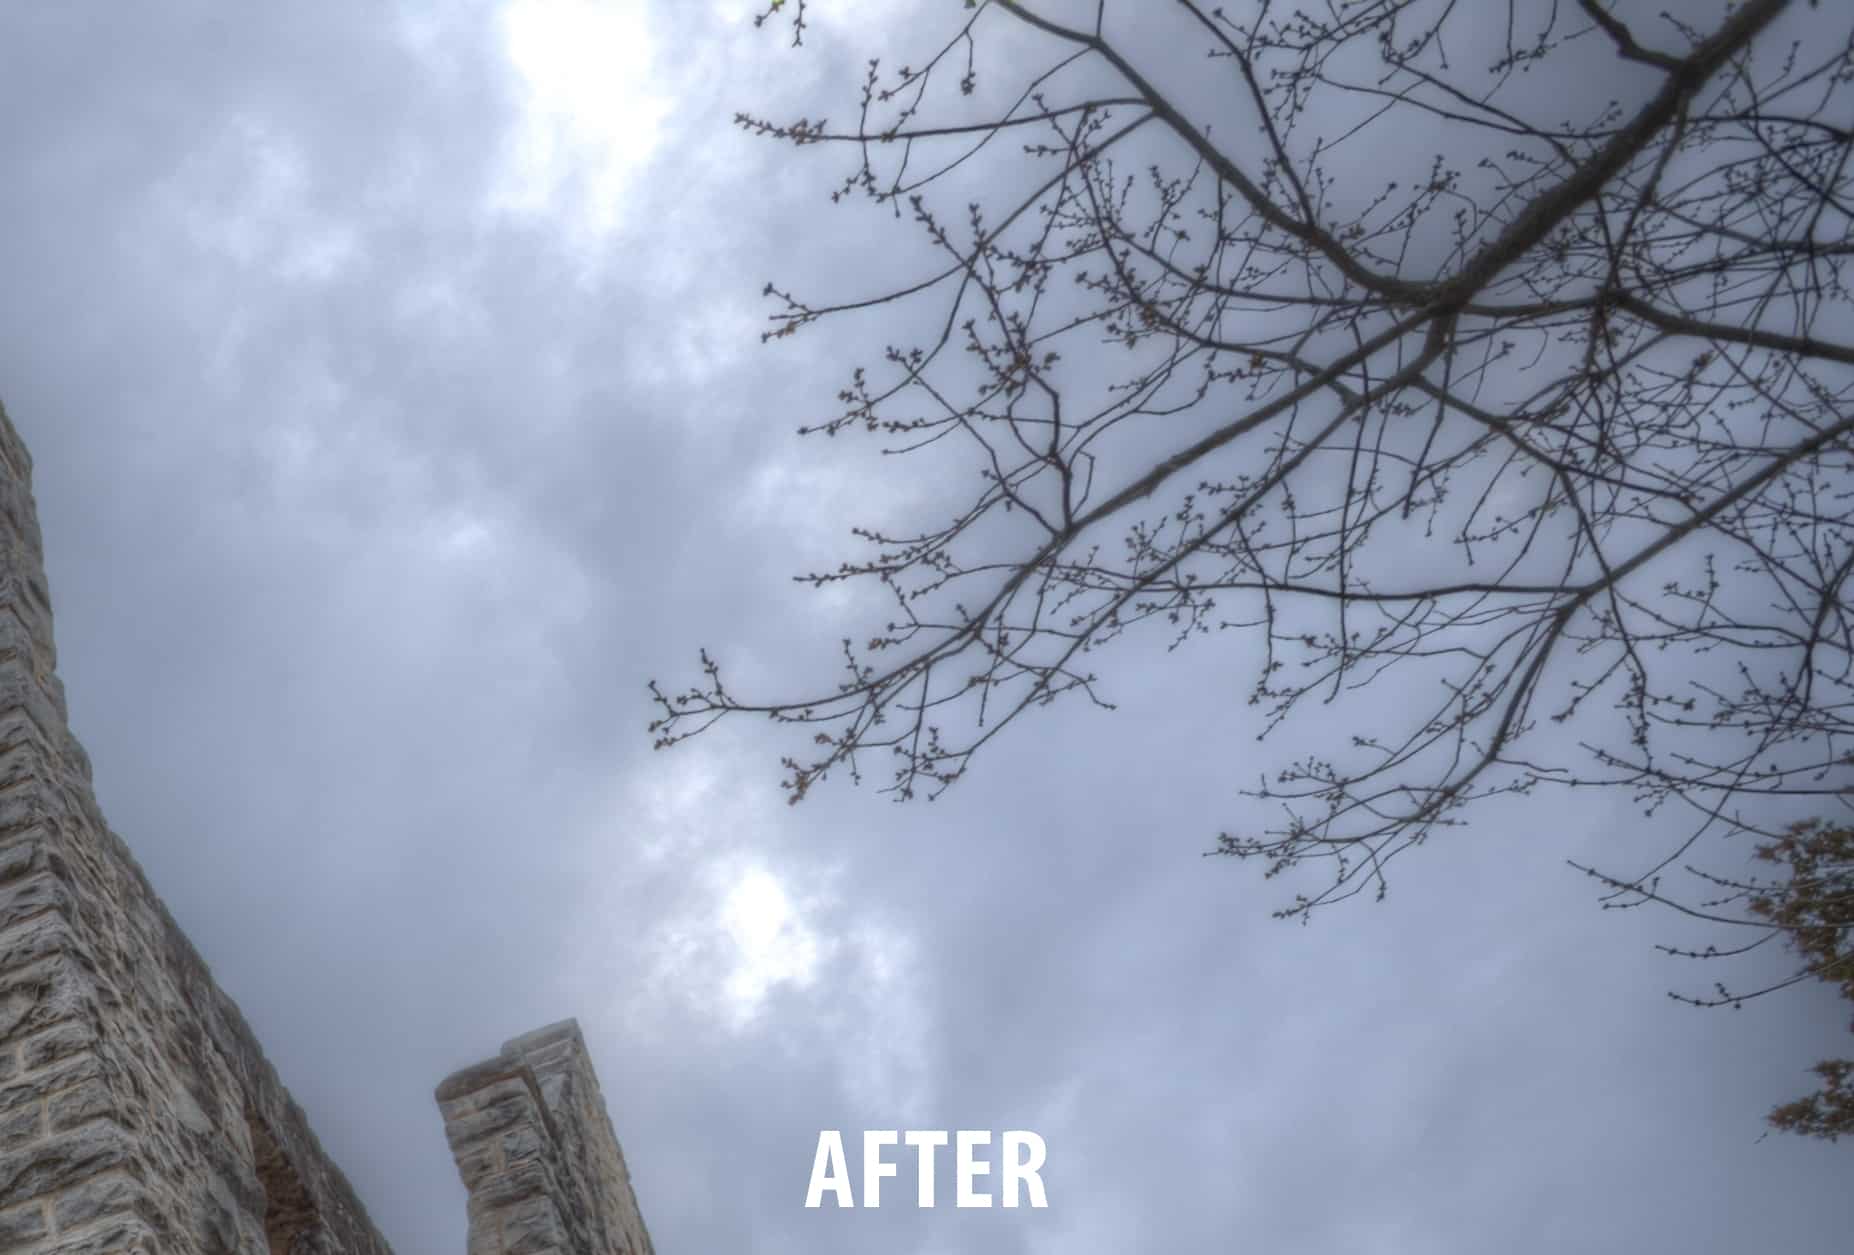
The great news is that Chromatic Aberration is very easy to get rid of! In this tutorial I will show you three methods to remove Chromatic Aberration in either Adobe Camera Raw or Lightroom in under 3 minutes! No excuses for Chromatic Aberration anymore, got it 🙂
The 3 methods of Chromatic Aberration removal shown:
- Automatic Removal with CTRL or CMD Click
- Manual removal with hue sliders
- Double Chromatic Aberration removal with ACR as a Filter in Photoshop
Like the style of this tutorial? You will LOVE HDR Insider! Full-Length HDR Workflows, Critiques & More!
![]()
[hcshort id=”9″]

For Blake, it's all about the art and process synergy. He dives deep into complex topics and makes them easy to understand through his outside-the-box thinking so that you can use these tricks in your workflow today!


Blake, that was stupendous! Chromatic aberration is definitely, in your words, a pain in the butt. You just showed us a relatively easy way to get rid of it. I’ve often resorted to cloning it out, but cloning is at best just ok. So thanks again!
Kay
Ooo coming them would be tough! That takes skill to make it look good.
Thanks Blake! I have a few questions about the CA sliders, can you move them too far to the right? If so, what happens when you do this? Some times I think I move it too far, and see some weird things where the CA was, or it starts affecting other areas of the image. Thanks
If you move them too far you could make a haze of color around the edges instead of a line. I recommend moving slow and process twice if you have to.
This is one of those places where the Micro 4/3 standard really excels. The lens distortion and chromatic aberration characteristics are carried in the RAW file and used by Lightroom (not sure about ACR) to adjust the image at import (the same information is used to adjust JPEGs processed in camera). I’ve taken over 10,000 images in the past 18 months on my Olympus cameras and have honestly never seen CA in any if the shots. But maybe my old eyes just can’t detect it. 😀
Blake,
Very helpful. Thanks a million
Also,LOVE the mustache in the Important lessons video.