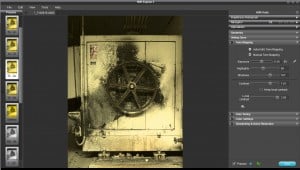
I was recently contacted by Unified Color to do a product review of HDR Expose 2. It seems it is still in it’s developmental stages but has plenty or room to adapt to the HDR world due to it’s many positive attributes. While it will not produce stunningly detailed HDR images, it will give you a great baseline for a natural looking HDR image.
The Interface:
For the most part was very user friendly and required very little learning curve to make my way around. I like the dark presentation and the crisp outlines around the features, very sleek and appealing.
The Good:
- Noise Reduction is a nice touch to have during the tone mapping process as noise tends to get pretty out of hand quickly with HDR.
- Color and Tone adjustments built right into the interface are great, as you can manipulate these settings prior to post processing in another program, like Photoshop.
- Selective Saturation! This feature is incredible during tone mapping and I really like how Unified Color has handled it in the tone mapping process. With HDR tone mapping one color may start to stand out more than the others and it is nice to have full control over that prior to post processing. GREAT Feature!
- Built in Sharpening is actually pretty decent.
- HDR Expose creates natural looking HDR images, a plus for any HDR Purist.
The Bad:
- I noticed a lot of lag time as I processed my images. I was predominantly working with 5 RAW images and am not sure if that had something to do with the lag. I noticed that after I made a slight adjustment it would take one to two seconds to register it. If I made a larger adjustment it would take about three to four seconds. This is very discouraging when editing and may be the biggest downfall of the program, there are several other tone mapping programs that work much faster on the market. Just to mention, I am running 16GB of Ram on a 4 gigahertz processor.
- I noticed ghost lines on handheld exposures. I tried every method of merging and still had no luck. HDR Expose works very well with tri-pod mounted exposures; however, I had no luck with handheld exposures.
- There were very minimal HDR tone mapping adjustments only Exposure, Highlights, Shadows, and Contrast. I wanted to see a bit more in there as far as adjustments. In particular, a details adjustment, I know that HDR Expose is designed to create realistic HDR images, but the typical HDRtist these days wants the ability to increase the dynamic range in the details as well, it gives their work that “HDR Look”.
The Bottom Line:
If you are an HDR Purist, one who likes the clean crisp look of extracted dynamic range but does not like over exaggerated detail, this program is perfect. If you are in for a program that produces very strong natural results, HDR Expose is a great match. However, you will be very discouraged if you want that punchy detailed HDR look.
Final Product From HDR Expose (No post processing, straight out of the software):


