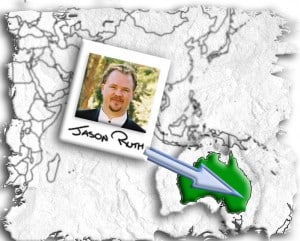
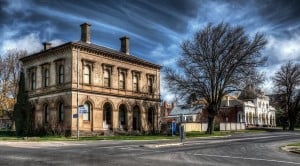
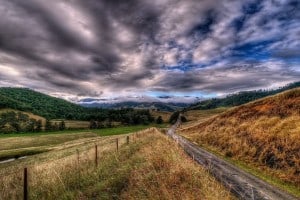
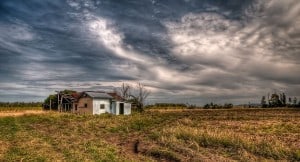
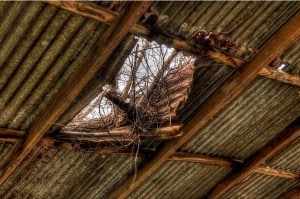
Jason Ruth caught my eye with his incredible HDR panoramas and architectural subject matter. From Hornsby, NSW, Australia Jason’s images never cease to amaze me on my Redbubble feed. After seeing his post office image (below) Jason became an instant favorite.
What type of equipment do you use for your HDR process (Camera Model, tripod, any other devices)?
The same equipment I use for photography in general (haha). In all seriousness and sarcastic responses aside it is actually true.
- Nikon D300
- Nikkor 16-85mm f/3.5-5.6 VR
- Nikkor 12-24mm f/4 (When I my wife is feeling generous enough to lend it to me)
- Nikkor 70-300mm f/4-5.6 VR
- Nikkor 60mm F/2.8 micro
- Manfrotto 190XPROB
- Manfrotto 322RC2 Ball Head
- Phottix MC-36 remote release
Sometimes:
- Hoya Circular Polarizer Filter
- Hoya NDX400
- Cokin Neutral Density Filters
- Cokin Gradual Neutral Density Filters
What is your subject matter of choice for HDR?
I actually don’t have a subject matter of choice relating to HDR. The choice of images for which HDR processing is used are the ones that I feel will benefit from HDR processing. Sometimes I have taken images with HDR processing in mind and found disappointment (and disgust) in the results. Then the image is assessed from a single image perspective and often an end result is found this way.
Simply put, HDR processing is used if the images benefits from it.
What is (or was) your inspiration for HDR photography?
This may sound strange, but I cannot remember a single moment in which HDR photography became an inspiration, must do, etc. What I do recall is my Father-inlaw discussing HDR photography with me and emailing through various links to HDR images. Subsequently Photomatix was downloaded in its test version and I tried it out on a few images, all the while searching for tutorials, which led me to Trey Ratcliffe (Stuck in Customs). This leads one to continue searching out HDR images and just wanting to have a go yourself.
But all that aside I want to give the credit to my Father-inlaw when it comes to HDR photography, thanks Jeff.
I see you shoot in a 5 exposure bracket with +/-2 EV stops, do you find yourself taking less single exposure shots since you started HDR? I rarely stop at one anymore, hence my curiosity.
I will admit to being a bit lazy in this area with the camera being set to bracketing at 5 exposures. However of late I am beginning to regret not experimenting with 7 and 9 exposure bracketing. There had been a lot of images processed of recently that have not gone to plan and have ended up with areas of lost detail, either under exposed, over exposed and even both (damnit).
A couple words about your processing workflow?
First up is the creation of new folders. Main folder being the date and location, sub-folders are originals, Photomatix Results, PS Results and RB uploads. Images uploaded using Bridge CS3 and converted to a dng file. All images are shot at lossless compressed 14-bit RAW. From this point onwards it all gets rather haphazard in terms of workflow. Sometimes I will go through images, looking for an image series that catches my eye, then selecting that series and enter them into Photomatix for processing. Once that it is done it is then onto the tone mapping. As a general rule I have been following the tutorial from Trey Ratcliffe. Once that is done and saved the 16-bitt TIFF file is then opened in CS3, base layer duplicated and given the Noiseware treatment (if needed). Next is a procedure to find the grey point of an image using a 50% grey layer, select difference blending and now add threshold. Set threshold to 1 and then start to increase it to find what should be grey. Get a large enough spot and mark it using the eyedropper tool. Now delete the threshold and grey fill layers. Once these are deleted a curve layer is added, the black, grey and white points selected, though sometimes a white point has resulted in an image being just not right (so sometimes a white point is not selected). Curves; 3 points selected and the curve adjusted to add contrast.
That is usually about it, but if I find the colours TOXIC (greens and blues are the obvious ones) then some desaturation is used along with layer masking.
The processed image is saved as a 16-bitt PSD file, converted to 8-bit and saved as an 8-bit JPEG image (compression setting of 12) which is for uploading to sites such as RedBubble. Once the image is uploaded the JPEG is deleted and only the PSD kept.
Anything else you would like to add?
HDR Photography; oh there is so much to say and so many people to offend. Of these people I would undoubtedly offend with certain criticism I am probably guilty of it too, so let’s not go there (smiles).
Stuff it: SAY NO TO TOXIC HDR.
Focusing on the positives; HDR photography is another tool that has been added to the digital photographers arsenal, for better or worse. When used properly and with a critical eye some amazing results can be achieved. Poor photography will always be present and poor HDR processing only makes that more visible.
So where can I see more Jason Ruth:

