
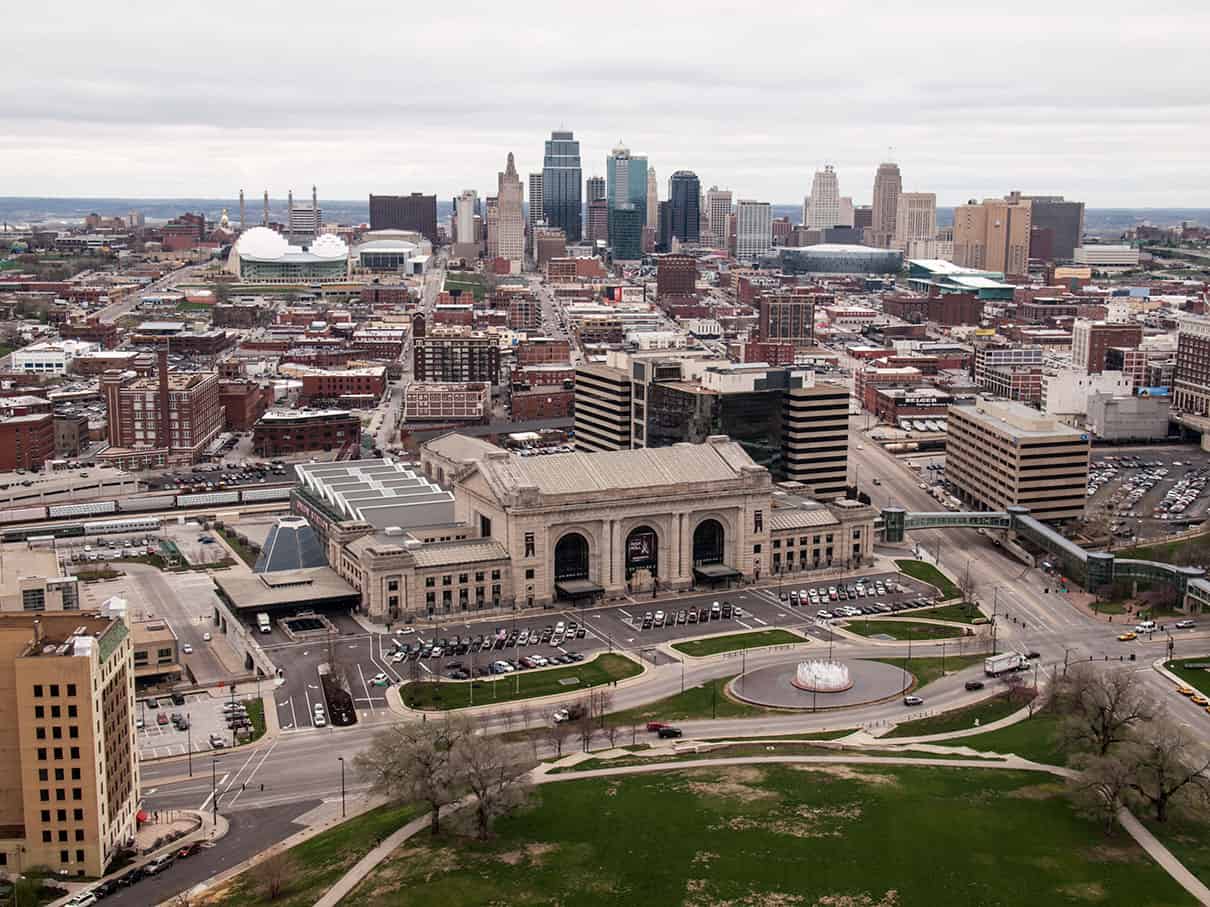
Missouri is the “Show Me State” I figured it would be more than suiting to show you my city and have you return the favor by showing me yours. There were several excellent entries in this month’s concert. I was very excited to see people from all over the world not only tone mapping my city, but allowing me to see theirs as well. I don’t get to travel the world and see too many cities, so it was quite the treat to take a little trip around the world with this month’s Concert. Without further ado, the entrants as they were received!
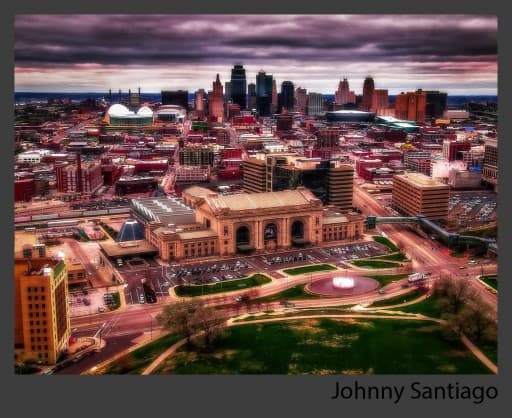
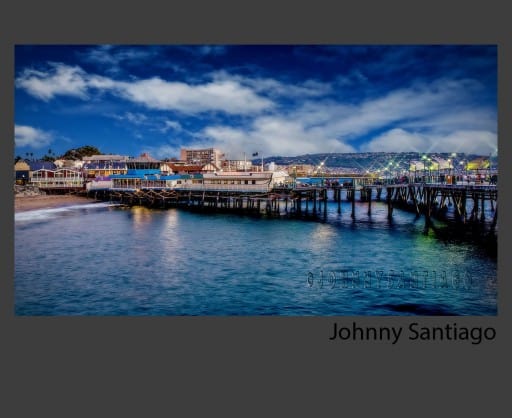
Johnny Santiago
Location: Redondo Beach, CA
I’ve been a serious amateur photographer for about 12 years now and still enjoy learning new things about photography.
I really enjoy shooting long exposures and realistic HDR pictures. I’m a Nikon shooter by choice and love post processing using CS6, LR4 & 5, OnOne Perfect Photo Suite 7.5 Software and Topaz plug-ins.
Post Processing Highlights:
- Well as I always do now starting in Lightroom 5, I sent all shots to Photoshop CS6 HDR Pro and converted to a 32 bit tiff. Save the file and go back to LR5.
- Back in LR5 I lower the highlights and increase the shadows. Check the exposure and contrast. Increase the vibrance and clarity. Use the gradient tool for more detail in the clouds and make them a little darker.
- Still in LR5 I started to work on the colors. I chose to enhance the red tones and get some nice rich colors.
- Then I went back to CS6 and copied the layer, Used Gaussian blur 28% and used an Overlay blend mode and then used the high pass sharpening filter. (See Blake for this tutorial)
- Saved the file and sent back to LR5. Put a slight vignette. Then used Topaz DeNoise to get rid of any noise and
- I basically used the same workflow for my Redondo Beach Picture.
Where You Can Find Johnny: Fotostooge@yahoo.com
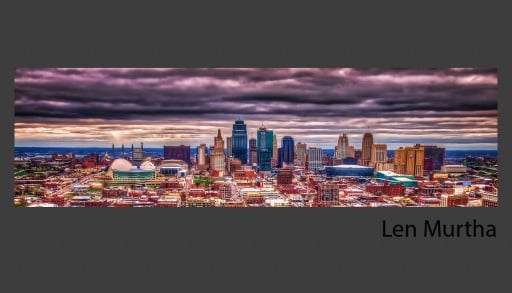
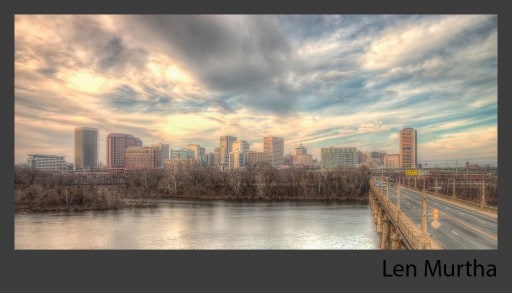
Len Murtha
Location: Richmond, VA
I am a new photographer that enjoys taking pictures and then loading them into my Mac to edit. I am fascinated by the ability to take a raw file and create something magical with it. Everyday HDR is a great site for all levels of photography.
Post Processing Highlights:
- Loaded bracket into Photomatix and processed using one of the presets.
- Transferred TIFF into Camera Raw and made adjustments lightening up the shadows and adding vibrance to the shot. I am a big fan of color.
- Next, I took the photo into Topaz Adjust 4 and applied their filter called “Painting Venice”.
- Then I went into Topaz Denoise and eliminated the noise. This is one of my favorite programs I use to clean up a photo.
- From there, I opened the photo into onONE Perfect Effects and added a nice vignette.
- Finally, I cropped the picture to give it a wider, panoramic feel.
Where You Can Find Len: Portfolio

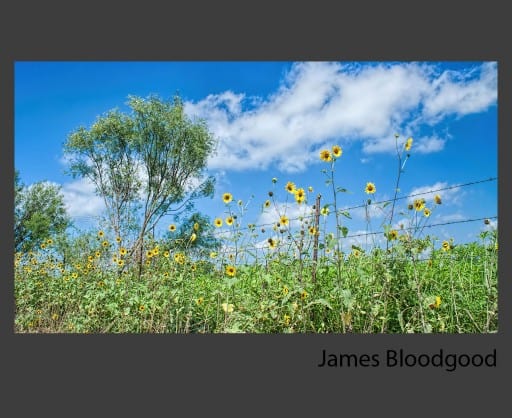
James Bloodgood
Location: San Antonio, TX
I live outside of San Antonio, Texas, so rather than using the typical San Antonio icons such as the Alamo, Riverwalk, or Hemisfair Plaza I chose to represent where I actually live. Although it’s not technically summer yet this is pretty typical of a summer day in my rural area — barbed wire fences surrounding fields of wildflowers under a clear blue sky with fluffy white clouds.
Post Processing Highlights:
- Blake’s photos tonemapped in Photoshop with some light noise reduction in Adobe Camera Raw.
- I then used the following Topaz Labs plugins: Clarity for contrast; Adjust for exposure and saturation adjustments; Lens Effects for a vignette; and Detail for final sharpening.
- Finally, I used a simple exposure layer to kick up the exposure a little.
- For my pictures I had a hard time satisfactorally removing the ghosts because it was a breezy day so I ended up using a single image (my nominal exposure).
- Like with Blake’s images, I used a series of Topaz Labs plugins in Photoshop: DeNoise to smooth some of the Luma noise from the sky; Adjust for exposure adjustments; Clarity for contrast and color; and Detail for final sharpening.
- Prior to sharpening I used the blue channel in screen mode to lighten the centers of the sunflowers a bit.
Where You Can Find James: Flickr, G+
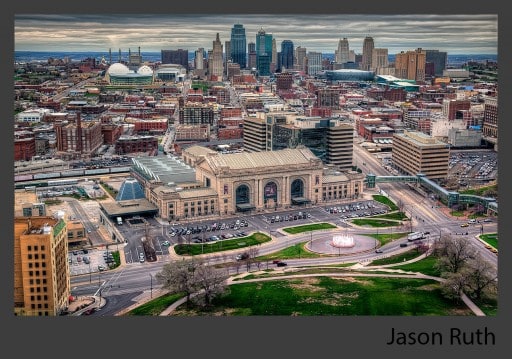
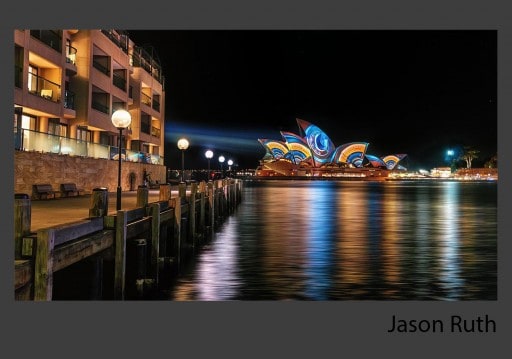
Jason Ruth
Location: Sydney, NSW, Australia
A keen amateur photographer that spends too much of his spare time devoted to photography. Whether that be getting out and taking photos, catching up with like minded photogs (the Sydney scene is very much alive and well), or sleepless nights processing.
Post Processing Highlights:
- RAW files get a touch of clarity, contrast, chromatic abberation correction and a touch of vibrance in Lightroom, then opened as 16 bit TIFF files in Photoshop where noiseware is used (lowest ev image used as baseline).
- TIFF files opened into Photomatix, merged and tonemapped, then saved as a 16 bit TIFF file
- Bracketed TIFF files and tonemapped TIFF file is opened into a single photoshop file as layers.
- Pick the best matching image, exposure wise to mask in to remove ghosting/movement of cars and people. For me I used to 0ev image.
- Merge visible as a new layer, convert it to a smart object.
- Color Efex Pro 4, detail enhancer, brilliance/wamrth, pro contrast, and lighten/darken centre filters used.
- Topaz Clarity used as a filter
- Sharpener Pro 2 used as a filter
- Save PS file, then merge layers, convert to 8 bit and save as JPEG image.
Where You Can Find Jason: Smugmug
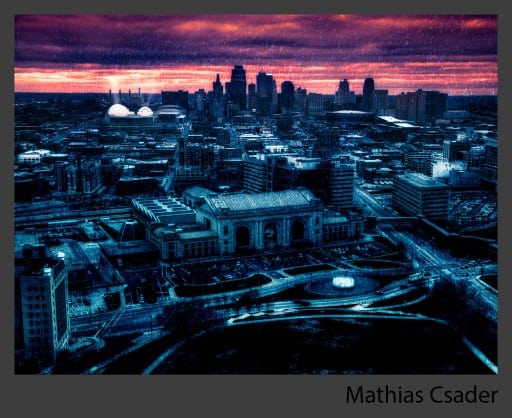
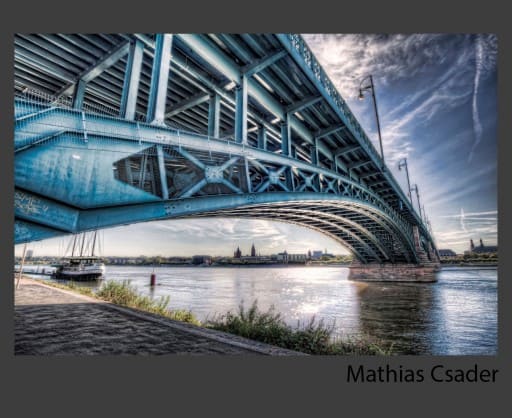
Mathias Csader
Location: Wiesbaden, Germany
I’m a passionate nature and landscape photographer. Beside this I love everything else in photography like HDR and Urbex.
Post Processing Highlights:
- Developed the RAW-Files with Adobe Camera RAW
- Photomatix was used for creating the HDR and tonemapping. Tonemapping was done very carefully
- First started of with Luminosity Masks to get more contrast
- Used Nik Color Efex (Tonal Contrast and Low Key)
- Added a Black/White Layer for desaturation and some Color Lookup Layers for the Sky and the City
- I then used a bunch of Leves Adjustments, some Glow and Dodge & Burn to get the light right
- On top of that I merged all layers together and used the Glowing Edges Filter, colorized it and paint with a layer mask carefully the radioactive glow on the buildings
- After that I added the rain with render fiber, level adjustments and different blur filters. Matched the color of the rain with the radioactive glow of the city
- Sharpend – Finished
Where You Can Find Mathias: Blog, G+, 500px
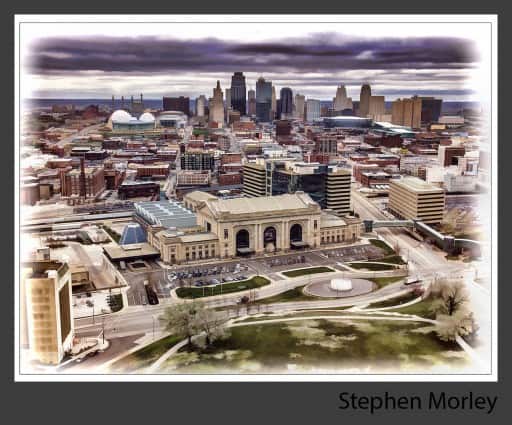
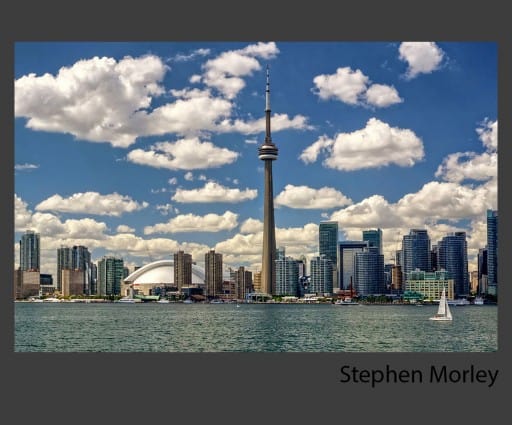
Stephen Morley
Location: Southern Ontario, Canada
Longtime amateur photographer who enjoys the journey as much as the destination.
Post Processing Highlights:
Kansas City Photo:
- Processed in Photomatix Pro with photo relistic intent.
- In CS6 minor colour corrections and cleanup.
- Used the adjustment>lookup table to find a tone I liked.
- Into Topaz Simplify 4 to give painterly look.
- Back into CS6 with a mask to bleed through some detail.
- Added soft bleed border and used stroke for inside solid box.
Toronto Skyline photo:
- Single photo converted to 3 images from Camera Raw at =1.5,0 and +1.5. exposure values.
- Tonemapped these 3 Tifs in Photomatix 4 Pro.
- Adjusted, cropped and color corrected in CS6
- Applied Topaz Detail and Clarity.
- Resized in CS6.
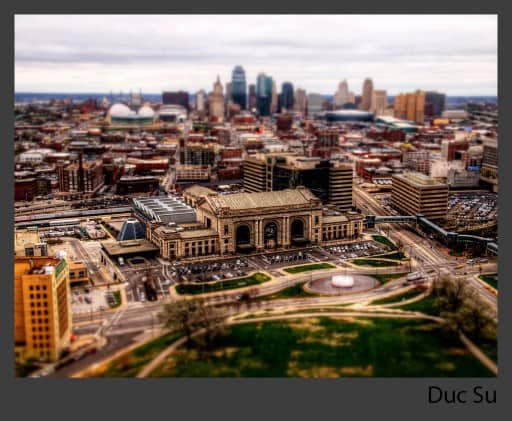
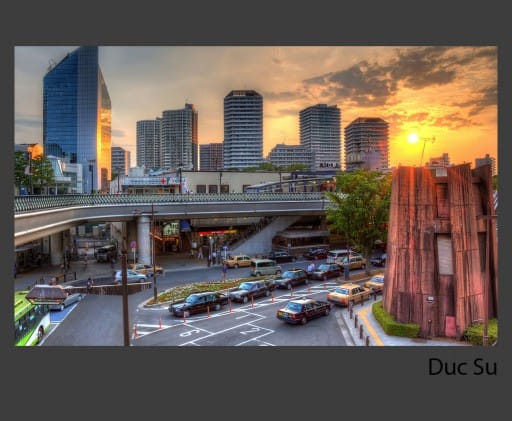
Duc Su
Location: Saitama, Japan
I am a beginner in both photography and HDR. I’ve spent a solid month reading tutorials, blogs, how-to’s, tips & tricks, and others about camera basics, composing shots, and post processing HDR images.
Post Processing Highlights:
- Used Photomatix for a mild tone mapping.
- Used Photoshop adjustment levels such as the brightness and saturation level to tone down the image.
- Used OnoneSoftware Perfect Effects 4 to enhanced the image. Effects used were tonal contrast, increase color, draken, and clarity on parts of the image.
- Highlighted the foreground building and the pedestrain walkway to give it some pop.
- Warmed the image up just a tad.
- Applied some sharpening using Photoshop high pass filter.
- Reduce noise in the clouds only with Nik’s dfine2.
- Finished off the image with a blurred effect using Onone Software Focal Point 2.1.
Where You Can Find Duc: Flickr
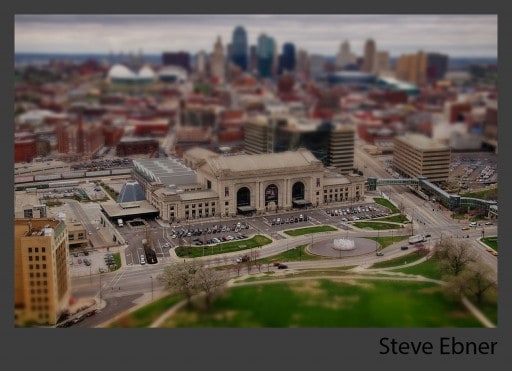
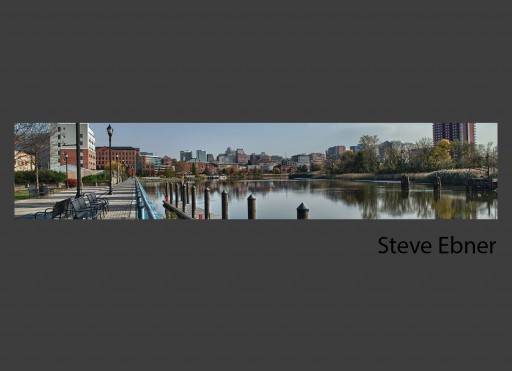
Steve Ebner
Location: Delaware, USA
I am a photography enthusiast who can never seem to get enough time to get out and shoot. I enjoy learning processing techniques.
Post Processing Highlights:
- Tone mapped in HDR Efex Pro 2
- Brought default image into Color Efex 4 and applied filters (contrast pro and tonal contrast )
- Brought image into Photoshop Elements 11 for tilt-shift effect — blur with gradient layer mask
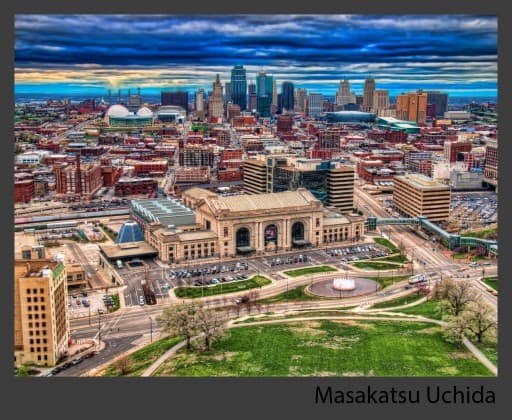
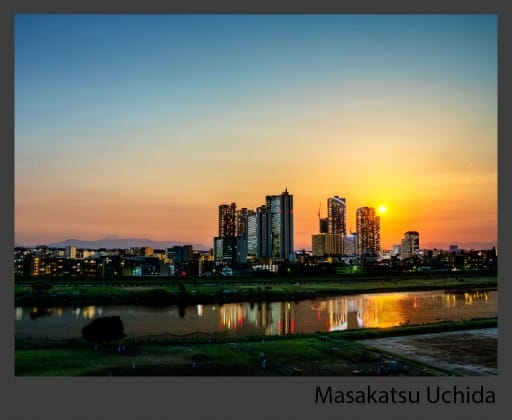
Masakatsu Uchida
Location: Tokyo, Japan
Started with digital photography 3 years ago, I’m big into HDR form last May when I knew it for the first time.
I shoot with a Sony NEX-5R, and love spending time in image processing. I always like a natural look but I tend to like heavily looking images. I’ll try to perfect the photo realistic look
Post Processing Highlights:
- Raw images taken into Photoshop Elements for development, and coordinated black & white tones.
- TIFF images imported into Photomatix for tone mapping.
- Imported into Photoshop Elements.
- Layer1:Topaz Denoise & Spicify. I really wanted to impressive the sky.
- Layer2:Vibrance. I prefer this to saturation. Part of the square and buildings are masked. And put it at 75% opacity.
- Layer3:Highpass filter. Set up 1.5pixel in radiums. Drawing mode is overlay.
- Layer4:Saturation and Hue tuning.
- Layer5:Lightness and Contrast tuning.
About my tone mapped city:
This is view from my house. It’s the scenery which is common in Japanese cities, but there are not many location overlooking Mt.Fuji in the distance along the river
- I have prepared the night view and evening view photos.
- How to create in Photomatix is the same as above.
- Tone mapped TIFF images imported into Photoshop Elements.
- Layer1: Night view. Part of the ground and sky are masked.
- Layer2: Evening view. Drawing mode is softlight. And add Lightness and Contrast tuning.
- Layer3: Topaz Denoise & Spicify.You can see Mt.Fuji to the left side of the picture.
- Just looking at the view of the sunset will heal your mind.
Where You Can Find Masakatsu: Blog

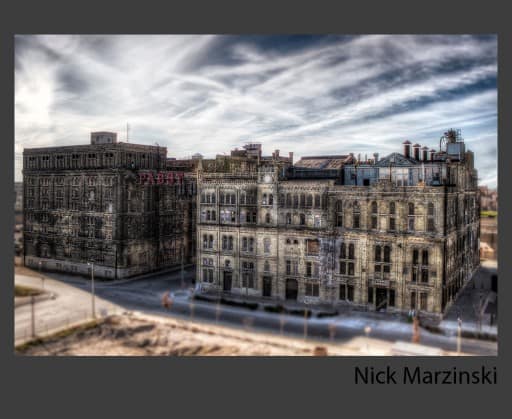
Nick Marzinski
Location: Milwaukee, Wisconsin, USA
Started with digital photography eight years ago, a few months before my oldest daughter was born. Macro, landscape, abstract, and HDR photography are particular interests. I shoot with a Canon Rebel T1i, use Lightroom 5, Photoshop CS6, Photomatix, and a bunch of Nik and Topaz plug-ins. I live outside of Milwaukee, and chose a shot I took of the old Pabst Brewery as my city shot , which you can read all about on my blog, Trapping Light.
Post Processing Highlights:
- Blake’s KC image of Union Station got tone-mapped using Photomatix’s Merge to 32 bit Lightroom plugin. After doing some basic slider fiddling in Lightroom on the 32 bit image to set the exposure, I exported it to CS6 along with the base exposure original image as separate layers.
- In Photoshop, I hid the original exposure with a black layer mask, and then masked portions of it back in to get rid of some of the ghosting from moving traffic and pedestrians.
- Merged the shot and ran it through the glamour glow and tonal contrast filters in Nik Color Efex Pro 4 to purdy it up some.
- Back in Photoshop, I made two copies of the image (for a total of three copies), hid the top layer, and ran Photoshop’s tilt shift blur filter on the middle copy to start off the tilt-shift effect.
- Since it doesn’t factor distance to subject into account, Photoshop’s tilt-shift filter can’t completely simulate the model effect of a tilt-shift lens, but there’s an easy way to get around that. Using a white layer mask and a black brush on the filter layer, I painted out the filter’s blur effects from places that shouldn’t be blurred. Then, I unhid the top layer, ran a gaussian blur filter on it, and hid it with a black layer mask. Then, using a white brush on the top layer’s mask, I painted blur into areas that weren’t blurred by the tilt-shift filter but should have been.
- Finally, I ran the image through Nik Silver Efex Pro for a high contrast black and white look and slight coffee tone, and then lowered the opacity of the black and white layer to bring some color back in.
Where You Can Find Nick: Trapping Light, G+
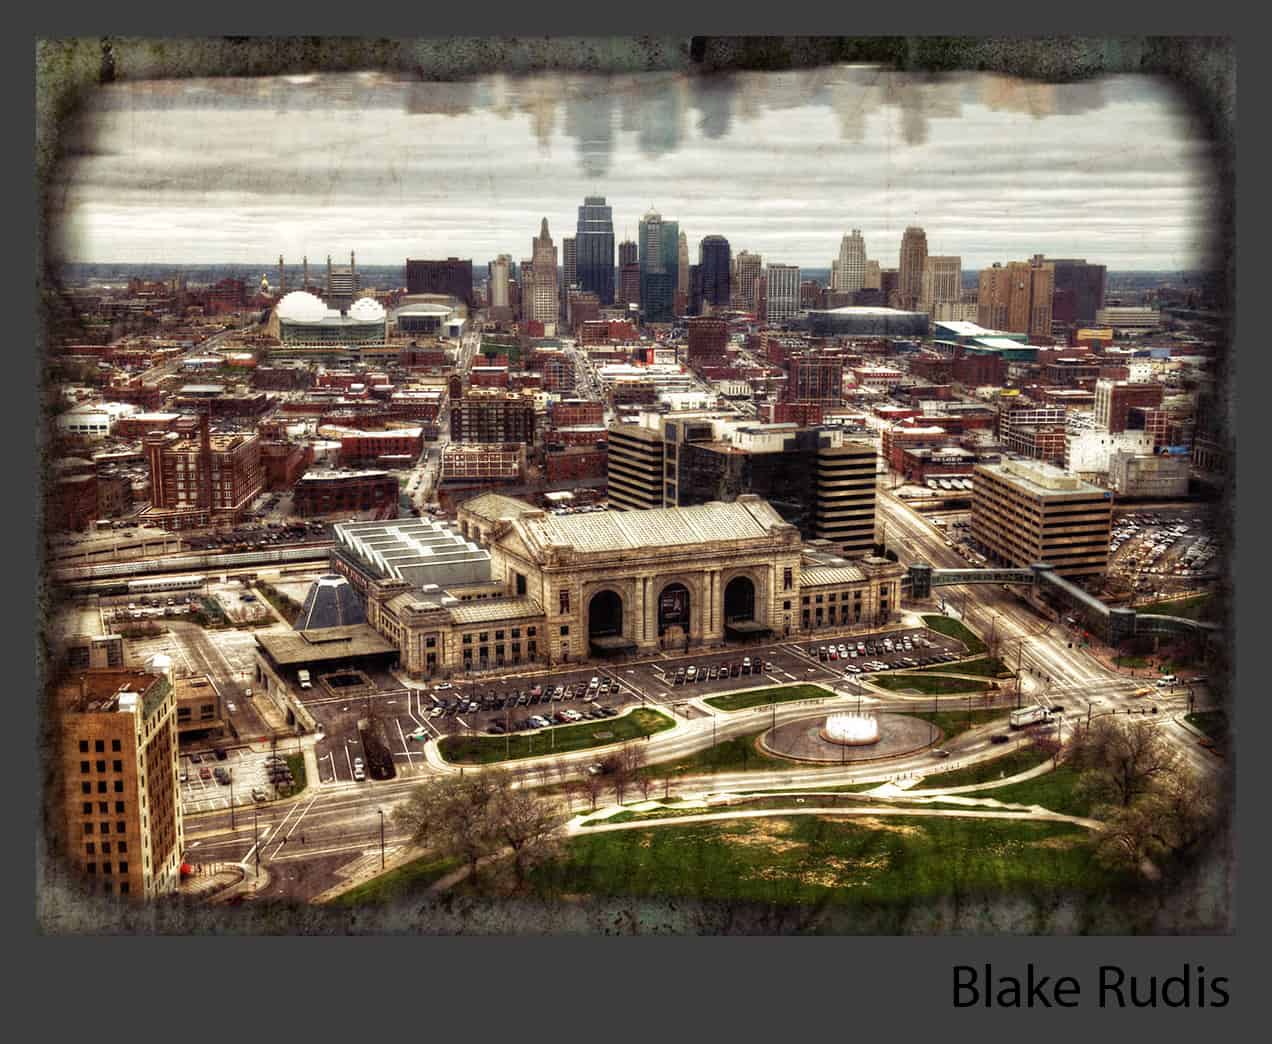
Blake Rudis
Location: Kansas City, MO
I have been working avidly on this blog for a little over 2 and a half years now. I fell in love with HDR photographer the first time I exposed brackets for it. I never thought an art form could be live altering, but apparently it can! Sometimes I wish I never learned about HDR, I would have a ton of time on my hands!
Post Processing Highlights:
- A mild tone mapping in Photomatix Pro, just to bring out the details without going overboard.
- Brought it into Adobe Camera Raw for a shadow and highlight tune up and a bit of clarity and contrast control.
- In Photoshop, the Highlights, midtones, and shadows were selected independently where each received a gentle curves treatment to regulate the shadows and highlights that were off from the tone mapping process.
- I duplicated the image and rotated it on itself, flipped it horizontal and dropped the Opacity to create the city’s reflection in the sky.
- I added a Refine Edge Border then applied a slight bevel and drop shadow.
- I imported a grunge texture from my stock for the background.
- I applied a soft light high pass texture to the final image to make it appear tattered or folded.
Where You Can Find Blake: Right here on everyday HDR!
