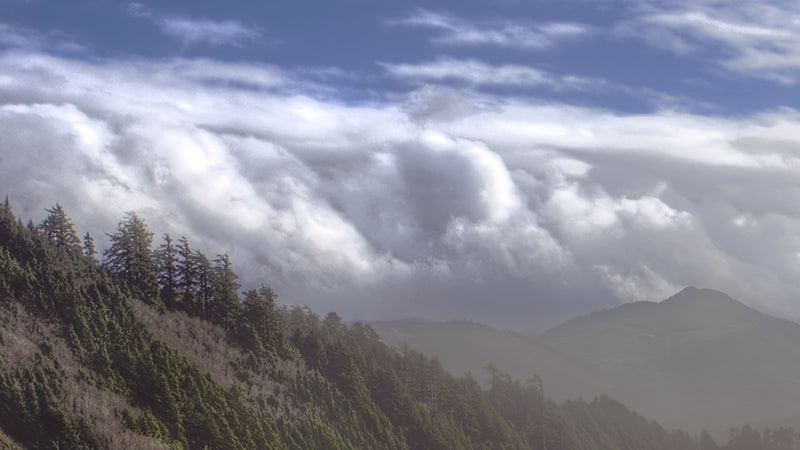
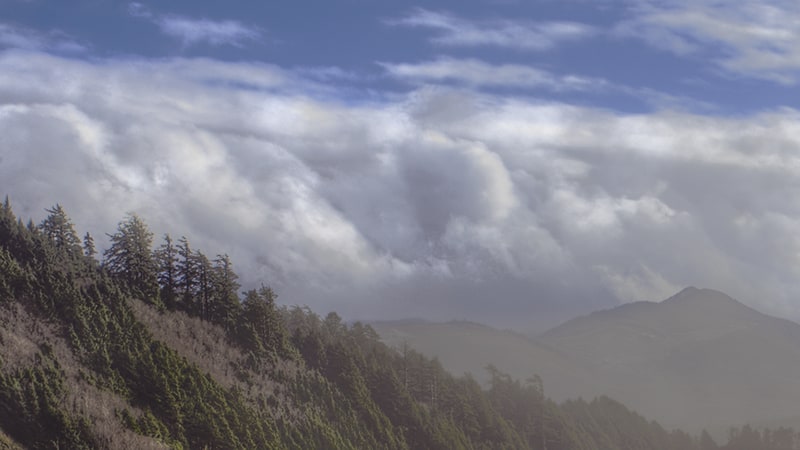
I once thought blown out clouds were a deal breaker… not anymore!
There have been many landscape photos that have found their way to my trash can on my computer because I pushed the histogram a bit too far to the highlights and ruined the picture. It can be challenging sometimes to balance a good histogram when the scene offers a full gamut of dynamic range. You want to expose for the highlights, but run the risk of introducing noise in the shadows when you recover the exposure. On the flip side, you want nice clean shadows with sufficient detail, but then you risk blowing out cloud detail.
You may be thinking that those challenges are a thing of the past with our high-end sensors and HDR processing, but the struggle is still real! The problem with blown out clouds is that the viewer is going to go straight to the areas that are the lightest. Big blotchy white spots on our photo, ironically, are a black hole for the viewer’s attention. We want to avoid those paper white monoliths at all costs, but how do we recover detail where there is none?
You don’t, is the answer. You cannot recover detail in a photograph if the detail is not there, to begin with. However, you can add structure with a little bit of creative problem solving.
In today’s free tutorial I am going to show you a new method I developed by accident when trying to create an artistic effect Action. Ever wonder why I harp on experimentation so much?
The basic concept is to render some clouds in Photoshop and blend them in with Blend If. Say goodbye to blown out clouds! Here is the list, or skip to the bottom of the page and watch the tutorial and download the Action!
- Before you begin, reset your brush swatches to the default colors by pressing ‘D’
- Create a New Layer
- Fill the new layer with 50% gray; it needs some data there to render the clouds, 50% gray is arbitrary really.
- With the new layer selected, go to Filter > Render > Clouds
- Your image should be all clouds now.
- Double click next to the new layers text to go into the layer options.
- Change the blend if settings so that the shadows through the mid tones are protected, then press all to split and feather the Blend If settings.
- Lower the Opacity of the layer to around 15 – 25%
- Add a mask to the layer and paint out the areas you do not want to be affected by the cloud detail.
- Lastly, experiment with Blurs and Blending Options. Also, try clipping a Curves adjustment layer above the cloud layer to modify the contrast.


Wow!
Funny I said the same thing! Happy accidents!
Serendipity AND great.
Thanks for share. Really well done!
Great video as always Blake. Thanks for the great info.
Thanks for taking the time to stop by 🙂
Yes A great video but I moved your action into the Photoshop 2017 action folder, started Photoshop and the action isn’t listed
Thanks! The Actions are in a “holding pattern” when they are in the Actions palette. You have to physically save them into the Actions folder in your Photoshop root folder. Click on the Action in the palette, then go into the menu of the Actions palette and click “Save Action”. The root folder should pop up by default, if it does not, here are the file paths:
Windows
C:\Users\[user name]\AppData\Roaming\Adobe\Adobe Photoshop CC 2017\Presets\Actions
Mac
/Users/[user name]Library/Application Support/Adobe/Adobe Photoshop CC 2017/Presets/Actions
Very cool!!! Thanks.
No problem! Thanks for watching!
This will sure be useful! The difference is fantastic! Thank you for the tut and the action!
Su
Woo hoo! Thanks for watching and stopping by as usual 🙂
Wicked cool, Blake. You’re a genius!
🙂 happy accidents!
OUTSTANDING! Boy, will I be able to use this.
Thank you so much as always,
Vinny
Woohoo! I always aim to try and impress you, Vinny!
Brilliant Blake! You are a creative Guru!
By the way, love that Zone System Express!
Thanks for all you do!
Aww shucks, you are making me blush 🙂
Thanks for watching!
Killer actions!
Woo hoo! Thanks, Steve!
Blake,
Another winner tutorial, great advanced training. I ask this question most of the time because I don’t use Photoshop. Can I use this technique in Elements 14, Especially the Action. I have been layering in skies with masking and use motion blur to get the effect. Anyhow, keep up the great work.
I really wish I could answer, however, I haven’t spent an ounce of time in Elelments so I cannot answer that one. If you can render clouds, then maybe. however, my experience with Elements is limited at best 🙁
Two thumbs up (-:
What a magic video, thank you so much Blake, I now feel a little bit more confident about trying a few things
Thanks so much Blake your PS techniques and tips are great … so helpful.
Thank you. Just when I needed it most, as I had encountered this issue recently and now its so easily done.
Thanks for showing this technique, Blake. (I had to laugh because of the blown out areas behind you in your studio!)
No problem. The studio lighting, unavoidable. I can’t control my webcam like I can my camera.
As usual – you are incredible.
Just reporting good stuff 🙂
What a clever chap you are Blake. I have recently returned from a photoshoot of a sunrise some 400 miles from where I live. It was only when I got home I realise that I suffered from blown out highlights in the sky which, of course, I should have checked before I left the site.
This tip is of great value and I am already using it in conjunction with your zone panel to colour balance the end result.
AWESOME! AWESOME! This is going to help with SOOO MANY of my images. Thanks to your generosity in sharing information.
Thank you, again, Blake, for another excellent application of “Blend If!” Now I am wondering: What if I used a B&W photograph of real clouds for the trick, rather than Ps’s rendered clouds? Hmmm … I will have to give it a try, next time I am trying to rescue a landscape image. What do you think?
Two words: Photoshop Whisperer – enough said!
“Shhhhh, Photoshop, Be Still”
It would appear that your technique for fixing “blown out clouds” would benefit from the use of a luminosity mask to select the blown out area. At what point in your work flow would you suggest introducing it ?
Hey John, I guess you could use an LM. However, Blend If and LM’s are VERY similar, but I think you gain a lot more control with Blend If. You can make the spread a bit more gradual and less harsh than an LM. Granted, LM’s let you see the mask better, Blend if gives you a more gradual and natural spread.
I would do this at the beginning for a blown out image from the camera, or at the end where my post processing may have been pushed too far. It is one of those things that can be used almost anytime, especially if Blend If is used. Blend If has another advantage. If you put this layer on top it will always be changing as the layers underneath it change. If it gets brighter underneath the clouds will continue to fill in, like a liquid mask rather than a solid container that an LM would provide. Thanks for making me think about this one 🙂
Wonderful job. I like that cloud filter for various tricks and this is just one more to add to my bag. 🙂
Excellent Blake, thanks!
Where is the video? The tutorial leaves some things out. I would like to watch the video.
It’s on this page. Under the download the action button.
great stuff Blake!! thank you.
Dear Blake
I am big fan of your tutorials especially the one aspect which helped me was to fill the blown out clouds! I was in Siem Reap during the rainy season and nothing on earth could bring in a decent cloud unless I was using long exposure by underexposing the sky. I used the cloud actions that have been downloaded on 3 of the pictures posted in this gallery. Thanks a ton for the actions!
https://www.patron.gallery/rajivpachat
thanks and regards
Rajiv
Hey Blake
I have been following your tutorials on On1+ and now here at f64. I have improved my post processing skills so much in the last few months that I am thrilled. Thanks for all your help and keep the lessons coming for both On1 and Photoshop.
Blessings
Woody Spedden
Excellent tutorial about how to fix out clouds in an image. I also saw your image and video. That a good information shares this blog.