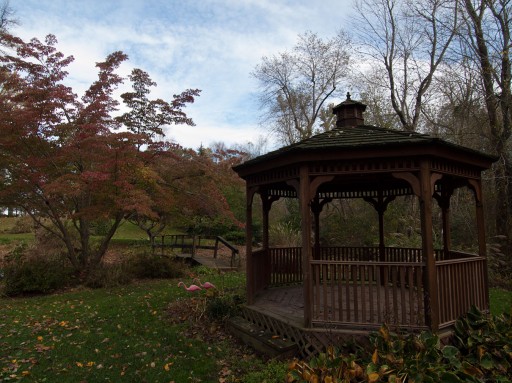
HDR Concert #10 kicked off without a hitch! It was surprising due to last months lack thereof. I was thrown for quite the loop when the Concert was full in less than 24 hours. In the past I have never had to close a Concert within 24 hours of its announcement, in fact I would normally have to spam it multiple times over many social media sites to get 10-12 entries!
Thank you everyone for your submissions, they all look great! I am truly honored to showcase such great work from all over the Globe on the blog. It always dumbfounds me that we can stretch across continents so easily through the use of the internet. Here we all are, all together working on one set of brackets and having a great time in the process! You guys rock!
Hey Mom, you are about to see 14 awesome pictures of your backyard Gazebo! Great job on the landscaping Glenn!
In the order they were received:
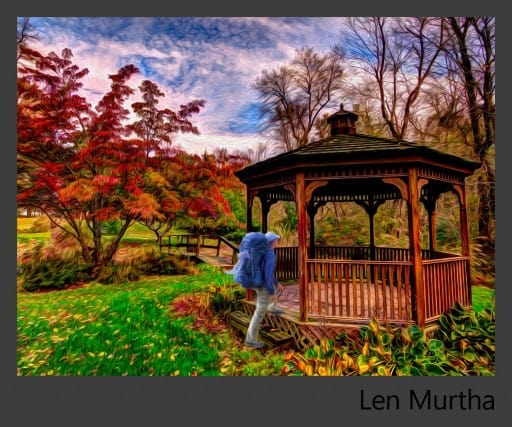
Len Murtha
Location: Richmond, VA
I am a photography hobbyist. I enjoy photographing landscapes, animals, and obscure objects. I love HDR because it allows me to be more creative with my photographs.
Processing Highlights:
- I used Photomatix and tone mapped using their painterly preset.
- Then I imported the image into Photoshop where I made minor adjustments in Camera Raw.
- Next, I took an HDR photo of myself in another picture and placed it into the Concert Series image.
- Then, I free transformed it to scale and placed it at the steps of the gazebo.
- I then masked the layer, took out my eraser tool and cleaned up the edges of the pasted object.
- I then added a curves layer and blended the object to the background.
- Finally, I added the oil paint effect from the filter menu in Photoshop.
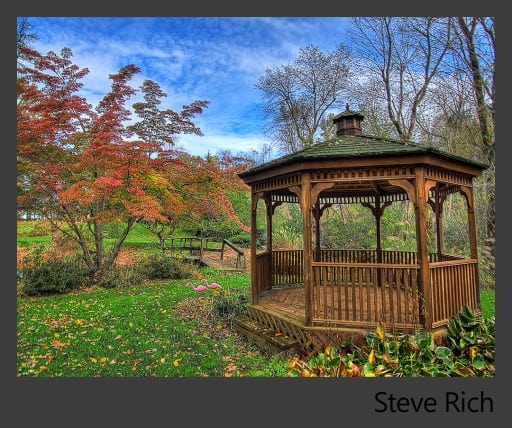
Steve Rich
Location: Aiken South Carolina
I am 55 years old, married and have two daughters, both daughters are married. I have a 3 year old grandson and 4 month old grandaughter. I am a late bloomer when it comes to post-processing images using enhancement applications. For years I was a point and shoot with no post processing. With the birth of my grandson, this gave me a reason to learn something new. I use all the Adobe products, Photoshop CS6, Elements 10, Lightroom 4, Nik products, OnOne and Photomatix.
Processing Highlights:
- Photomatix Pro
- Tonemapped image brought into Photoshop CS6
- Topaz Denoise applied
- Imported image into OnOne Perfect Effects 4, 4 Presets applied
- Image imported back to Photoshop CS6, masked in plants from another image, the tonemapped image the plants looked blurred. The blur was removed via masking in one of the bracketed images.
Where You Can Find Steve: Facebook
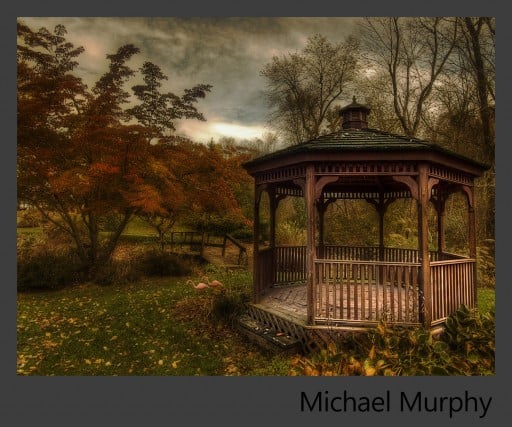
Michael Murphy
Location: London, United Kingdom
Mike Murphy is based in London, England and has been a hobbyist photographer for a few years. HDR is the reason he fell for this hobby, and 95% of the images produced are done so using this technique. Being based in London Mike is spoilt for choice when it comes to architecture; however a nice landscape and an Urbex trip are always a high priority for getting out of bed. More so than a sunrise which he will only see if on a photo holiday.
Processing Highlights:
- Processed 4 (of 5) exposures in Photomatix Pro (5th exposure had too much movement)
- Sharpening and contrast boosts in CS6
- Applied the Autumn Filter within Perfect Effects by OnOne Software
- Perspective crops and warping applied
- Increased saturation on the leaves and grass
- Applied slight focal blur on the background areas
Where You Can Find Michael: Murphyz Photography – Twitter: @Murphyz
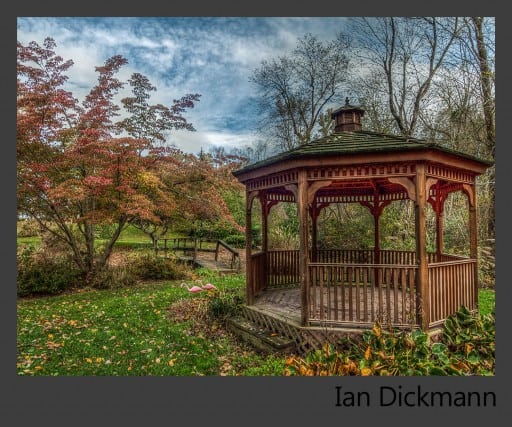
Ian Dickmann
Location: Milwaukee, WI
I am an amateur photographer who bought his first SLR in 2008 and now uses a Sony a77. I mostly shoot a mix of urban architecture and sports. I love the ability of HDR to make images look more like real life and how I see things in person.
Processing Highlights:
- Merged RAW images in Photomatix
- Imported to Lightroom 4
- Increased the contrast and clarity.
- Play with the highlights and shadows to maximize histogram
- Lens correction to straighten the gazebo
- Cropped due to lens correction
- Increased the sharpness and corrected white balance
Where You Can Find Ian: Facebook, Flickr
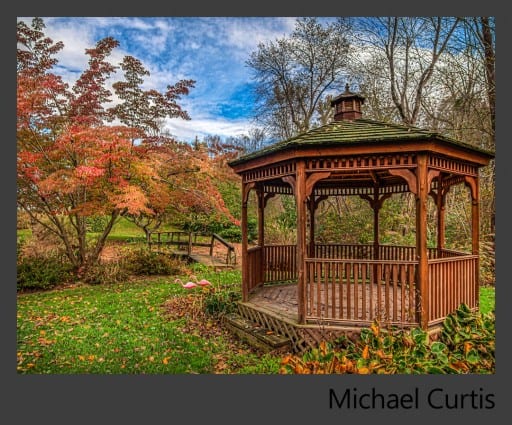
Michael Curtis
Location: Waynesville, Missouri
Lead Photographer at Fort Leonard Wood, US Army Missouri
Processing Highlights:
- Photomatix Lightroom then Photoshop CS4
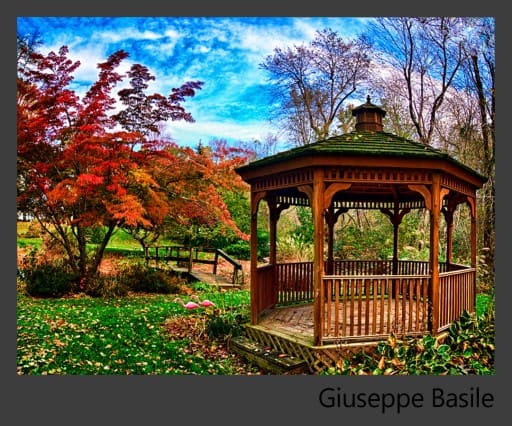
Giuseppe Basile
Location: Sydney Australia
Landscape / Seascape photographer primarily shooting Sydney Coastline
Processing Highlights:
- Photomatix pro for HDR conversion
- Tonemapping all settings set to 0 strength set to 10
- Opened into PS CS6
- Adaptive wide angle used to fix perspective
- Nik software Colour efex Pro 4 Adjustments
- Selective curves adjustments with masks
- Final sharpen and resize befor saving
Where You Can Find Giu: Glow Photography
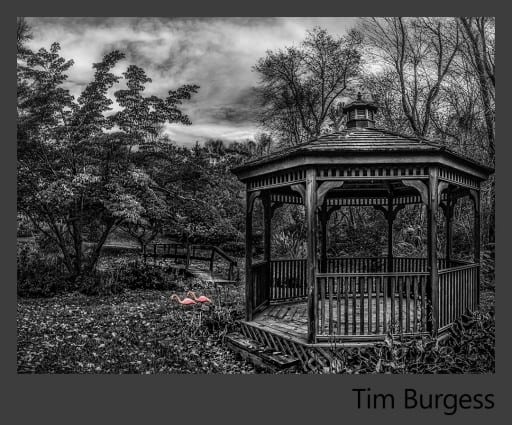
Tim Burgess
Location: United Kingdom
I’m a freelance Animator and Compositor. Photography has always played an important part in my work. In the past couple years photography and HDR has become more of a passion and I’m constantly looking to improve
Processing Highlights:
- Raw images corrected in Lightroom 4
- Merged in HDR Pro and saved as a 32 bit Tiff.
- File, taken back to Lightroom 4 adjusted and loaded into Photoshop as a smart object .
- Second copy made into Camera Raw remove color add contrast and clarity.
- Blend mode set to Luminance.
- Curve adjustment.
- Layers with selective masking used to darken and lighten different parts of the image.
- Converted to B&W mashed through the birds from the color image and flattened.
- Used Adaptive Wide angle filter to correct lens distortion.
Where You Can Find Tim: Redbubble
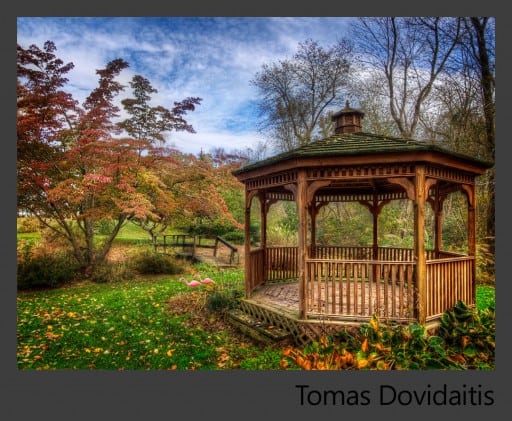
Tomas Dovidaitis
Location: Lithuania
Amateur HDR photographer.I love it and I trying to learn all the secrets of the best photographers 😉
Processing Highlights:
- Started with Photomatix.
- Then tone mapped version in PS5.
- Cropped.
- Used filters from nik software for contrast.
- Then sharpened and little bit dodge and burned for the final image.
- Little vignette.
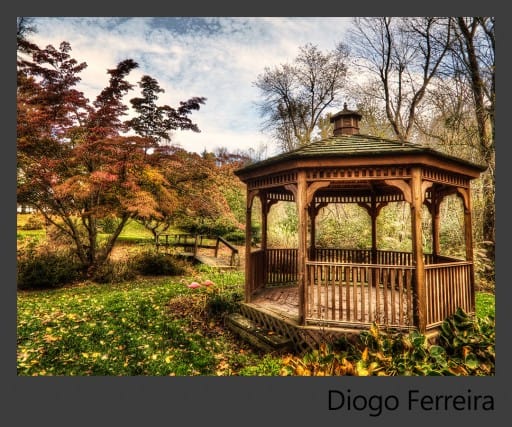
Diogo Ferreira
Location: Portugal
I’m an amateur photographer with a passion for HDR photos.
Processing Highlights:
- Photomatix 4.1
- Photoshop
- Nik Color Efex
- Lightroom
Where You Can Find Diogo: Flickr
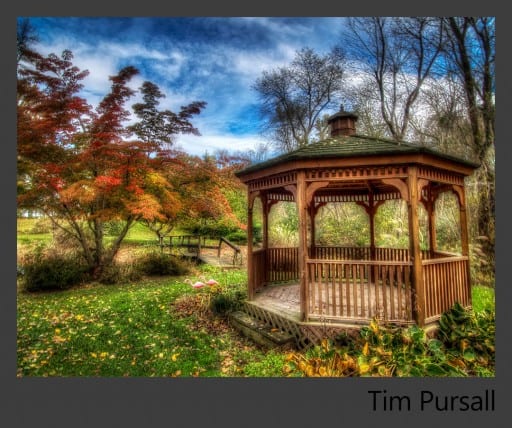
Tim Pursall
Location: Bristol, United Kingdom
Amateur Photographer with an interest in HDR images. Regular blogger (see my site below) which features my images. Dream of making a living out of this but for now the day job continues!
Processing Highlights:
- Five brackets tone-mapped in Photomatix Pro.
- Pro Contrast and Glamour Glow filters applied from Color Efex Pro.
- A couple of hue and saturation layers applied to boost the reds and yellows on the group of trees on the left.
- Some noise reduction applied using Noiseware. Masked to target the sky and part of the gazebo.
- Into Lightroom. Slight contrast boost using a preset from the SLR Lounge preset pack.
- Medium vignette added from the same preset pack as above.
Where You Can Find Tim P.: TP Images, G+, 500px
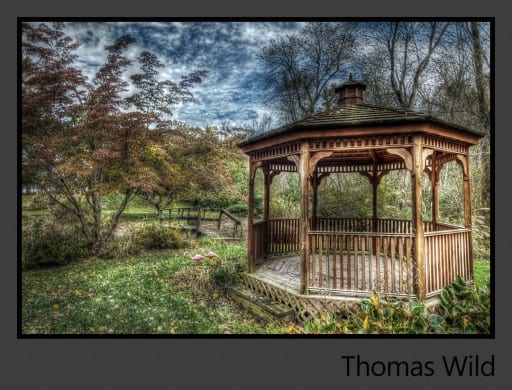
Thomas Wild
Location: Dresden, Germany
I am a 40 year old engineer from Dresden (Germany), and do photography as a hobby. I’ve had my DSLR since the summer of 2011 and am quite a novice in this area. I’m still hanging in the HDR photography, because I’m interested in the technology and, above all, the very different results.
Processing Highlights:
- Developed the raw files with Lightroom to tiff-images then Topaz deNoise each tiff
- Input Photomatix Pro 4 (Detail Enhancer) 2times!
- Post-processed in Photoshop+Topaz Adjust many settings to get back the details and the colors
- Slight perspective correction + cropping
- Tone + Curves layer on the pavilion
- Saturation + colors layer on the sky
- Topaz clean –> CrispStyle
- Tone + Saturation layer on the trees and grass and saturation layer on the ground
- Global curves, saturation and levels layer for global fine-tuning and remove some yellow cast
- Layer for the vignette effect
- Different layers high-pass Filter for sharpening part by part
- Bordered black
Where You Can Find Thomas: Website, Twitter- @magnetismus, G+
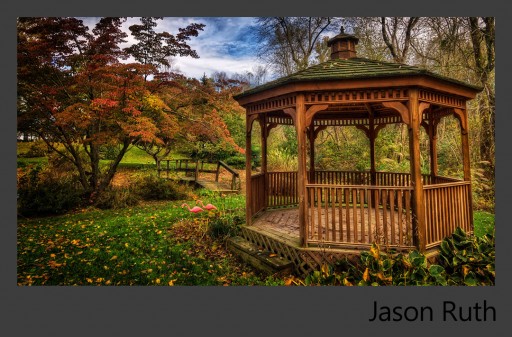
Jason Ruth
Location: Hornsby, NSW, Australia
Started into photography back in 2001, got my first digital camera in 2003, a Coolpix 5000, which was promptly housed for underwater photography, couple of years later got my first DSLR, a Nikon D50, then in 2009 it was upgraded to a D300, at the same time I was introduced to HDR processing. It’s all been downhill since then.
Processing Highlights:
- All images opened using Camera RAW, lens correction and chromatic aberration correction applied, opened into Photoshop
- Noiseware applied to each image and saved as 16 bit TIFF files
- TIFF files processed in Photomatix, including tonemapping
- Saved Photomatix tonemapped image as 16 bit TIFF
- Tonemapped TIFF, and bracketed TIFFs opened into Photoshop as layers.
- Masking of tonemapped layer, -1ev, and -2ev images
- New layer of visible result, convert to smart object, applied NIK Viveza, NIK Colour Efex Pro (detail extractor, vignette, and glamour glow).
Where You Can Find Jason: G+, Flickr, Blog
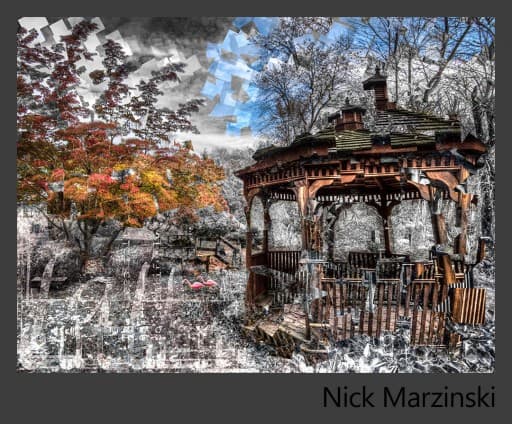
Nick Marzinski
Location: Milwaukee, Wisconsin, USA
Started with digital photography eight years ago, a few months before my oldest daughter was born. Macro, lansdcape, abstract, and HDR photography are particular interests. I shoot with a Canon Rebel T1i, and have an unhealthy obsession with using Lightroom 4, Photoshop CS6, Photomatix, and a bunch of Topaz plug-ins to wreck perfectly beautiful pictures.
Processing Highlights:
- Prepped the image in Lightroom with noise and clarity preset adjustments, then made 2 HDR images in Photomatix: One for the gazebo, one for everything else.
- In Photoshop, I combined the two HDR images using a layer mask. Then I made two copies of the image (for a total of three copies). Ran a black and white adjustment layer on the bottom original, and dropped the blues to darken the sky.
- Ran the two (still colored) copies through a lens correction filter and distorted the heck out of them. Then added black layer masks to both copies to hide the layers.
- Using a square brush and varying the size and rotation of the brush, I poked holes through the two black layer masks to let the distorted, colored images show above the black and white original. I wanted to make the gazebo look interesting or ugly, depending on your point of view. I also looked for sections of color where I could isolate one or two specific colors by square brushing them in–including the sky, the tree on the left, and the flamingoes. I went through a lot of experimentation here, and the undo command and I became good friends.
- Painted on a few hue/saturation layers to get rid of the greens around the gazebo and the blues in the sky around the tree and to accentuate the reds. This step also accentuated the square brush-strokes, particularly in the upper left hand section of the image.
- At some point in the process, I may have taken a picture of my basement floor and added in as a texture.
- Painted on a brighter levels adjustment layer with square brushes.
- To deal with the empty space on the lower left side of the image, I added some text layers and distressed them using a layer mask and some grungy brushes.
- Put it back into Lightroom and added a slight vignette and some minor adjustments before exporting.
Where You Can Find Nick: G+
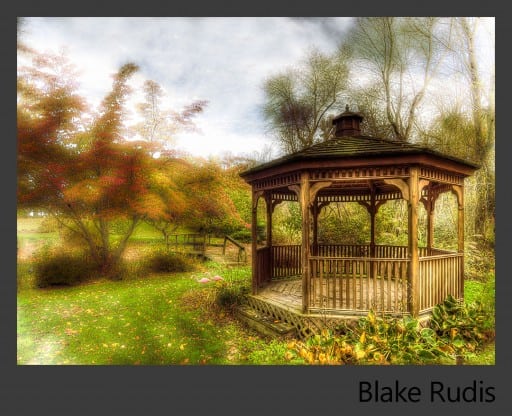
Blake Rudis
Location: A few miles North of Kansas City, Missouri
I am Blake Rudis and I am helplessly addicted to HDR photography and showing people how I do it. I am not sure if I am more addicted to HDR or the sharing of my secrets, either way I am addicted, I love it and I am not going to stop doing it!
Processing Highlights:
- I started in Photomatix to create a mildly tone mapped image, not dark, not light, relatively contrast free and not stylized.
- I then brought it into Camera Raw where I through the shadows for a bit of a whirl along with the Highlights and a slight touch on clarity. Of course I used some Noise Reduction as well.
- I brought it into Photoshop and did some serious dodging and burning to set myself up for the future adjustments. I really wanted to push everything else back so I dodged the crap out of them and burned some of the gazebo and plants.
- I then ran my favorite Action on it (Dreamscape). This Gazeboe is at my Mom’s house and every time I go out there and shoot it I feel like I have journeyed to another place. I wanted to capture that dreamlike effect so I ran it through the Action.
- After the Action ran its course I added a yellow tone to bring out the warmth of the image and called it a day.
Where You Can Find Blake: I am here all the time, if you have HDR questions feel free to email me: everydayHDR@gmail.com.
While everyone has an opinion on what is “right” in the world of HDR, I will try to give you an unbiased opinion to help in anyway I can!

