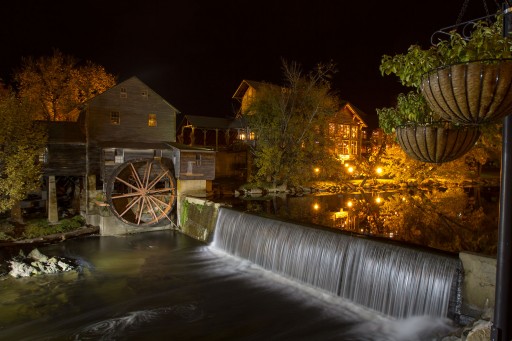
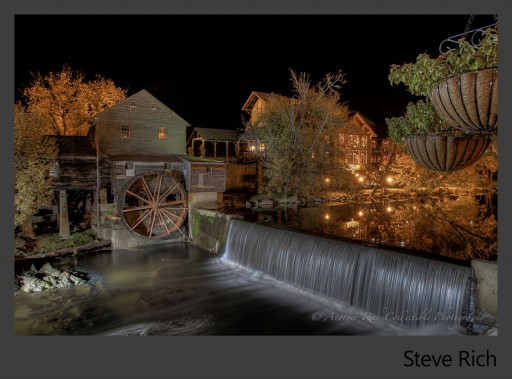
The brackets for this months HDR Concert were provided by Steve Rich. Thank you Steve for providing a great capture of Pigeon Forge Tennessee at night. It was very difficult for my creative juices to spin on this one, I know the contest was open for anything but the image was already very good. As usual it was awesome to watch my inbox flood with images for the concert. Thank you to all who participated.
Starting with the man who provided the brackets!
Steve Rich
Location: Aiken, South Carolina
I am 55 years old, married and have two daughters, both daughters are married. I have a 3 year old grandson and 4 month old grandaughter. I am a late bloomer when it comes to post-processing images using enhancement applications. For years I was a point and shoot with no post processing. With the birth of my grandson, this gave me a reason to learn something new. I use all the Adobe products, Photoshop CS6, Elements 10, Lightroom 4, Nik products, OnOne and Photomatix.
Processing Highlights:
- Three bracketed images taken in camera raw using a Canon 7D and tripod, Tamron 10-24.
- F 5.6 ISO 100
- Imported into Lightroom 4.2 for final tweaks on color.
Where You Can Find Steve: Steve Rich Collectible
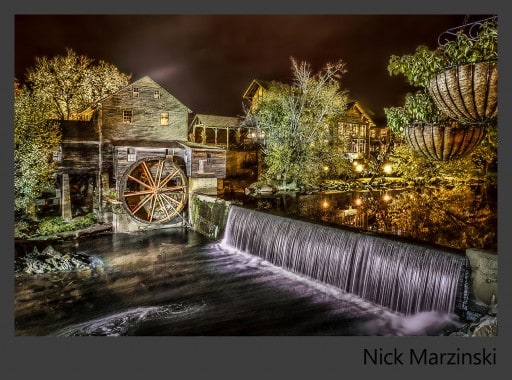
Nick Marzinski
Location: Milwaukee, Wisconsin, USA
Started with digital photography seven years ago, a few months before my oldest daughter was born. Macro, landscape, abstract, and HDR photography are particular interests. I shoot with a Canon Rebel T1i, and currently use Lightroom 4, Photoshop CS5, Photomatix, and a bunch of Topaz plug-ins.
Processing Highlights:
- Noise reduction and vibrance boost in Lightroom, then exported to Photomatix for HDR processing.
- Imported the HDR image and 0 exposure image into Photoshop as two layers, aligned layers, and selectively masked the 0 exposure image over some of the brighter portions of the HDR image.
- Gaussian blurred the sky with a layer mask to get rid of some additional noise.
- Various masked curve adjustments for contrast, hue/saturation adjustments to boost the saturation on the mill wheel, give a purplish hue to the waterfall, et cetera. I also used a brownish gradient map set to overlay to tone the image.
- Brought a copy of the image into Topaz Adjust to give it some additional pop, which got masked out of the sky.
- Additional sharpening with a High Pass filter (again, masked out of the sky).
- I brought in a wood grain texture, rotated it so the grain ran the same way as the water, dropped the opacity, and masked it off the sky.
- Final cropping in Lightroom.
Where You Can Find Nick: G+
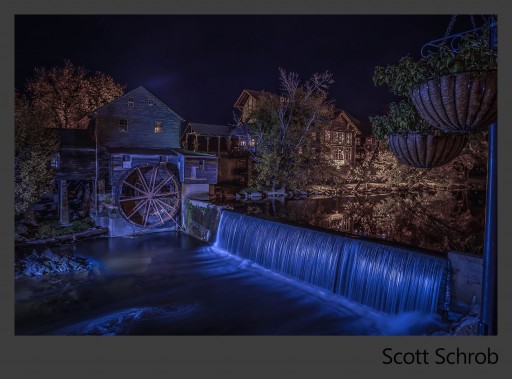
Scott Schrob
Location: Princeton, NJ
I am 31 years old, married with newborn twins (boy and girl). My time for photography has deminshed quite a bit, however, that hasn’t stopped me from working more on the ‘post processing’ part of photography. I used to be a straight out of the camera type person, but I have taught myself the ‘basics’ of Photoshop and Lightroom after coming across the HDR scene. You can usually find me on Google+ with me linking to 500px for some of my better pieces
Processing Highlights:
- Merged to HDR in Photshop CS5 from Lightroom
- Lightroom adjustments (Highlights, Shadows, Clarity, Vibrance and Saturation)
- Import back to Photshop to remove the lights along the tree line and water
- Import back to Lightroom and used a preset that I generally use for night city scapes
- Did some final adjustments (Temp, Noise, Saturation) in Lightroom
Where You Can Find Scott: G+
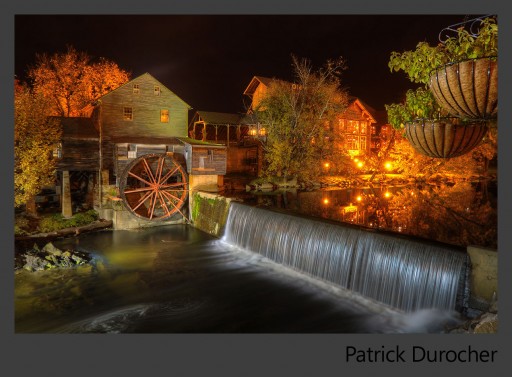
Patrick Durocher
Location: : St-Jean-sur-Richelieu near Montreal, in Quebec, Canada.
Born in ’67, photographer since the mid-80’s. I studied in professional photography, but never worked as a pro. I am also an Aircraft Maintenance Engineer.
Processing Highlights:
- Converted to TIFF and noise removed with Neat Image
- Processed in Photomatix, saving 2 files : one “vivid”, and one high contrast B&W.
- I opened those in Gimp in layers, the B&W on top and opacity adjusted to 30-40%
- The output went in AcdSee pro, where I adjusted exposure, ligthing, curves, vibrance, contrast, sharpness, etc.
- One last pass in AcdSee in Edit mode where I fine tuned sharpness, burned some highlights and cropped.
Where You Can Find Patrick: G+
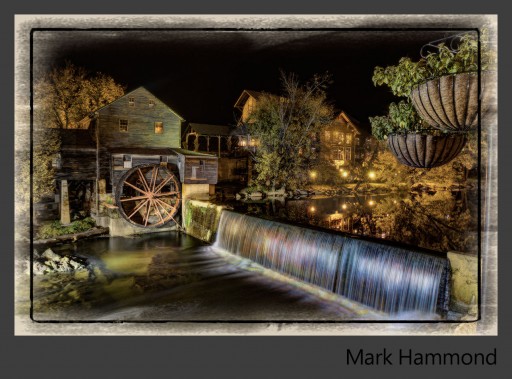
Mark Hammond
Location: Sedalia, MO
One of the things that excites me about photography is no matter how much you learn tomorrow you discover how much more there is to learn. I’m not trying to become the worlds best photography but I am trying to be the best photographer I can be.
Processing Highlights:
- Begin with Photomatix, I really like what they have done with their upgrades
- Photoshop elements with a brightness layer
- Topaz adjust to give some pop
- Topaz star effects to accentuate the lights
- On One photo frame to add a border
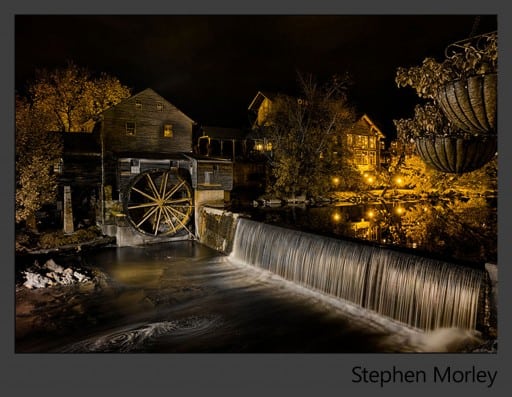
Stephen Morley
Location: Southern Ontario, Canada
Long time amateur photographer. Developed first film (Plus-X) circa 1960 in a furnace room and soon learned the relationship between temperature and chemical reaction (development time). I discovered digital world in 2000 and with a LR4 catalog approaching 100K, hopefully I have a few “keepers”.
Processing Highlights:
- Brought in HDR Efex Pro 2 adjusting exposure, shadow and highlight details.
- Back into CS6 color balanced to taste.
- Straightened verticals using distort transform and cropped on right side.
- Added a brownish texture
- Selectively dodged and burned to taste
- Converted to 8 bit, downsized and sharpened.
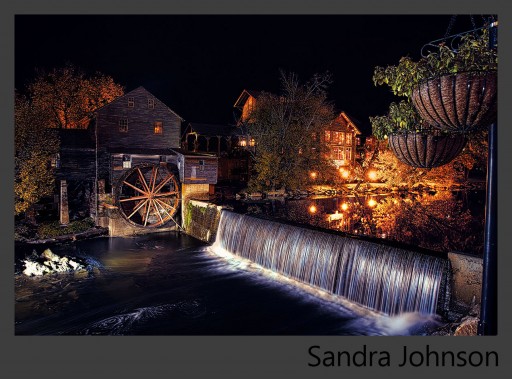
Sandra Johnson
Location: Germany
Love art in most forms…….being able to take ideas (sometimes) and run with them. Photography in the HDR form allows you to pull out those details and the feeling of atmosphere. Here I tried to pull out that romantic feeling of light, letting the light, or lack of it pull you into the photo, deeper and deeper.
Processing Highlights:
This week I was having comp. problems, so was unable to merge to HDR. So, I only used the 0 Jpeg file. I took this into photoFXlab(Topaz stand alone), and choose 2 photos from 500px.com as inspiration. Each alternative on a separate layer and through masking combined what I liked from both. Making a stamp copy I then went into Elements 9 ( on my laptop,as my normal work comp. was in the workshop). In Elements I first did a blur sharpening before taking it back into topaz de-noise. 2 x level correction, one of which in soft light and another opacity. Again Topaz HDR, 5 and 4crisp, last being soft light reduced opacity. Hue/Saturation reduced opacity. Having my MAC back I downloaded HDR EFEX 2 on trail and took a stamp copy thus far into it, worked in B&W, back in PS changed the layer to screen and took the opacity down.
Where You Can Find Sandra: Facebook, Flickr, 500px
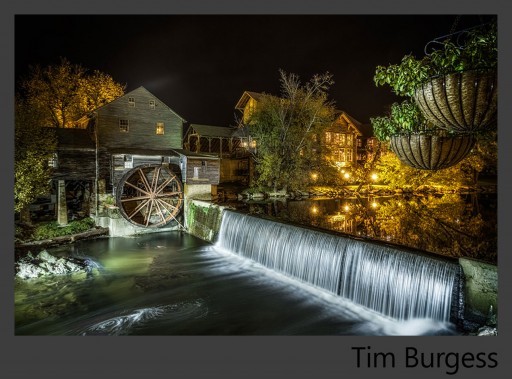
Tim Burgess
Location: United Kingdom
I’m a freelance Animator and Compositor . Photography has always played an important part in my work. In the past couple years photography and HDR has become more of a passion and i’m constantly looking to improve.
Processing Highlights:
- Raw images corrected in Camera Raw, Merged in HDR Pro and saved as a 32 bit Tiff.
- file, taken into Camera Raw adjusted and loaded into Photoshop as a smart object .
- smart filters used to sharpen and reduce noise .
- curves adjustment layers used with masks for shadows and hi-lights.
- File flattened and converted to bit map image so as todo some image correction with the warp tool.
Where You Can Find Tim: Redbubble
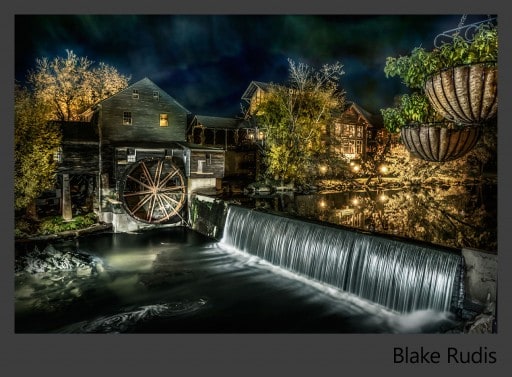
Blake Rudis
Location: Just outside Kansas City, Missouri
I hang out here on EverydayHDR.
Processing Highlights:
- I call this piece Aurora Borapigeon Forgealus!!!
- I started by converting the three bracketed images to a 32 bit HDR file in PS.
- I opened it in Adobe Camera Raw (ACR) and modified the main HDR sliders, Highlights, Shadows, Clarity, Exposure, Contrast.
- I then opened it in Photoshop and saved it as a 16 bit TIFF.
- I reprocessed it in ACR for more dynamic range.
- I masked several curves adjustments and other minor edits.
- I made 3 separate clouds layers all set to Soft Light to create the Auroras in the sky. I felt that was the blank canvas of the piece and tried to have at it.
Where You Can Find Blake: www.everydayhdr.com

