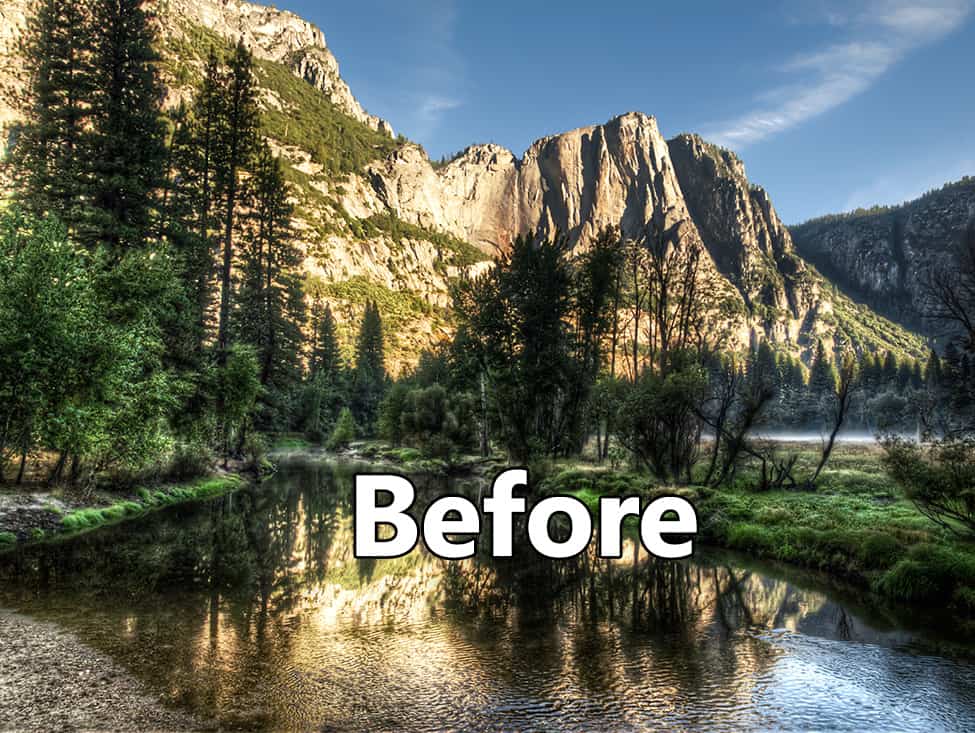
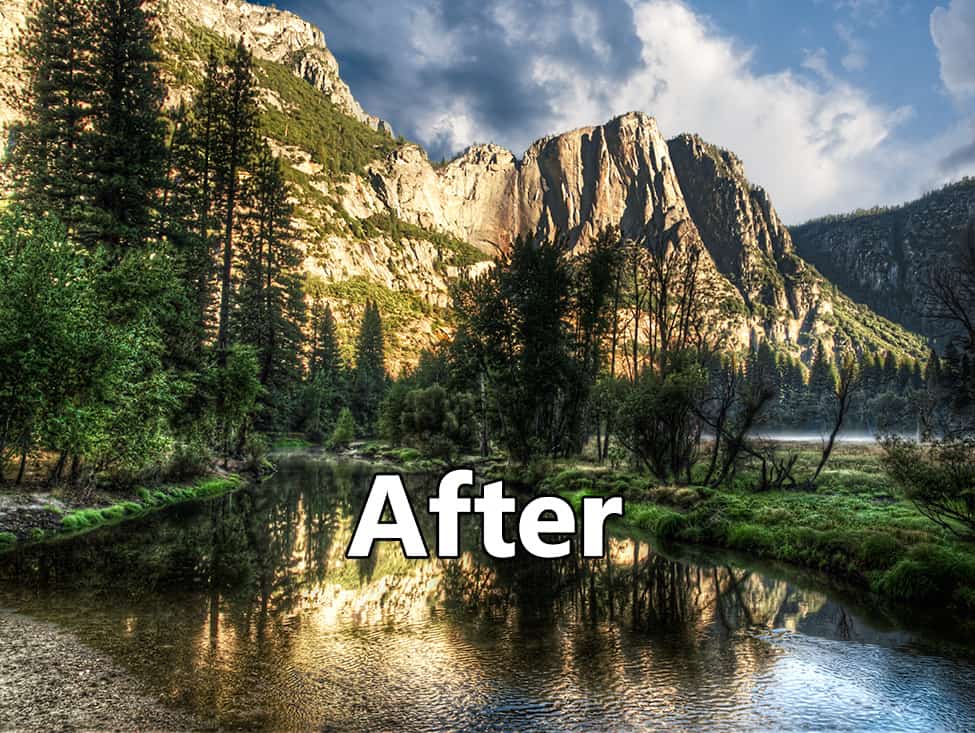
Want to replace a sky like a Boss!?!
We have all been down this road. We go to a place that is gorgeous, on our bucket list. We have visions of amazing sunrises, beautiful cloudy afternoons, and sunsets that just won’t stop making you drool. However, when we get there we have boring pale blue skies and sunsets that just don’t mystify. So what do we do?
We drop our ethics for a moment and replace the sky. We watch a YouTube video and forget it ever happened and if someone ever says, “Wow that is an amazing picture, lucky you with the clouds.” We graciously say, “Thank you and tell them the truth under our breath as we slowly walk away”.
The truth is, I have no qualms with replacing a sky within reason. If the sky is boring I may replace it with clouds that are serene, but only if the time periods are similar.
For instance, I would never put a bolt of lightning in a picture that was taken on a sunny day that would look silly. Nor would I place a sunset in a picture that was taken on a sunny day at 2 PM with harsh shadows.
In this tutorial I am going to show you how to not only replace a sky, but also fix the reflections of the sky on water and show you how to match the color temperatures perfectly!
Quick Tips from this tutorial:
- You can replace a sky at anytime in your workflow.
- Avoid replacing skies with mismatching times of day unless you are very good with Photoshop! That is a tutorial all on its own!
- Use Clipping Masks to help blend and match the exposure and color temperature of the new sky being brought in with the original scene.
- If the scene has a reflection of the sky on water, duplicate the sky layer, flip it vertically and blend it in the water with Masking and a Soft Light Blending Option.
- You can move a layer independently from its mask if you click the link between them. The mask will remain in place and the layer can be moved freely around. This is useful when you want to move
Like the style of this tutorial? You will LOVE HDR Insider! Full-Length HDR Workflows, Critiques & More!
[hcshort id=”5″]


What you did above is great. Thanks for the information/tip.
Thanks! It was my pleasure really.
great video i learned a lot thanks for sharing
No problem! Glad you liked it.
Did you notice the face in the upper left of your sky photo. Just thought it was kinda cool!
I didn’t while I was doing the tutorial, but someone pointed that out on YouTube and I saw it right away!
I absolutely love your tutorials. Thanks for sharing. The only small suggestion I might add is to talk a little slower. You are sharing so much information that I like to take some notes. Thanks again!
Thanks Cindy! I do go pretty fast to try and cover as much as I need to in a topic. I am working on that!
Dear Blake,
This is the type of an Intermediate Tutorial that I find tremendously valuable. You covered many aspects of post processing in an interdependent and sequential manner and in a way that we can really apply to any image. Thank you very much. This was great! I am looking forward to another year (God willing) of your tutelage.
Vinny
Thanks Vinny! I always appreciate your helpful feedback!
This is a great tutorial. I’ve replaced skies when needed and what I learned today will really help me do them better in the future. Thanks!
Awesome to hear!!
I replace skies quite often and yet you’ve given tips that I hadn’t given much thought to that I need to be more careful with..like color temperatures and time of day, being more mindful of sky reflections in any water that may be in the scene. Something that looks “OK”..might not stand up under closer scrutiny without some help. Thanks again.
That being said, may I offer a suggestion? A lot of keyboard shortcuts are verbalized during the video. They are good to know and can be helpful to those using the same system and software but are not always applicable. If the emphasis is on the action naming of each step, rather than the keyboard shortcut, it may be easier to follow.
Glad I offered you done helpful tips! I take all suggestions into account. I discuss the keyboard shortcut as well as the action so those using PS can pick up shortcuts that speed up their workflow. I well be more mindful of the action from here on, but those shortcuts are so valuable!
This tutorial email I received couldn’t have come at a more perfect time!
I was struggling with replacing a sky in one of my images and
this tutorial made the process a whole lot easier to understand and
accomplish.
I am learning from your tutorial’s every time I watch one, you have
showed me tips & tricks I never knew about or would consider using.
Without your tutorials, I’d still be in the dark about a lot of the capabilities
that you can add to a photo. Love your site, tutorials, and the detailed info
that you provide in helping me learn more about in photoshop.
I truly look forward to watching & learning more from you and your tutorials.
Thank you for having such a passion on your topics and sharing them!
That is great to hear! Thanks for the feedback! Glad it came at such an opportune time.
Very well done! Kudos — I’ll be jotting down a few notes from the video.
Awesome! Just glad I can help!
Another great tutorial. Thank you. Looking forward to more in 2015!
Thank you Blake, I learn soooo much from you!!
Great tutorial that helped me a lot. Thank you Blake.
You are very welcome, Penelope! Glad to hear it!
Thanks, Blake! I love your tutorials!
Someone asked you to speak more slowly so they could make notes – if you press the ‘spacebar’ during the video, you can stop and start it at will! I’ve been making notes too!
That is a great tip! I try to keep it at a medium pace. If I go to slow, pros get frustrated, if I go too fast beginners get frustrated. I try to remain neutral for both.
Your short cuts are impressive, I will use very often, I checked many tutorials how to replace the sky, you have the best
thank you Rudis
Thanks! That is awesome to hear! Thanks for the cordial feedback.
This is awesome Blake, I’ve watched this several times now, made some notes and I still learn a trick or two every time I watch it again. You have a great way of teaching!!
Thanks, Jerry! That is awesome to here it has a lot of replay value 🙂
I have just used your method of Filter, Blur, Average and it’s worked brilliantly. Great tip.
Check out my Facebook page for the image:
https://www.facebook.com/photo.php?fbid=1556029904671038&set=a.1398860530387977.1073741830.100007921296573&type=1
Thanks Blake.