On1 Effects 10 is pretty OnPoint
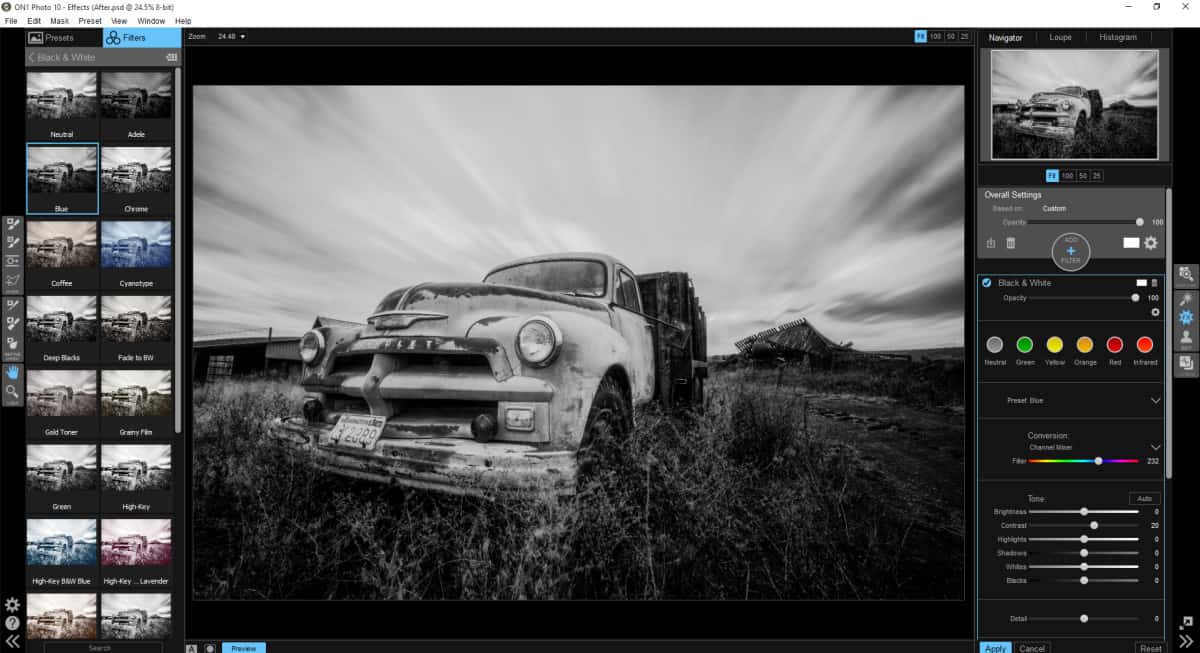
It was almost a year ago that I took a good solid look at On1’s Perfect Effects 9. The new On1 Effects 10 was released last week and I have had the luxury of taking a look at all of its new features. It may not seem like much has changed, but there have been some significant improvements that I will point out along the way.
Noteworthy new features from Perfect Effects 9 to 10:
- Faster image processing (there is a noticeable difference)
- Moved from the File > Automate section of Photoshop to the Filters section
- Updated UI
- Black and White Effects has been turned into a Filter in Effects 10

The Pro’s:
Much of what was good in Perfect Effects 9 remains the same in On1 Effects 10, but here are some more of my thoughts as I worked through Effects 10 over the last few days:
- Increased Workflow Efficiency in Photoshop as Effects 10 can now be found in the Filter section rather than Automate. It may sound like a silly Pro, but I found myself sometimes forgetting where PE 9 was in the past when it was stuck in the Automate section.
- Black and White Effects is no longer a separate Plugin. BW Effects has been added to On1 Effects 10 as a Filter. This makes it much more valuable in the editing process as all of the other fine filters can be used in unison with easier accessibility.
- It is no longer called PERFECT. I like that, it is humbling to know that nothing is ever Perfect and On1 realized that and titled the new Plugin simply, Effects 10. They dropped the Perfect. It is hard to always be Perfect anyway 🙂
- The new User Interface rocks. I found the addition of Filters to be more streamlined and user friendly. It seems to be much easier to navigate and build custom Presets.
- The overall editing experience seems a bit faster and a bit more responsive. The sliders seemed to work as fast on the image as I was moving. In the past I noticed a bit of lag between adjustments.
- I prefer the darker interface over the lighter interface in PE9. I did a study a while back on the UI of Photoshop and how it affected your editing decisions. It seems that 90%of the time I like the look of my images when edited on a darker interface. It makes the colors pop more and makes it a bit easier to see the varying degrees of tonal contrast in your images as you edit.
The Con’s:
- Masking can be very slow and in-turn inaccurate. At one point I had built up 5 Filters and started masking. It was very slow even with 32 Gigs of Ram and a 2 Gig Video Card supporting it.
The Bottom Line:
The Pro’s certainly outweigh the Cons with On1 Effects 10. The sticker price of Effects 10 is $59.95, which is not bad for all that Effects can do. On1 Effects 10 is a great addition to your Photo Workbench. It can be used as a sole source editing program like Photoshop or Lightroom, but it can also function as a helpful Plugin to your already efficient workflow. I tend to use it as a Finishing Touch program to take my images one step closer to masterpieces.
Learn More About On1 Effects 10
Watch the Video of my On1 Effects 10 Editing Process:


Great tutorial, Blake. I’ve only used a small bit of Effects up to now. This has opened my eyes to new possibilities.
You also highlighted my single biggest beef with Photo 10 – the product no longer automatically creates a new layer in Photoshop. That, in my mind, is a huge step backward. I’m hoping they’ll restore that feature ASAP.
I agree, I do not like the fact that it does not produce another layer. I could have sworn it did in past versions.
Hi Blake – great video – learnt loads. Can you do a video re Raw file software as I am confused as to which system is the best between Adobe Camera Raw, Lightroom, ON1 photo and DXO. Thanks
Wow! Thanks Blake. I love On1 and your B/W conversion technique has helped out a bunch. Thanks!
Blake,
Thanks for the video, I learned a great deal and after watching it a few times I picked up some more great pointers. One thing I discovered was that when I wanted to re-edit a photo that I had already edited in On1, when On1 brought up the previously edited photo the colors, etc were garish which looks to me as if On1 reapplied my previous filters to the original filters. I simply clicked on my edited photo, went to filters and applied On1 enhance and got the weird results.
Blake,
Thanks for the video
Thank you Blake for an awesome video! You took a very complex subject and made it easy to follow and understand. Keep up the good work, thanks.
Just in case you think folks have forgotten about this fantastic tutorial– Not so! Today I watched it for about the 5th and 6th time. The 7th time I’ll be taking detailed notes! This workflow concept appears straightforward, sensible, and, by golly!,very effective. It makes more sense than some of the fancy tutorials that go so fast and assume so much.
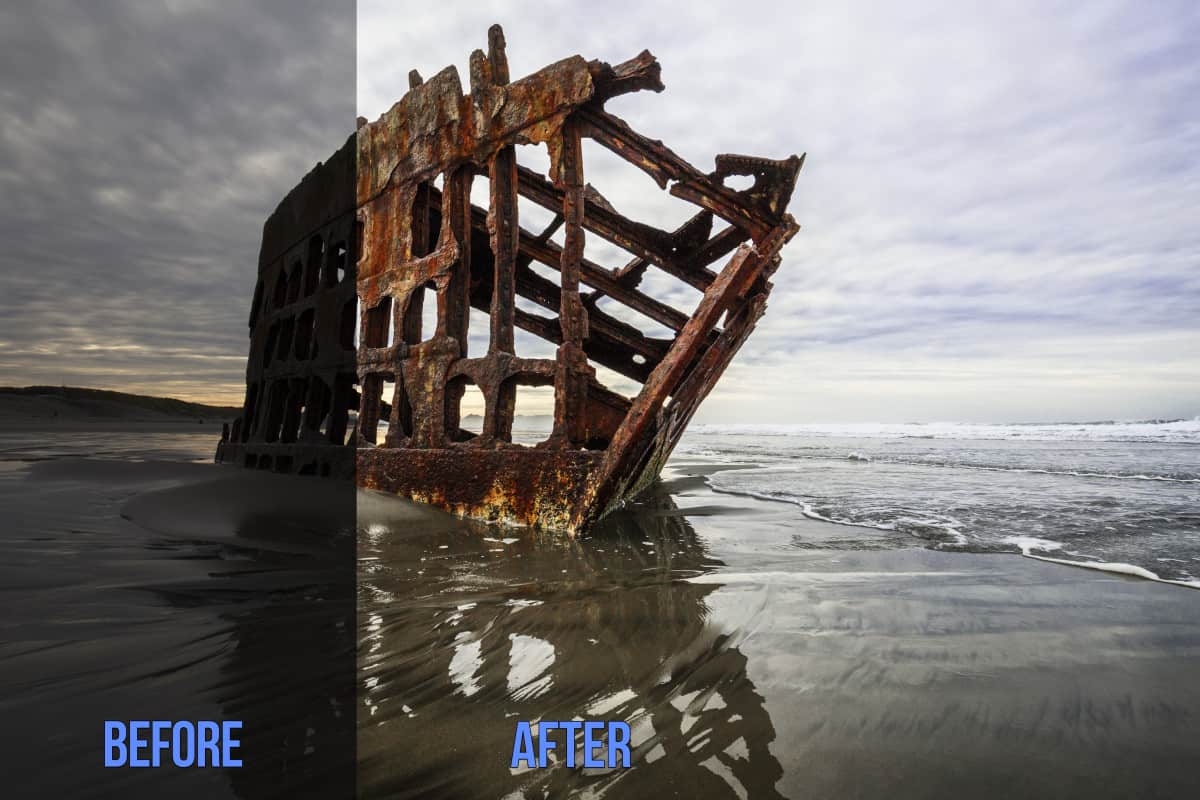
(Sure with I had that ship image to practice with! –hint, hint)
Seriously, Blake, I’m an old lady trying to learn about photography and editing. Your tutorials are always clear and on point. Thanks!
Great video, lots of good correction & enhancement tools.
I have many black & white photo that I printed myself in my darkroom many years ago. I would like to scan these photos and apply some of the ON1 Effects tools to correct and enhance these scanned photos. I think this could be a great video.