The Lighten Blend Mode and the Sea of a Million Waves!
A few weeks ago I conducted a tutorial showing off the various Blend Modes in Photoshop, but I hesitated to get too far into the Lighten Blend Mode. The Lighten Blend Mode can be a powerful asset in photo post processing. Most people use it to create the star trail paths that look like giant circles in the sky. In many cases those images are created from a series of long exposures not one photo. Let’s look at what Adobe says about the Lighten Blend Mode.
Adobe describes the Lighten Blend Mode accordingly:
Lighten Blend Mode: Looks at the color information in each channel and selects the base or blend color—whichever is lighter—as the result color. Pixels darker than the blend color are replaced, and pixels lighter than the blend color do not change.
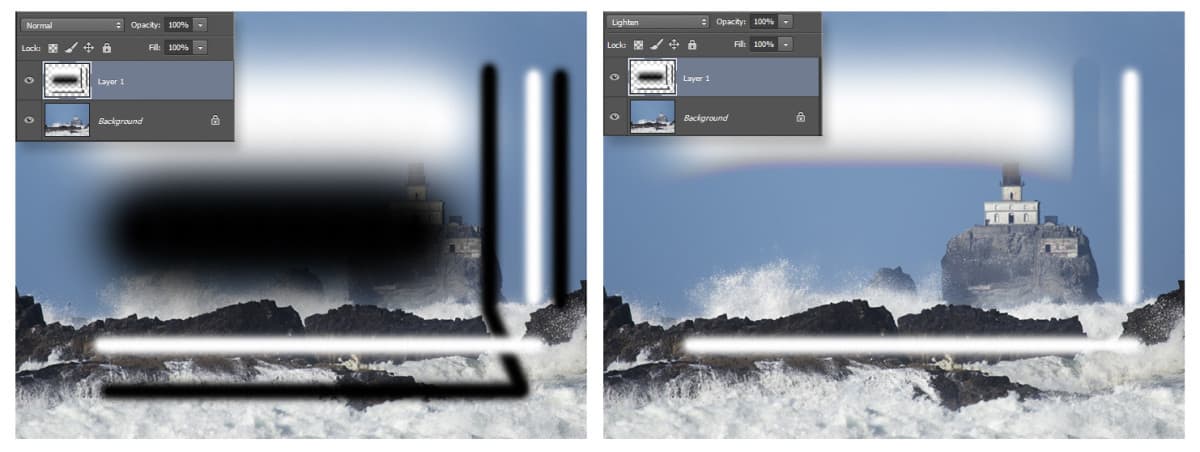
What does that mean in layman’s terms? In it’s most basic principle it means any layer you set to Lighten will vanish unless the pixels contained in a given area are lighter than the layer you are placing it on. To demonstrate this. I took White and Black and painted them on a photo. I then set that layer’s blend mode to Lighten. The result shows that all of the Black vanishes and only the pixels that are lighter than the underlying layer staying.
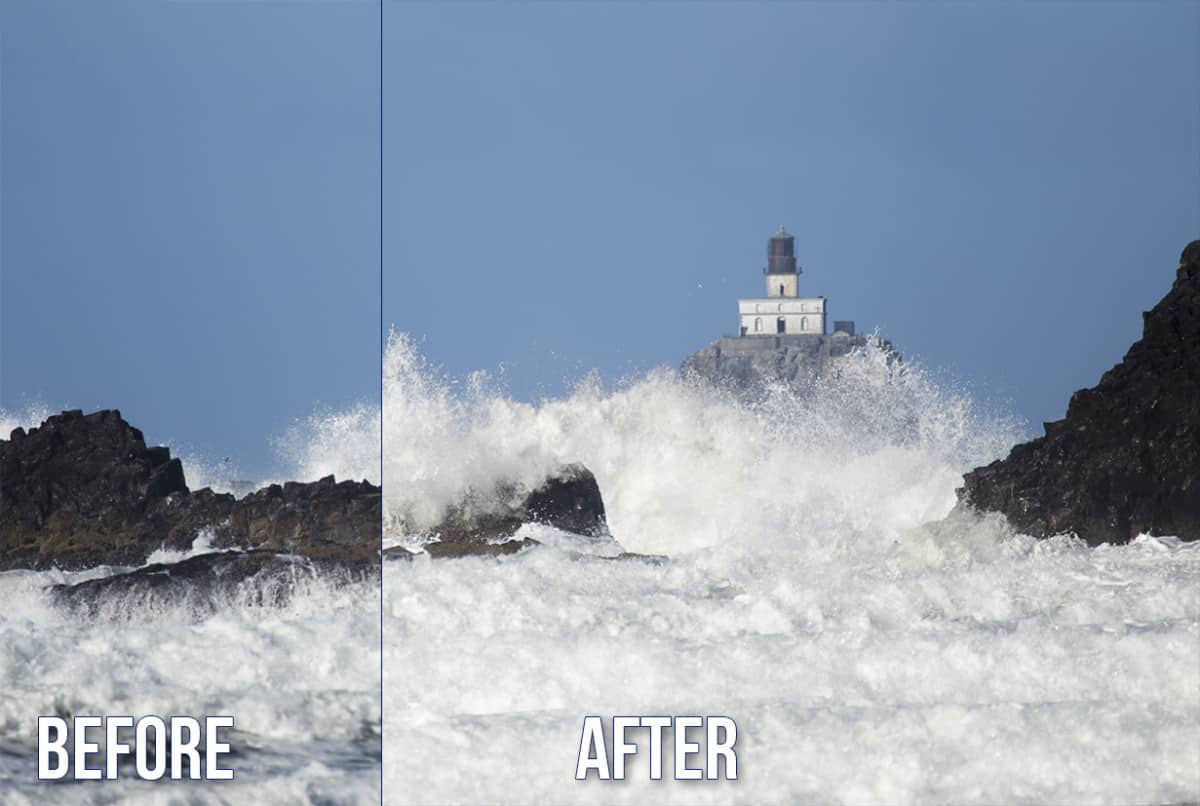
So how would you use this in practical application? In today’s Photoshop tutorial will show how 9 photos of the ocean waves can be stacked on top of one another to look like a much more violent sea and it is done rather quickly using the lighten blend mode!
Like the style of this tutorial? You will LOVE HDR Insider! Full-Length HDR Workflows, Critiques & More!
[hcshort id=”9″]


A really great tute, Blake. I recently used the Lighten blend on a couple of lightning shots but now I can’t wait to go out to the coast and find some breaking waves! Many thanks.
It is so cool watching it happen on your photos. I do the same for lightning, but seeing it on waves was a blast!
Wow what an awesome video, I just keep learning great things from you and amazed at the same time, just how much you can do with a photo. No waves here in Sudbury Ontario, not much lighting either, but I can try the light painting Once again thanks
SINCE I seem to have many of the same sort of images of that lighthouse as you do, I can’t wait to give this a try. I had a hard time choosing the one of about 50 shots I took of the lighthouse to be the one I edited and posted. This technique shows me I don’t have to choose! Thanks, Blake!
That is one great video…Another example of why I keep up all of the lessons you publish…Learn something every time…Thanks, Blake.
Thanks Blake, that is the best explanation/demo I have seen for ‘Lighten’ blend mode. I will be able to use it now with more confidence on what to expect from the image when using this blend mode. Great.
Blake, thanks for the tip. One of my goals is trying to understand what each of the blend modes are doing. I have a question. What is the difference between Screen and Lighten? I use Screen to drop out blacks. I wonder if there is a difference in how these work. As always, I appreciate your energetic and information tutorials.
An excellent tutorial. I attempted to open it in Windows for a couple of days and it would not work, saying there was a problem with the web page. Finally, I used Firefox and I am so glad I did because this is an excellent technique. Thanks for sharing with us.
Great tutorial Blake you do such a great job teaching PS.
Thanks Blade for this awesome tut, I was astonished how quickly and easily at the same time one can reach so perfect result. Just through the blend mode…