How to build a frame with the Bevel and Emboss Layer Styles
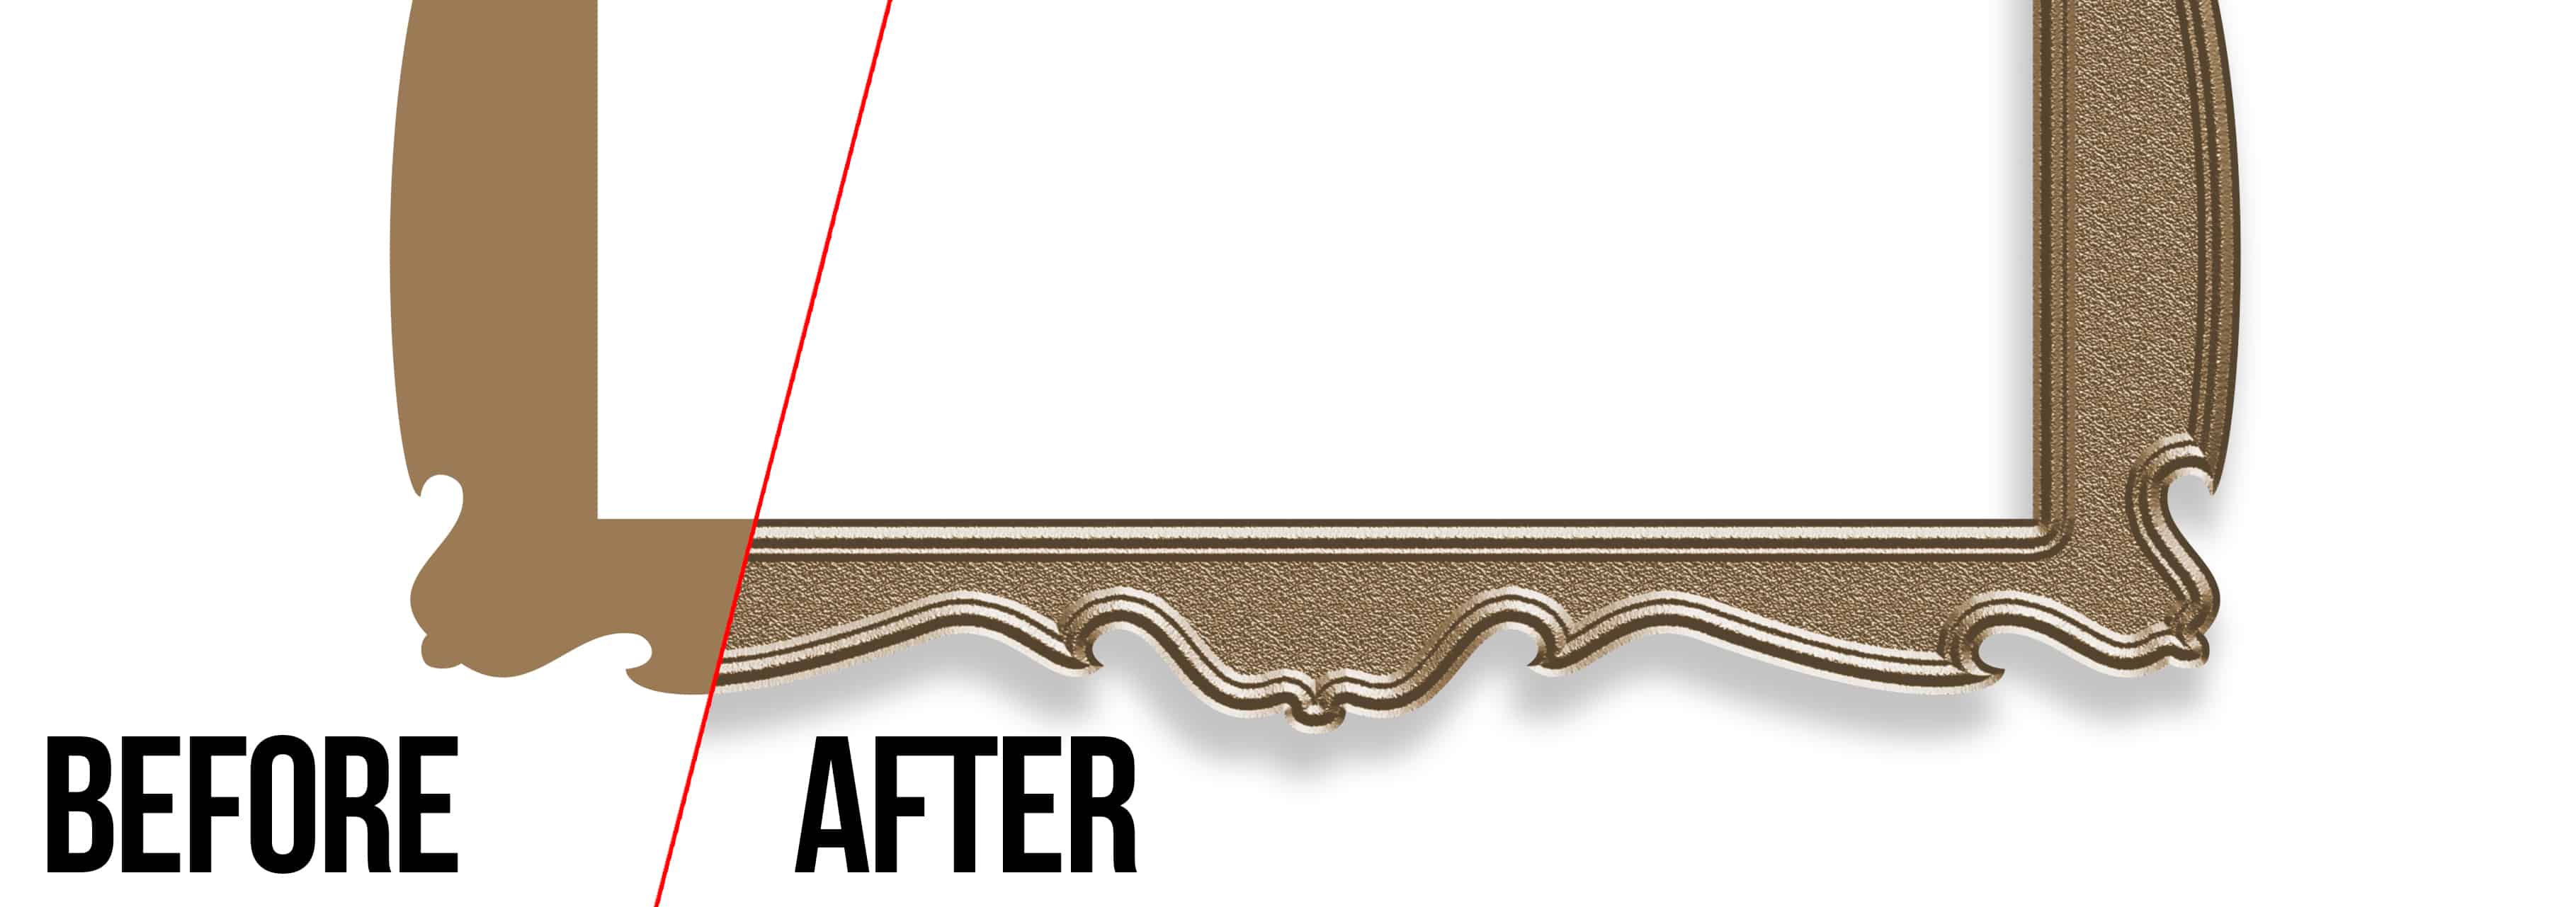
Most users of Photoshop use Bevel and Emboss on text to give their words depth and structure but did you know you can use it to make a killer frame? As usual, it is just a matter of stepping outside of the usual box we live in between the pixels of the User Interface of Photoshop. I used this technique to make the “Rudis Family Christmas Card” this year.

Within Photoshop there are a plethora of Custom Shapes that can be made, but they lack depth and dimension due to their typical two dimensional quality. I struggled with this during the creation of the Christmas Card. I wanted a good looking frame, but the pictures I was taking of the frames in my house were either not realistic looking enough for me or not elegant enough for the idea I was going for. I had just about given up on the idea when I ran across a frame that would work well in Photoshop.
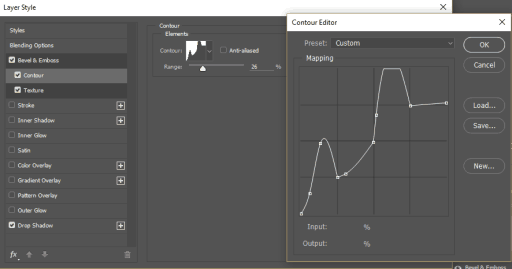
I knew the frame had the potential to be what I was looking for but my typical bevel and emboss workflow just wasn’t cutting it. However, right underneath the bevel and emboss layer style is a function called “Contour”. With the Contour curve you can control the “carving” of the two dimensional wooden frame. For every point added and curve made you are essentially carving into the two dimensional object.

Couple this control with the typical Bevel and Emboss function and you have a carved frame in seconds. The size and the depth of the frame contour are dictated by the depth and size of the bevel. Just know that as you decrease the size of the frame (CTRL+T) the depth and size will remain the same so you may need to tweak them.
In this Photoshop Tutorial I will cover many things beyond the bevel and emboss function, to name a few:
- Making a frame from a custom shape.
- Resizing a picture to fit a frame.
- Moving an image within its stable mask to create composition.
- The Bevel and Emboss Function.
- The Contour of the bevel and emboss.
- Adding texture to a shape.
- Adding color to your frame.
- Adding a drop shadow to make your frame pop off the page.


Like the style of this tutorial? You will LOVE HDR Insider! Full-Length HDR Workflows, Critiques & More!


Another fine tutorial, Blake. I never know about the custom profiles. That’s cool.
p.s. Nice jammies, but does Sarah know you threw her under the bus?
Thanks! haha, she does now 🙂 She’s a good sport!
She will now 🙂
In case you don’t think anyone watches or absorbs the tutorials… Workflow page 52 and counting 🙂 Here’s a link to this newest page. Thanks again Blake!
https://www.dropbox.com/s/2d8m77x66p0c1zo/Blake%20Rudis%20Framed%20Us_121115.JPG?dl=0
Wow! 52 pages! You should start a Blake Rudis eBook, lol
Besides that I greatly enjoy yours tutorials, I am so glad that you so casual show a part of your daily life.
That you are so open-hearted, I like about you.
don’t change !
Happy Holidays
Thanks! It is so comforting being able to share pieces of our life with you.
Happy Holidays to you as well!
Blake, get looking family….thanks for this video…always need information…William
Thanks William!
Fantastic tutorial and beautiful family. Many thanks 🙂
Vinny
Thanks, Vinny! Glad you like it.
Wonderful video, and I also enjoy you down to earth attitude, it’s refreshing because not many people would share some of there lives with us which makes it special. You have a fun loving family. Merry Christmas
Thank you, Marla. I have always been sharing the family from the beginning, in an odd way I guess I consider all of you a part of it. I appreciate you!
Merry Christmas.
I haven’t watched the video yet – I’m in my lunch break at work & checking emails, but I have to comment:
Ohh no…another Blake selfie…LOL ????
Maybe you should consider for the monthly HDR Insider project – a “SELFIE”? ?
haha! My selfies rock!
Wish I could be so confident about my ‘selfies’. If you did an HDR Insider ‘selfie’ Project, mine would be much more subtle.
Great video tutorial once again ???
Love the jammies!
Oh, yeah, the tutorial was good, too.
Thanks, Blake
Its always great to learn a new technique for Photoshop.
I think this photo of your wife is fine, there’s only a mild resemblance to you.