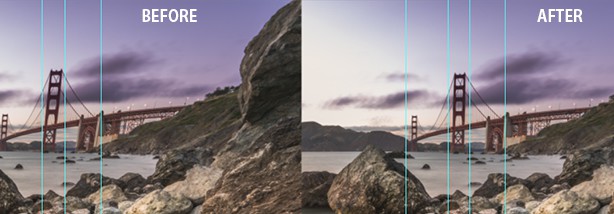
When everything else just won’t work, resort to manual Perspective Correction in Photoshop
There are times when Manual Perspective Correction in Photoshop is a must. Typically, these are times when you have exhausted all other measures and the only way to fix warped perspective in your photo without losing your composition is with manual measures. It is not as easy as one click lens corrections, or the adaptive Wide Angle Filter, or even the Perspective Warp. Sometimes you just have to do it on your own. I’ll show you how at the end of this post.

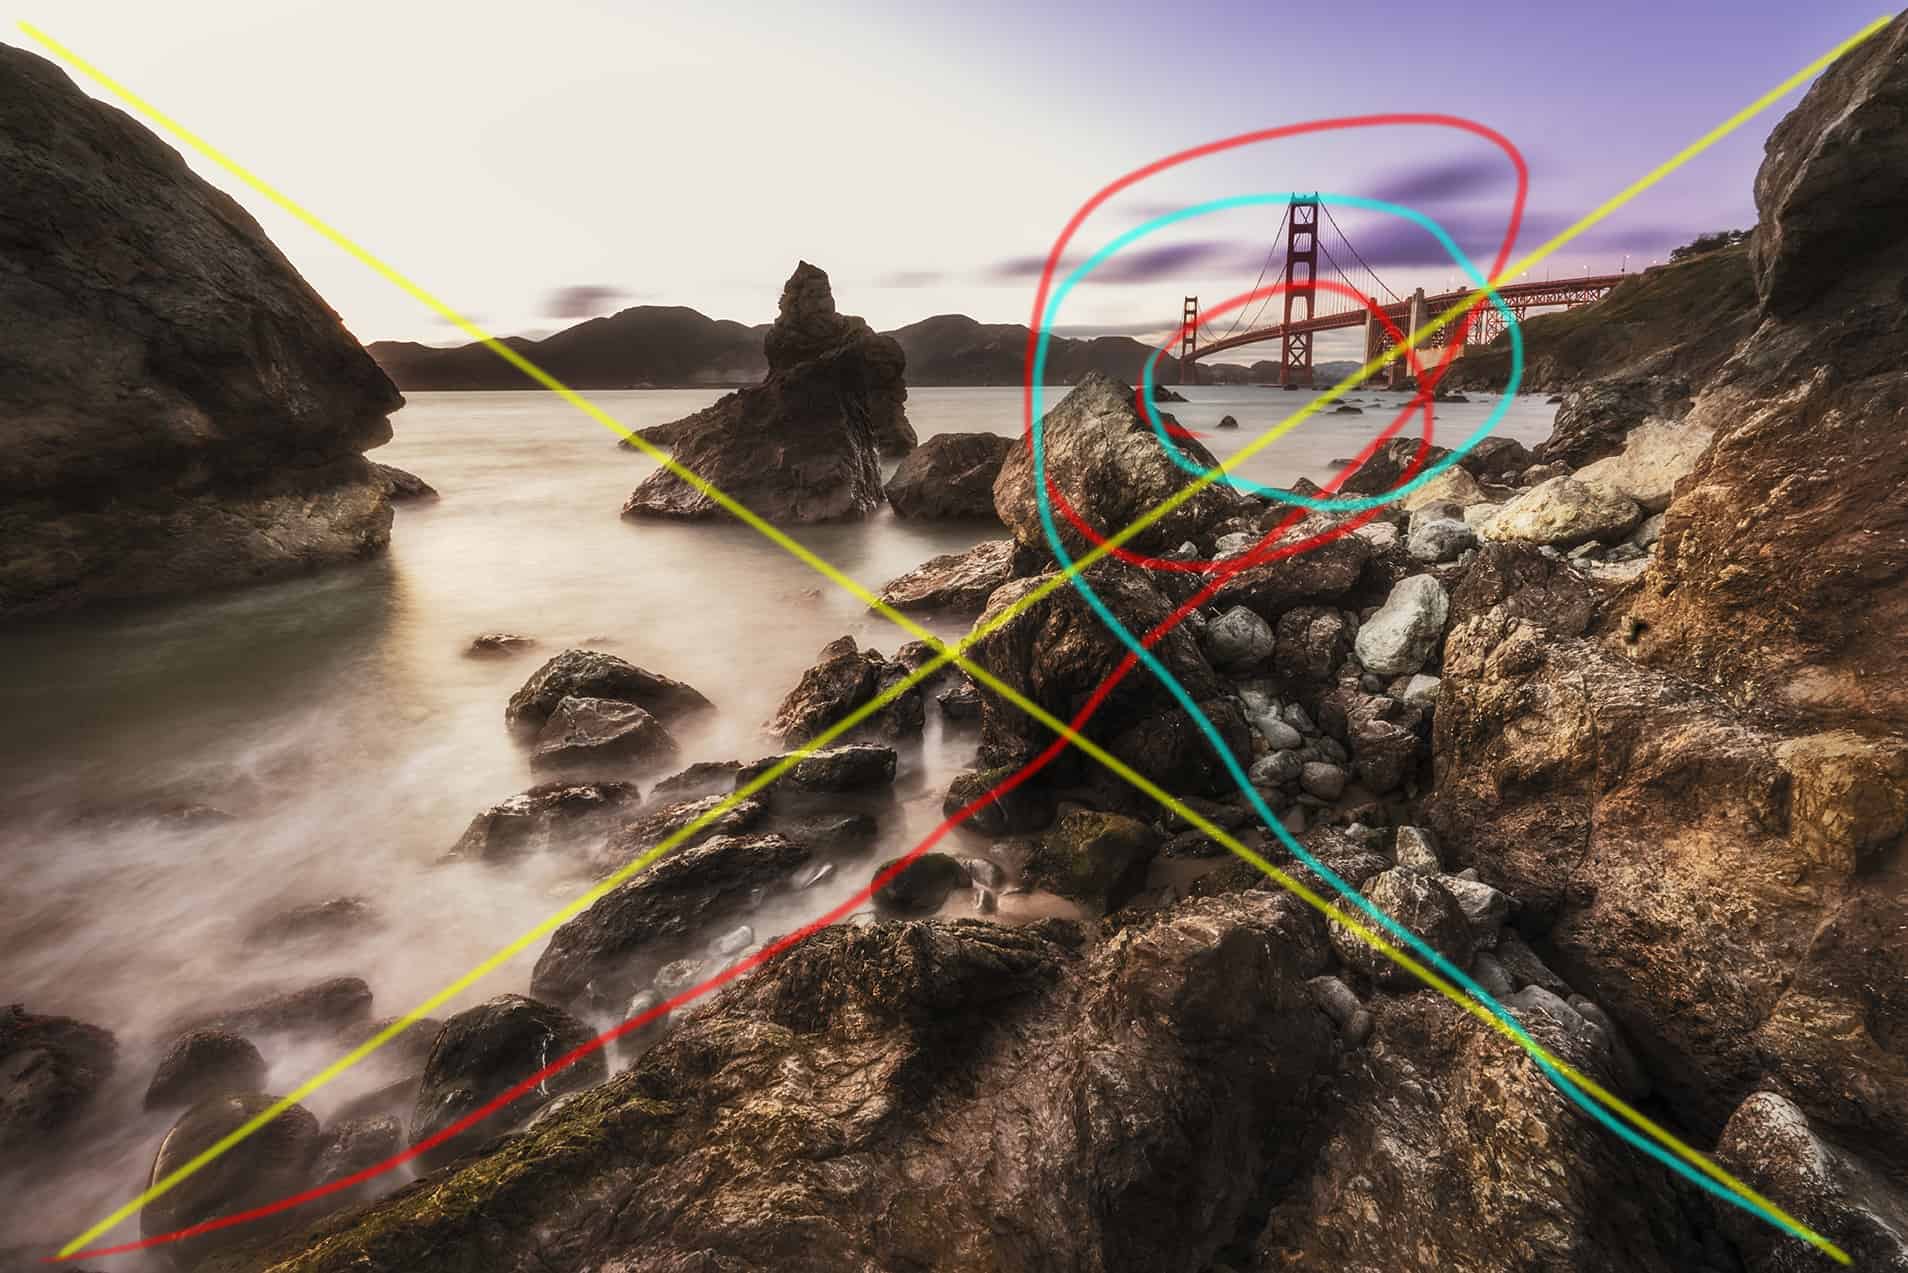
I was trying to fix the warped perspective on this image of the Golden Gate Bridge. All of it was looking great except for a bit of lens distortion in the bridge. All of the automated methods would change the entire composition of the photo. When I was on the scene I really liked how the foreground created leading lines that would take you right to the bridge (the red and cyan lines below). I also liked how the canvas seemed to be split like an X with the elements within the scene and how they were framed. When I used the automated methods, these compositional elements were sacrificed because the entire canvas would warp in order to fix the perspective of the bridge. I knew I had to resort to manual perspective correction in Photoshop.

It is not difficult to manually correct your images in Photoshop. As a matter of fact, you are probably already using these techniques on a daily basis, just not in this fashion in Photoshop. In today’s tutorial, I will show you the art and magic of manual Perspective Correction in Photoshop. We will discuss the following:
- Compositional elements within the frame of the scene.
- How to duplicate one piece of your photo to edit without affecting the rest of the photo.
- How to mask the excess areas out to make your new perspective corrected image fit seamlessly into your photo.


Excellent! This works so much better than Perspective Warp. It’s aggravating to straighten one tree in the forest and find the rest of the leaning as a result. Can’t wait to use it. Thanks, Blake.
Great tip Blake. I’m sure this will be quite useful. Thanks.
Thanks for checking it out. One of my favorites
You make it look easy.
Oh’ it’s not so bad!
Blake , another tool in my workflow…thank you for all you do…William
Thanks Blake… Use this quite often… If I recall I first learned this in a segment that you did and the target was a small warped barn in a field. Have been a stickler on vertical lines since. Thanks ahead as we have augmented our workflow notes with this refresher…
Great tip! I can definitely see me using this!
Blake,
Great tip. I’ve always been frustrated not being able to just change the perspective of the area I want without distorting the entire image.
This solves that problem!
Thanks much for your expertise.
I also remember you doing similar to the barn but forgot all about it. Will try and retain this method as it a great tip!
Thanks Blake!
Sometimes manual intervention is the best solution!
Thanks Blake. Excellent stuff. I agree with Kate: “..works so much better than Perspective Warp”. A great method and one that I’ll be using from now on whenever I need to fix minor perspective issues.
Hi Blake, I enjoy your vBlogs they are very useful: however, this one I felt rather long winded…. What I did with your image was use> Filter… Adaptive wide angle; This allowed me to to adjust the image in about 2mins, from opening to closing. I have a screen print of the operation can I send it to you, what email address?
Great and useful tutorial
I must tell you that I love your teaching methods and I have read many, many tutorials and watched mucho videos/ You are so easy to follow. Thank you.
That is very important to me. I appreciate it! I’m smiling now, it is a good day 🙂
Now that I took the time to sit down and watch the video… Wow, that was easy and very logical. As another wide angle photographer now I want to go back and re-work some old photos that I corrected with the “old” perspective warp technique. Keep the posts coming, lots of times I’ve already figured out some of the same techniques you use but then I’ll watch one and… “hey, wow… I’m glad Blake figured that one out. That means I can save time by using the same technique.” 🙂
Great tutorial, very much appreciate the info.
Dear Blake,
Thank you very much for all your tuts. Now I would have a favor to ask you.
In PS we have at least these color adjustment layers:
– Selective Color
– Channel Mixer
– Color Balance
– Hue/Saturation
Could you pls make a tutorial on this topic to show us how and when use these layers?
Thank you
Great topic. I have it added to my list of future tutorials.
Many thanks for your prompt reaction!!!:))
V.
So easy once shown. You have resolved one of my (many)problems. Thanks for sharing.