Relight any photo with the Hard Mix Blend Mode in Photoshop!
The Hard Mix blend mode has very quickly become my favorite blend mode to experiment with. Every time I use it in a unique way it seems to pull through with flying colors. It is a remarkable blend mode.
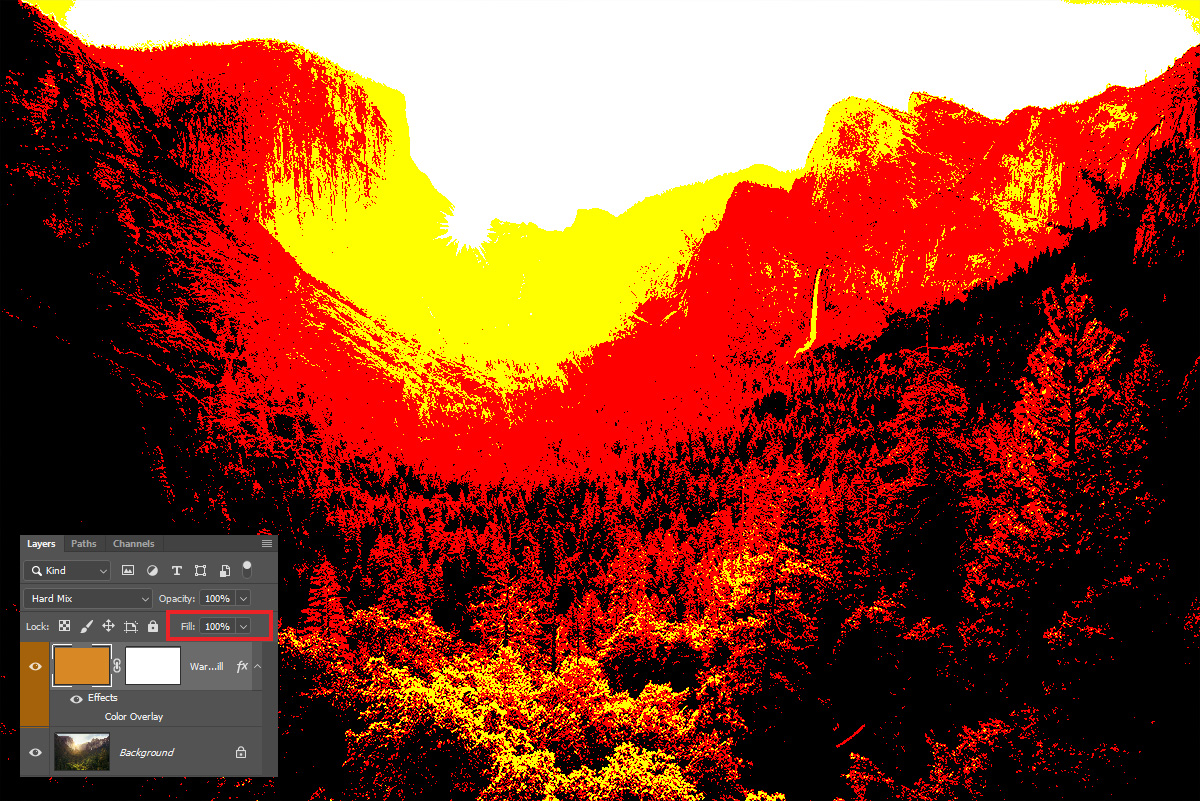
You may be scratching your head at that if you have ever used it before. By default, the Hard Mix is junk, absolute trash. When you first select it, you will see a whole bunch of pixelated colors that are hideous and almost offensive.
That is because Hard Mix is controlled by Fill, not Opacity! The lightbulb should be going off now 🙂 One thing to note about the Hard Mix blend mode is that many programs in the photography market include it, but they fail to include a fill slider to control it. The Fill slider acts as a calculation control where opacity works as an intensity control.
The mechanics behind the Hard Mix Blend Mode never cease to amaze me. As you can see it makes it very easy and fun to experiment with.
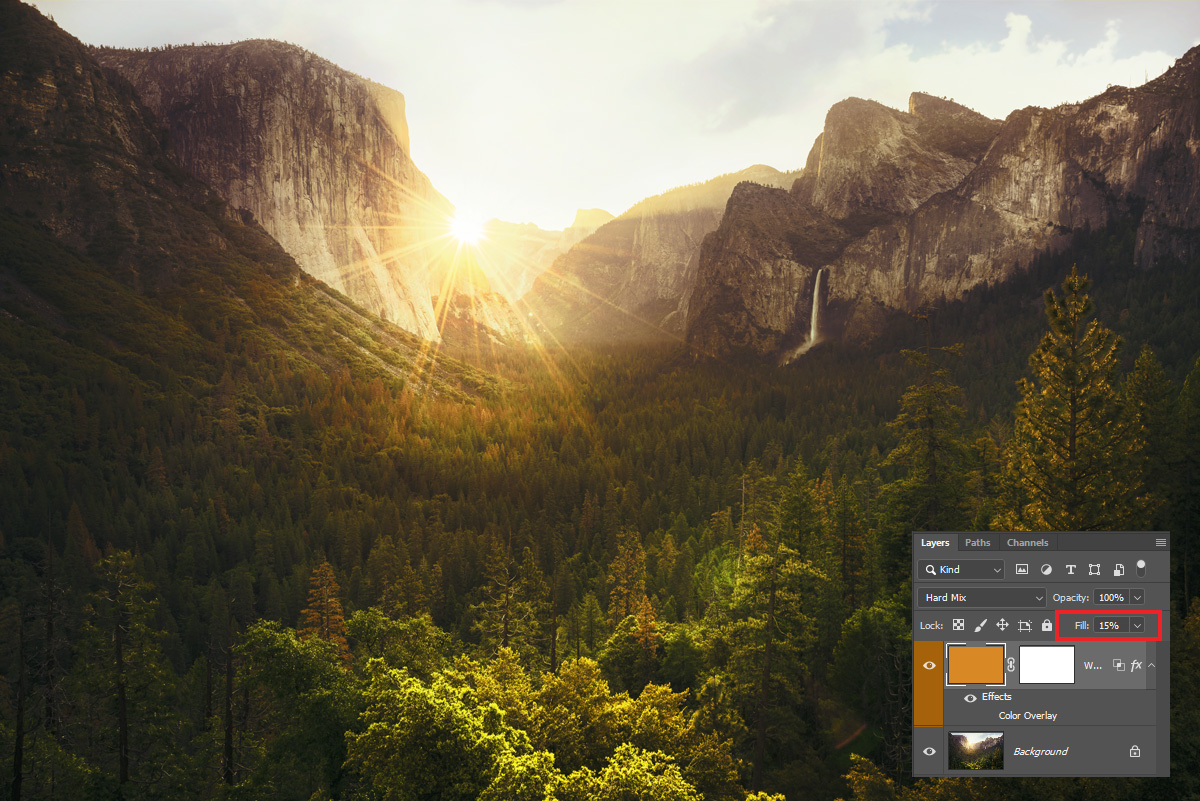
In today’s tutorial, I am going to show you how I use the Hard Mix Blend Mode to relight photos. This is especially useful for images with a less than appealing Alpen glow look that you want to amplify.
A couple of things to experiment with:
1. The Hard Mix Blend Mode rests critically on your Fill setting… keep it between 10-20% for a natural appearance.
2. Use Blend If to block the Brightest and darkest points in your photo. HArd Mix does some funky stuff to them.
3. Experiment with Brushed Colors, Color Fills, and Gradients. They will all respond differently to the Hard Mix Blend Mode.
Enjoy today’s tutorial, and please feel free to download my actions, experiment with them and make your own if you are so inclined!


I always enjoy and always love your videos, very informative!
Sweet! Thanks!
Used the warm brush action some minutes ago with 2 colors. Nice result!
Am I right that this is a fast way to get the colors you want?
Thank you, Blake!
It’s wrong here. Where do I post my own comments?
Super useful video, will be adding the actions! Thanks for sharing!
Wow, I just watched this a tried it on an image I previously edited of a seagull on the beach.
Of course the edit is rough, but the difference is immediately noticeable. The amount of control this process offers is awesome! The image looks more naturally lit and I was able to emphasize lighting precisely.
It makes my older edit feel a little heavy-handed.
Thanks!
Thats awesome to hear. This is one I like a lot. I have shown it in several critiques, but decided to turn it into an actionable thing.
Now this has got to be one of your better tutorials because this is something i have not thought about. Well done
Glad I can impress
Blake: As always, thank you for another great tutorial!
My pleasure!
Wow! are you sure you are not a scientist? Great stuff and I love the fact you are giving it away.
Thank you for a great action.
Haha! Maybe just a pixel scientist, is there such a thing?
The tutorials you put up are amazing! Thank you for making Fridays better.
🙂 I love it!
Totally awesome tutorial, Thank you
My pleasure!
SUPER, SUPER SUPER
you are an ARTIST !!!!
how loveley is the result ……….
This technique is a significant restructure to my post-processing thinking. Can’t wait to try it out. And, thanks for making the science behind Ps more accessible. That, to my mind, is significant too. I feel better armed to explore my own style knowing why things happen the way they do.
GREAT tutorial…I will use this! Thanks so much. Beautiful effects.
Very interesting!
Will this work with layers in latest On1 PR2015.5 ?
No. ON1 ha the Hard Mix Blend Mode in their list, but they shouldn’t unless there is a way to reduce the fill of the blend mode. Most programs put it in there because Photoshop has it but rarely add the Fill to go along with it. It is useless without fill.
Good tutorial, thank you.
Thanks!
Great tutorial, Thanks.
You’re Welcome!
Is you want the effect even stronger, but still subtle, you can double your Hard Mix layer and adjust your opacity to taste, as well.
Yep, or you could increase the Fill.
One other point is, you can after brushing, go to edit/fade brush, to target the effect to taste, plus option click the layer mask and G-blur away any noise that may appear in your image.
Good point! The Fade Brush tool is awesome, but kind of a one trick pony. Once you commit there is no going back! But I do like it 🙂
You are the greatest with your teaching. I’m learning so much, and I love your actions (using them as a starting point).
Thank you so much! I appreciate that. I do love what I do.
Fantastic tutorials and done with enthusiasm – beautiful photography also.
🙂 ♥
Great tutorial, thank you Blake! The last part – one layer with different colors picked directly from the image and brushed in on hard mix is the icing on the cake 🙂
Oh yes! My new love 🙂
i seen you use some other those wierd blend modes in ps. this is one i really got to play with
I love the weird Blend Modes
thank you Blake can’t wait to try as always a real inspiration.
Woohoo!
Blake you are a Photoshop Whisperer!! How do you even come up with these great things?!?!? In any case just keep up the great work!! Thank you very much
I experiment A LOT! This tip came out of necessity to teach someone how to make an Alpen Glow more glowy in an f.64 Elite Critique. Those critique sessions are a treasure trove of great ideas. They come to me when I help others make their images better and give them new ways to use simple tools.
Could you also do a blendif for “blue” as well as the lights and darks to protect blues in the sky.
Thanks
You could! That’s a great option, I do like the bump in contrast in those skies sometimes, but if you want to protect a color that is great thinking.
You inspire me with everything you share. At 70, I need inspiration. You you do it.
Thank you.
Heck, even at 36 we need some inspiration! Glad I can help there.
OK, Blake, I know how to send my thanks to you now… I have to go >>way down<< the long list of other thanks to find the place where I can express my appreciation for the tutorials and wisdom you share so generously! Thanks for this piece on great tutorial on the Hard Mix blend mode, one more to add to the ones you have shared before.
Great video…thanks for figuring this all out and sharing your knowledge so openly. Makes a huge difference to me.
Thanks a lot Blake, you’re very kind to share with us this tutorial, really thanks!
Thanks, Blake. Awesome as always and can’t wait to explore with these.
gorgeous !
the last example where you paint orange and purple is very informative and useful !
marc
I am looking forward to trying this process. I keep thinking of all my previous edits where this would have made them awesome. Thank You
Hi Blake, fantastic method to improve an image. Thank you very much for your time in providing the Actions and explaining the theory behind them.
Thanks Blake. Very helpful as always.
This is very cool indeed. To be honest, I had never even bothered about the Hard Mix Blend Mode until now
This is very interesting. I wonder though, do you think this will work well with black & white?
?????/5
So many brilliant insights.
Thanks for these illuminating tips, ahem. ?
Seriously, your style of experimenting and explaining is exactly what so many of us need to finally understand and make use of these underused and under appreciated blend modes.
Thank you.
Fantastic video, Blake. Thanks for showing me something that I would never think of myself!
AWESOME!! This is so cool. I used it to lighten the sunset and slightly darken the blue sky. Do you plan to incorporate this in a future Palette update?
Already put this into action and it’s working out great. I’ve been using it to amplify other colours too. Plus used it almost like a colour dodge & burn. It’s great, thanks for all your hard work.
Put your hands in your pockets and see if you can talk for 60 seconds
Why? The most effective orators talk with their hands.
Unbelievable , how do you figure out ps.
I already used it on an old photo with a color cast and boom the colors popped. Thanks Blake
I realize this is a free tutorial but what you post for free has helped me immensely with my processing skills and makes my f64 Elite subscription MUCH more valuable. Thanks
Blake, I look forward to your training videos every week. They are the absolute best out there.
Thanks for the interesting tute Blake. Can i use the actions in PS CS5?
absolutely brilliant technique and so clearly explained! Thank you!! So glad I found your website!
Triple Wow. Not just for this tutorial, but for all the ones that you share on your blog. You have a gift for making complexity much easier and for knowing how to combine various edits in Photoshop into short videos with great results. Thank you!
Thank you 🙂 I really appreciate it 🙂