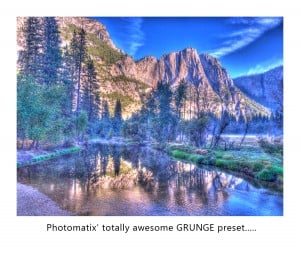
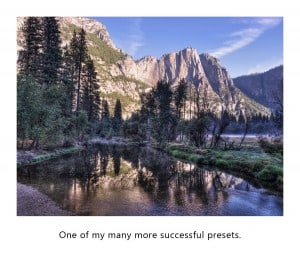
As a follow up to last Wednesday’s post on A Few HDR Shooting Tips here are 5 HDR tone mapping tips using Photomatix in particular. I have shown a few videos that go into Photomatix a little more in depth, but here are a few of my quick tips that I live by.
 1. Never use a Photomatix Preset as your final tone mapping decision. I love Photomatix, I use it for 95% of my HDR processing, however, their presets (for lack of a better word) SUCK! One preset will not work the same from scene to scene based on the varying dynamic range from scene to scene, but these presets have never done a single one of my HDR’s justice. The Painterly Preset is decent, but Grunge what the hell were they smoking?
 2. Save your tone map settings that work as your own presets. As I said before, the same preset will not work the same from project to project because the dynamic range will always vary from one scene to the next. However, if you find a great looking set of slider adjustments chances are they will look decent on another series of photos and need minimal adjustments. I have saved 110 presets and am sure I will save 110 more by this time next year. There are only 2 or 3 that work well for almost every tone mapping situation, I use those as starting points for other projects.
3. If you get weird looking skies that have electric blue patches there are ways to recover your HDR project, please do not process these images and think these areas will be over-looked. A savvy HDR photographer will read them in an instant and ultimately, you will lose credibility. The best way to fix these areas:
- Reduce the White Point: this will decrease the overall HDR effect in your final product, but you can always process it twice, once with a high white point for your details, and another with the lower white point to achieve a better looking sky. In post, mask out the bad sky with the good one and voila!


Thanks very much for your candid comments. I couldn’t agree withyou more. At best some presets are only a start. Have you tried using Nik HDR Pro Efect?
Thanks Brodie. I have used HDR Efex Pro and use it quite often at that. I love their presets, there are actually some useful ones there. I mainly use HDR Efex Pro to take a single exposure or a mildly tone mapped image to the next level. Great program, love the control points!
a) helpful tips b) you’re a funny bloke
Thanks for stopping by! I am glad you found these tips helpful and got a kick out them at the same time. Take care my friend.
I’m a total amateur and soooo rookie in HDR that I find your tips and tuts among the most helpful I’ve encountered so far. Thanks for sharing with us your knowledge and opinions. Maybe I’ll send you some of my efforts to have a look…
It is my pleasure. It is comments like yours that keep me doing what I do. I would be happy to take a look at your work. Send a couple my way, everydayHDR@gmail.com . I will give you constructive criticism to help you on your way in the wide world of HDR.
Why are there only 5 or 6 tone mapping “operators” in the scientific conversations of tone mapping but yet there are hundreds of tone sets in photomatix…what and where are they getting these from ??