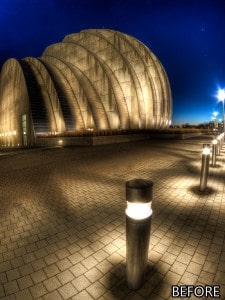
Last week I showed how to Selectively Blur an area of your photo using Adobe Photoshop CS 6 Beta, but did you know you can do this in past versions of Photoshop very easily, and with even more control? It is pretty simple actually and uses many techniques you already know, such as the Gaussian Blur Filter and Masks. However, the combination of the two in a creative way is one of my all time favorite tricks in my Post Processing arsenal. There are unlimited options with this tip here.
[important] Spoiler Alert
You will learn something in this tutorial, if you have something against that then by all means do not continue. [/important]


Great tutorial very easy to follow! Seems selective focus and tilt shift type effects are really in at the moment! Wonder how long for? I’ve used a slightly different technique to blur my images selectively so I will see if the feather gives me as gentle gradation as i get with my technique !
Not sure, but selective focusing can be great for narrowing the viewer in on your focal point, it adds a sense of whim to it. The phase is probably because we dont naturally see that way, but sometimes we feel like we do. When we see a photo that way it adds a whole new element to something we may have seen a hundred times subliminally.