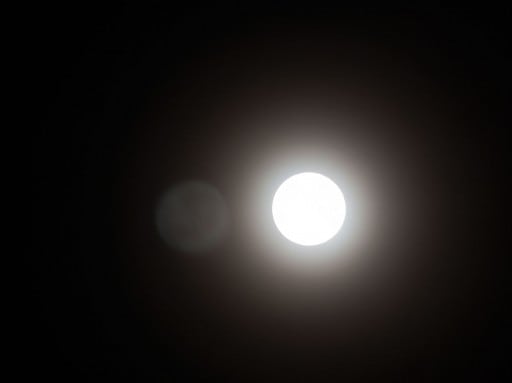
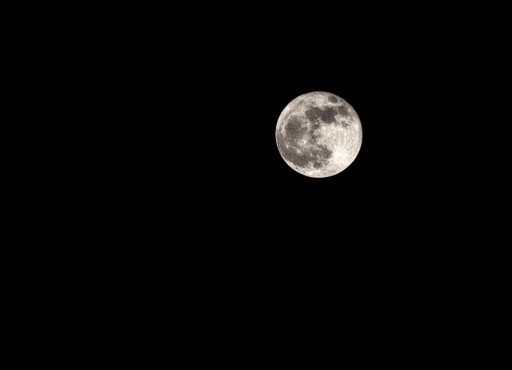
We recently had a pretty nice full moon here in the Midwest. My wife went to take the trash out and quickly notified me of its presence. I, of course, had to run and get my camera equipped with the 70-300 lens. I started photographing the moon and realized, these pictures suck! They were pure white. I knew what I needed to do, exposure compensation to the rescue!
Fiddling with the exposure compensation allowed me to setup the shot and snap away with the freedom to stop down the shutter speed at my leisure. You see the problem with the moon is that it is a big ball of reflecting light. It is tricky to photograph unless you start thinking about it as an object instead of a light source.
You see that big old moon is simply a rock that reflects the light from the sun. In order to photograph the object you have to work around that bright light it reflects. If you simply point the camera at the moon, focus it , and take a picture it will be a big ball of light. You must tell the camera to let less light in per shot in order to capture the moon, the object.
Moon Photography Tips!
When photographing the moon try these easy steps to get that perfect picture.
- It is helpful to have a strong zoom lens. I have a 70-300mm lens that is actually a 140-600mm lens with the multiplication factor of a 4/3rds camera.
- Manual Focus will be your best bet, focus it to infinity.
- A tripod is a must! A remote shutter release is not a bad idea either, if you have one!
- Set your camera to Aperture Priority Mode with an Aperture between f/8.0 and f/10.0. Apertures between f/8.0 and f/10.0 are the sharpest apertures on nearly every lens.
- Ensure your ISO is the lowest it will go to reduce the amount of noise in the final image. You can always reduce noise in post processing, but noise reduction is essentially the blurring of local pixels to reduce noise. The moon has a lot of cool features you do not want to blur!
- Place your camera in Mirror Lock Up (Olympus calls this Anti-Shock). To understand mirror lock up it helps to understand the inner workings of the camera. When the shutter button is depressed, the mirror flips up allowing the shutter to open to record the image, as soon as the shutter is closed the mirror closes and the picture is stored.The mirror flipping up can be pretty violent, while it only causes small vibrations, these vibrations are strong enough to throw off nearly any exposure taken with a zoom lens in less than ideal lighting conditions. By selecting mirror lock up, you are telling the shutter not to open until the mirror has been locked up for a certain amount of time (usually determined by your cameras specific allotted time). This will help mitigate any unwanted camera shake brought on by the slapping of the mirror.
- Take your first picture after you have the camera on the tripod, set to infinity focus with mirror lockup, with an Aperture between 8.0 and 10.0, and ISO set low. If the image turns out very bright, which it probably will, start using Exposure Compensation. Exposure Compensation allows you to keep all of your current settings but the ability to stop your camera up and down as needed.
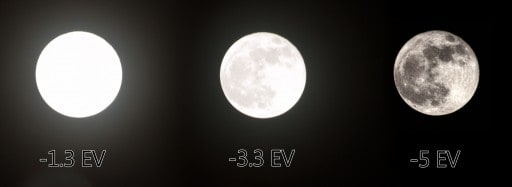
For these moon pictures, I stopped the camera down to -1.3, -3.3, and finally -5 Exposure Values before I got a decent shot without the glare around the moon. 5 whole stops of light!!! That is half of a half of a half of a half of a half of the amount of light the moon was reflecting!

- During post processing in ACR or Lightroom, adjust the Clarity and Contrast until you start to see all of the nifty designs on the surface of the moon.
- With some masking in Photoshop you can combine multiple exposures to get the best of both worlds! The clarity of the moon with the ominous glare of the light being reflected. Oh and you have to go to Filter>Render>Lens Flare!!! hehe!


Great post! Now I gotta try it!
Oh yes, it is fun Keith, especially when you add that clarity in Camera Raw or Lightroom! It really pops out that detail in the moon.
Great stuff, Blake! Well written, easy to follow, great shots… you got me all pumped up now! Awesome post, my friend!
Sweet! You got me all pumped with that positive comment! I love it! Thanks for the feedback my friend!
Hi Blake, great tips. I have to go about it differently in one respect. I can’t subtract out enough light to avoid blowing out the highlights so I have to use a different approach. I change my camera from matrix metering to spot metering. This forces me to add light via + compensation. I usually only have to add 1.5 stops. Since my camera only gives me +/- 3 stops it is my only option.
Very good point! I guess you could also meter for the shadows if you have that option as well. Thank you for your input, I completely overlooked that approach!