Tomorrow night is the Super Moon! Apparently it is the closest the moon will be to Earth all year. What a great opportunity to go out and shoot for the Moon! Alright, bad pun, I know, but I had to go there.
Check out these tips to make shooting the moon easier than ever!
- It is helpful to have a strong zoom lens a 70-300 mm will do the trick.
- Be sure to take the UV filter off the lens. With the UV filter attached you could catch an unwanted glare in the photo.
- Manual Focus will be your best bet, focus it to infinity.
- A tripod is a must! A remote shutter release is not a bad idea either, if you have one!
- Set your camera to Aperture Priority Mode with an Aperture between f/8.0 and f/10.0. Apertures between f/8.0 and f/10.0 are the sharpest apertures on nearly every lens.
- Ensure your ISO is the lowest it will go to reduce the amount of noise in the final image. You can always reduce noise in post processing, but noise reduction is essentially the blurring of local pixels to reduce noise. The moon has a lot of cool features you do not want to blur!
- Place your camera in Mirror Lock Up (Olympus calls this Anti-Shock). To understand mirror lock up it helps to understand the inner workings of the camera. When the shutter button is depressed, the mirror flips up allowing the shutter to open to record the image, as soon as the shutter is closed the mirror closes and the picture is stored.The mirror flipping up can be pretty violent, while it only causes small vibrations, these vibrations are strong enough to throw off nearly any exposure taken with a zoom lens in less than ideal lighting conditions with long exposures. By selecting mirror lock up, you are telling the shutter not to open until the mirror has been locked up for a certain amount of time (usually determined by your cameras specific allotted time). This will help mitigate any unwanted camera shake brought on by the slapping of the mirror.
- Take your first picture after you have the camera on the tripod, set to infinity focus with mirror lockup, with an Aperture between 8.0 and 10.0, and ISO set low. If the image turns out very bright, which it probably will, start using Exposure Compensation. Exposure Compensation allows you to keep all of your current settings but the ability to stop your camera up and down as needed.
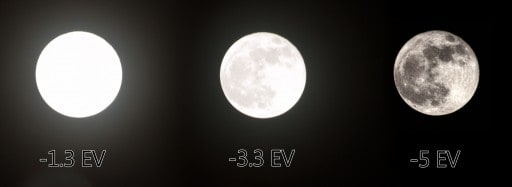
For these moon pictures, I stopped the camera down to -1.3, -3.3, and finally -5 Exposure Values before I got a decent shot without the glare around the moon. 5 whole stops of light!!! That is half of a half of a half of a half of a half of the amount of light the moon was reflecting!

- During post processing in ACR or Lightroom, adjust the Clarity and Contrast until you start to see all of the nifty designs on the surface of the moon.
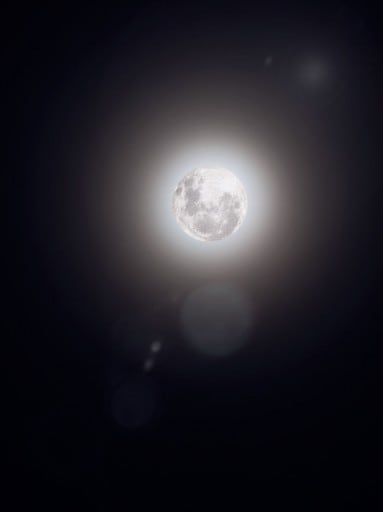
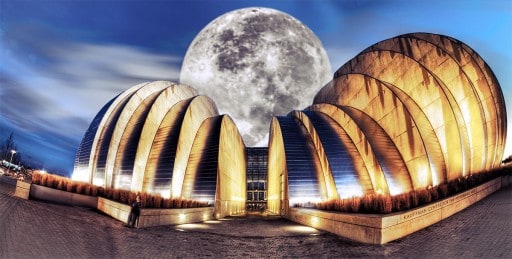
- With some masking in Photoshop you can combine multiple exposures to get the best of both worlds! The clarity of the moon with the ominous glare of the light being reflected. Oh and you have to go to Filter>Render>Lens Flare!!! hehe!


Blake,
Thank you for the initial settings insight. I had planned on doing a shoot for this, however we are forecasted to have strong storms late afternoon into the evening! Go figure! You get the knowledge, creative oversight, and puff! A brick wall! St. Petersburg, Fl. Is notorious for the lightning shows and maybe I will send you a couple of “hair raiser” shots in the near future! Thank you again for sharing your expertise. I cannot begin to tell you just how much this site has improved, not only my tone mapping skills, but my skills as a photographer and image editor. I am deeply thankful for your generosity to the community and myself.
P.S. I will still have my gear ready just in case however!!
With Great Respect, Tal
Thanks for the warm regards as usual! I do what I do because I never had that coaching in the beginning. I fumbled through EVERYTHING I know as a photographer. I try to give everyone every ounce of knowledge I have on photography and HDR.I had a similar issue with the moon. Overcast nights made it impossible to catch the moon. Until next year my friend!
Thanks again for your inspiring comments. Take care, Tal!
Blake
Thanks for sharing nice information
Not a problem, I am very glad you found it helpful!