There is much more to the HSL Adjustment Layer than you think!
Over the past few months, I have been experimenting with some of the more advanced features of the Hue, Saturation, and Lightness adjustment layer in Photoshop. If we take the adjustment for its face value it offers a ton of possibilities when modifying the colors in our photos. However, there is a feature that is right in front of our face that is more powerful than you can imagine when you know how to use it.
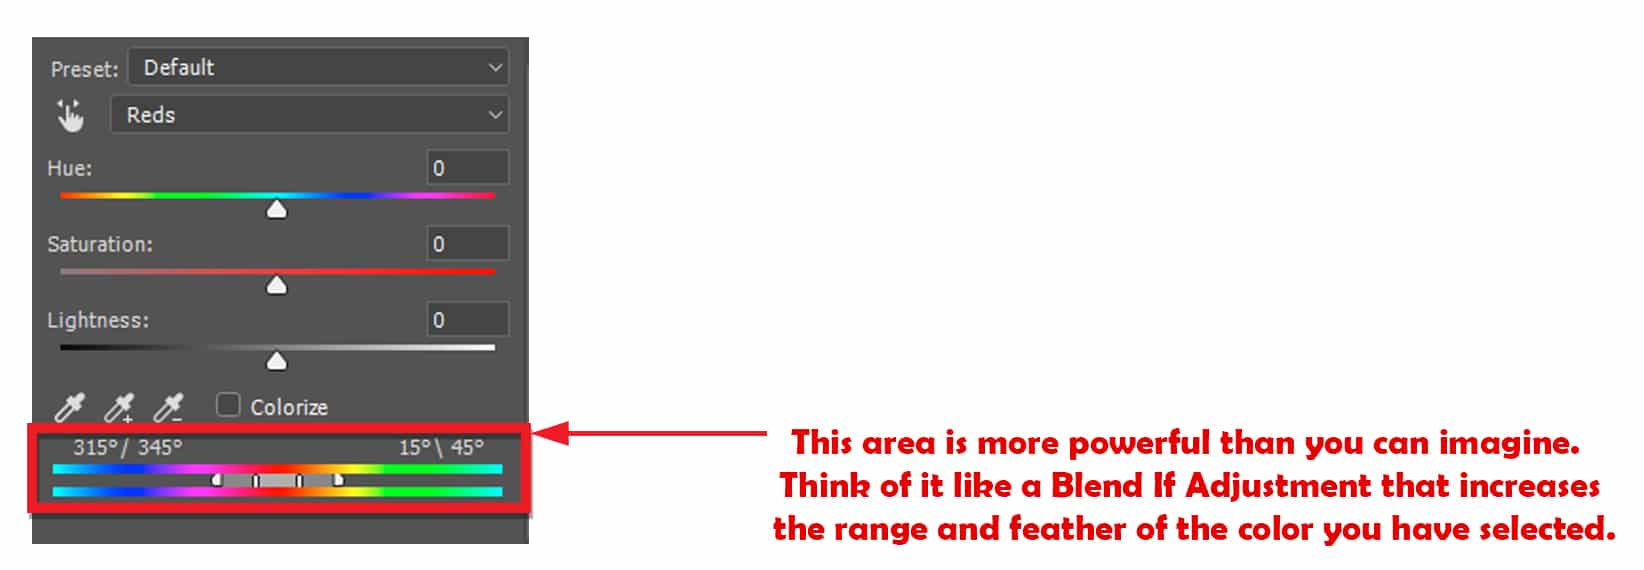
When you are in an individual color in the HSL Adjustment layer you will notice that a little bar pops up at the bottom with sliders inside of it. For the longest time, I did not touch this area because I did not know what it did. It wasn’t until recently that I decided to experiment with it. After all, everything we do in an Adjustment Layer non-destructive anyway right?
The bet way to describe the bottom bar area is like Blend If. When you make a selection for a color with the targeted adjustment tool, it is selecting a small portion of that color based on the range in the slider at the bottom. You can modify how much feather of a color is selected by increasing or decreasing the range (the triangular shaped icons). Or you can increase or decrease the range of the selected color by using the solid bars in the middle.
I highly suggest downloading the example image provided here and experimenting with the range adjustment as seen above. If you need more guidance with it and would like to see how you can practically apply this knowledge to your images, please watch the full tutorial below!


Very cool! I will use it.
Awesome! Thanks for stopping by.
Absolutely fantastic! I never knew what the heck those bars were……………until now!
Thanks so much,
Vinny
🙂 Thanks for watching, Vinny! Just glad I can help.
Another excellent use for HueSat adj layer:
Fine tune the range/feather to make a color “selection” (better/easier than color selection tool);
Then save the resulting selection as a mask and use the mask like any other mask.
Also make H-S panel on screen as a separate window (drag out alone) and drag its edges to make it very wide for ease of adjusting sliders with better precision.
Doug.S
All very good tips! Thanks for sharing.
Wow i would like to see a little bit more about this topic.
No problem, what exactly would you like to see more of.
I am amazed, again! LOL I always wondered what those bars did, too.
I’m going to have to rewatch and try to understand what it is I am doing, but, that is my learning style. LOL
I would be interested in what Doug Schafer is writing about, masks.
Thank you very much!
Su
Your little one is here!? Congratulations! Enjoy that little one ’cause they don’t stay little long! Blessings to you and your wife!
So cool, right? The little one came 3 weeks early! It was a shock to us all. He is so awesome!
I am experimenting with the masks idea too. Seeing what I can come up with.
Thank you, Blake! Very interesting tutorial and a very useful way to use the HSL Adj Layer!
I do agree! Thanks for watching!
Congratulations on your new son. Also great tutorial, so ver clearly presented.
Great tutorial!
Have a side question, what is that orange “Z” on your panel above the Zone System?
You have me curious as to possibly another panel in the works.
You got me! That’s my beta identifier for the ZSE 4.0. I’m still working on it, but it is going to be incredible. It will be a free update to current owners.
It’s a major update
Thank you, Blake, for opening up more options for me in Photoshop. (I was basically ignoring those spectrum bars at the bottom, hoping they would not give me any trouble, LOL)
Very kool Blake, I’ll definitely play with this new info in the future.
Very Cool Blake, thank you and congratulations on the new addition
Wow, that HSL adjustment seems to be a very powerful tool, I must play with it some more.
Hi Blake,
Great Tutorial! I’ve heard this explained many times, but the light bulb didn’t come on until you talked about feathering!!! Bars and Feather bars! Now the bulb is on!:-)
Thank you!
Dennis
Thanks for showing this, I need to to and practice more. I have learned so much from your videos and my post processing. Time to go play, and enjoy the new little one.
Wow-I never understood those bars until now.
Blake is Dr. HSL
A real ‘Eye Opener’, Blake!
How can I get to white or black, by selecting color range on this color bar? I don’t know if this is possible in this color bar.
I want to make a selection where I can delete white or black from an image by color range throughout the image. I had a python script in PaintShop Pro that could do this by selecting any color from a color range box with a degree of opacity % desired removed. In PSP this took a few seconds to tube an image with the script. Could you make an action in PS to do this ? Thanks so much for the tutorial!