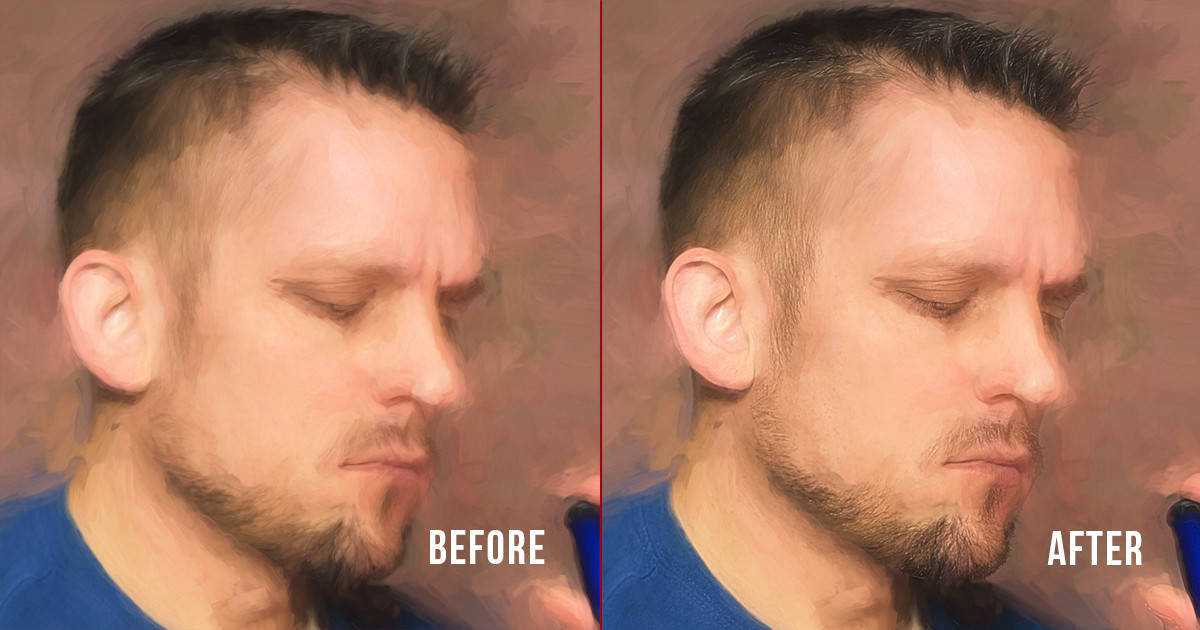
A wild way to recover detail in Artistic Portrait Work
During the Topaz Labs Webinar on Tuesday I showed some techniques for making an artistic portrait. I must say that I had the most fun during that webinar than many in the past few months. I think it was nice to stray from my usual workflow and do something out of my normal element.
During the Artistic Portrait Webinar I showed several things:
- How to make a light appear under the threads of a shirt
- How to increase Tone and Color with Topaz Clarity
- How to do a Frequency Separation technique with Topaz Detail
- How to make interesting painted portraits using 2 Impression layers
- How to give the image a radiant glow with Topaz Glow
- How to retain all of the original detail in the photograph and apply it to the Artistic Portrait
- How to use Texture Effects to blend interesting backgrounds with the foreground
In this tutorial today I will focus strongly on item #6. I only had about 2 minutes to show this final step during the webinar so I wanted to touch on it in greater detail today. It is a powerful technique for Artistic Portraits but you can also use it for Landscape images that have been given the artistic painted appearance.
Go to Topaz Labs
The basic premise is to make a High Pass texture sandwich:
- Save your base layer
- Duplicate the base layer
- Run a filter (I used Impression here) on the duplicate
- Duplicate your base layer again
- Move it to the top of the layers palette
- Change the blend mode to Linear Light
- Desaturate the Linear Light layer (CTRL+SHIFT+U, or CMD+Shift+U on Mac)
- Go to Filter – Other – High Pass
- Set the pixels to 3.0
- Adjust the Opacity to taste
- Mask out any unwanted detail effect
If you are more of a video person you can watch it all right here! Enjoy!


In the past, using Impression I would simply use a mask and paint over at very low opacity the areas that I wanted to bring back detail. This would however also make more global changes that were not necessarily wanted. This method gives one a flexible option to adapt the filter’s effect with more surgical precision. Along with the Wacom pen pressure, I also dropped the Brush Opacity from 100% to more slowly paint in or reveal the detail on my testbed photo. Again, thank you for this welcome workflow augmentation.
I LOVED it, and hope to remember how to use when I want. I truly appreciate your U-tubes, and how you present the material. You are a great teacher.
Best session EVER!!!!
Guess I should have studied Painting in college rather than Accounting. Can you recommend any references to get a crash course on those types of painting techniques you referred to in your presentation? They sure made sense as to how the painting techniques determined which PSCC tools were used and the conceptual foundation for those choices.
Very informative.
Just another fine teaching moment, keep them coming.
Fantastic video, learned a lot, now the hard part is too remember everything you learn and when to use them. I have about 5 different workflows going on and trying to find my spot in all of it. Not an easy thing