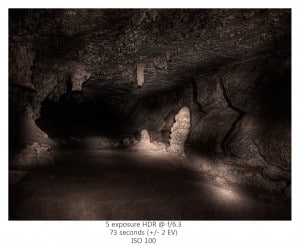
 I spent all last week back at Arizona near Fort Huachuca. This time I brought more flashlights for the cave exploring in the Coronado National Memorial! In case you missed the last post about Arizona, take a little detour. While there was not as much down time this trip, we did manage to head to the Cave Trail again. Last time, my co worker and I only had little LED key chain flash lights and our cell phones, we figured using the battery to explore a 600 foot cave would probably be a bad idea!
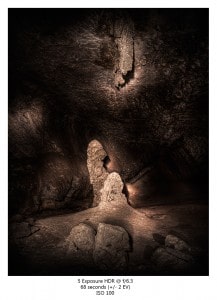
This trip I was prepared with 2 high powered Sure Fire flashlights, they worked awesome for light painting the inside of the cave. I handed one to a co-worker and had him do the interior painting, panning back and forth along the walls while I spent more time on the stalagmites and stalactites. He did an awesome job for being a first time light painter! After shooting the cave, we ran a test and both turned out the flashlights, there was not a spec of light to be seen, it is weird being in extreme darkness. You do not normally find yourself in the complete absence of light. I expected to be more frightened by the complete lack of light, however, after several seconds of hearing and seeing nothing i was quite comforted.
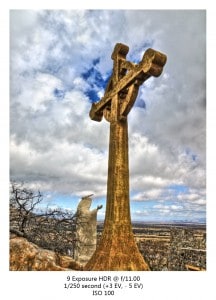
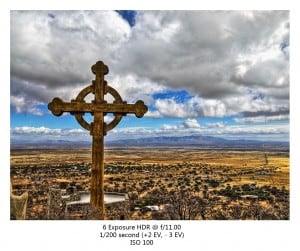
On our way back to our hotel we spotted a huge cross from the highway that appeared to be some sort of church. We had to take some side roads on the mountain side to get there, but man was it worth it! Panoramic views from behind this 75 foot cross. It was pretty uplifting and well worth the detour, if you are ever in Sierra Vista Arizona, check out Our Lady of the Sierras Shrine!
We took off to Tombstone the following day and took a tour of the old Court House which is now a museum. It was pretty interesting reading about Wyatt Earp, Doc Holliday and the gangs of the Wild West.
Tip For The Week:
When you are in the complete absence of light and want to do some light painting there are a few camera settings that will help you achieve a swell product:
- Position the camera about 20 feet or more from the subject you want to shoot, on a very sturdy tripod of course!
- Set the ISO as low as you can go to help prevent noise in the dark areas.
- Set the focus to Manual on your camera and set it to infinity on the lens (looks like this ∞).
- Place the camera in Manual Mode and open the shutter to f/11.0 or higher, to avoid a narrow depth of field. I modified the Exposure value on the image below to speed up the shutter a bit after some test shots.
- Place the Shutter Speed on Bulb “B” setting with a shutter release attached to the camera body.
- Once you are all setup flip the shutter release cable to the locked position, your camera shutter should open to take a picture.
- Begin to paint with your flashlight, but make sure you have a stop watch handy (cell phone works, if it counts seconds). Try not to focus the beam on one spot for too long as it will “burn” some nasty highlights into your image.
- After painting for a minute or so, flick the shutter release to close and wait for the image to record.
- Use the first exposure as a test. Once you have the image recorded on your camera, modify your exposure time (stop watch time) to get a good exposure. If your first shot was too bright, use less time to paint, if it is too dark, spend more time painting before you stop the shutter.
- So how do you crank out an HDR with one light painted exposure like this? I will show you on Friday!



super helpful post!! thank you! Next time your in need of some quality flashlight action check out 4Sevens. They typically have newer (sometimes 2 generations) more efficient led technology for much less $$ than sure fire. quality is top notch too.. http://www.4sevens.com/
thanks again!
Awesome, I will have to check that out! I was issued those 2 flash lights so I cannot complain! Although the batteries are crazy expensive! Thanks for stopping by Jason!
Wow, Blake, GREAT shots here, they are all top drawer, and I really appreciated the tips and tricks you published here for low light and light painting photography! Great resource, my friend, looking forward to more as you share it with us!
Thanks for the awesome comments, I really appreciate it! I am glad the tips were found helpful, I try to throw a hand around when I can. It is people like you and the resource you provide to others that keeps me making these tutorials and quick tips. It is awesome how you guys at http://www.lightstalking.com promote others work. Keep it coming, the inspiration I receive from seeing my tutorials there is exhilarating. Take it easy my friend!
I added your Toad Hollow Photography site to my links section, awesome stuff on your blog.
Very nice work on these images. Great tips as well. I haven’t done any light painting to date but plan to do so sometime soon.
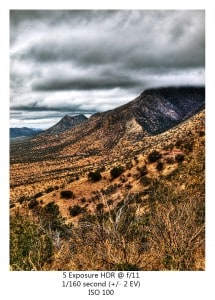
Really digging that Mexico Overlook shot. 😉
Thanks Jimi, it was quite the breath taking view from the hillside. I have yet to go on a day when the clouds offer more than a mess.