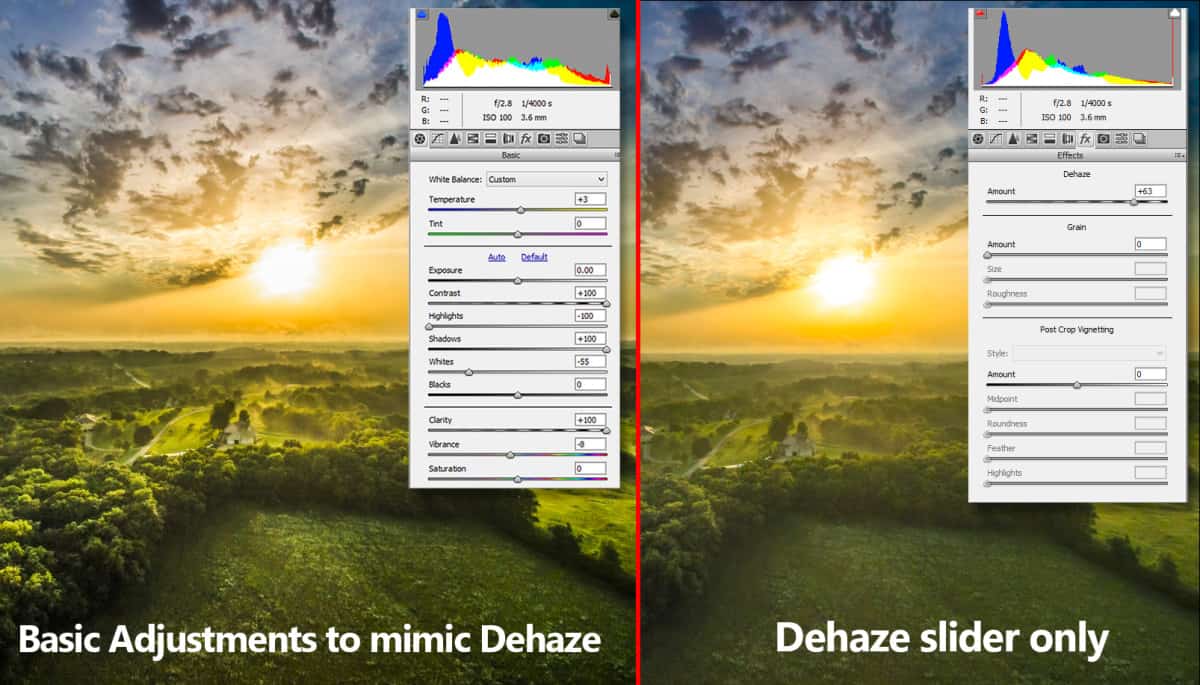
Let’s look at what this Dehaze in Photoshop is all about!
When Photoshop CC updated last month they added a new feature, Dehaze in Photoshop. However, you won’t find it in Photoshop it is nestled deeply inside Adobe Camera Raw in the Effects panel. I guess that is a good a place as any for it as it matches its sister program, Lightroom.
I have had a few weeks to experiment with this adjustment. At first I thought it was a ridiculous new Contrast adjustment. At first glance it seems like it. However, there is some serious power in this adjustment that really blows my mind. Over on the Adobe Blogs, this is what they said about Dehaze in Photoshop:
Introducing Dehaze: Many outdoor scenes have some amount of haze due to atmospheric conditions. Dehaze is a feature for removing haze/fog from pictures. It is based on a physical model that tries to estimate the amount of light transmission and how it varies across the picture. The user can then control how much haze to remove by adjusting a slider. This feature can also be used in the other direction to increase the amount of haze.
The key take away here is this: It is based on a physical model that tries to estimate the amount of light transmission and how it varies across the picture
In this Friday Tutorial we are going to do 2 things…
- See if we can mirror and match the Dehaze Adjustment with the settings in Adobe Camera Raw
- Show how we can use this Dehaze in Photoshop as a creative modifier for our photos
I was thoroughly impressed with the Dehaze feature as it took a lot of adjustments to mirror the effect.

I also enjoyed just how well Dehaze in Photoshop was for adding haze to a photo for creative effects.
Watch the Video Tutorial:
Like the style of this tutorial? You will LOVE HDR Insider! Full-Length HDR Workflows, Critiques & More!
[hcshort id=”9″]


Hi Blake,
Excellent explanation and tutorial on DeHase! One situation that I used it on was on some fireworks photos. It was excellent in removing the smoke surrounding the explosion and letting the lighting of the firework stand out. Love your Friday tutorials!
Dennis
That sounds like an awesome use of Dehaze, I know the smoke around the fireworks always irritated me in post.
Thanks Blake, for another excellent tutorial. When the Photoshop De-Haze feature was released last month, I used it, with success, to remove the “haze” caused by screen mesh in exotic bird pictures I took the week before at the St. Augustine Gator farm in Florida. However, previous to that, I had excellent results solving the problem using the Rudis Color Zone System: I noticed that the Violet thumbnail was all white(!)and when I pulled the curve down, the “haze” receded.
Thanks again,
Dan Carno
Ah! That is awesome! There are so many uses for the Color Zone System. It is awesome to hear success stories like this with it. I will keep that in mind.
Great tutorial Blake. The love the explanation and you discovery of how it could be used to actually create haze.
Thanks for the feedback. I see it as a more valuable tool for adding haze than dehazing!
That is welcome news. Down South haze is an almost constant feature. Had some success with Topaz Clarity. Looking forward to trying this.
Thanks, Blake.
Topaz Clarity probably would be pretty useful for this also. There is a lot of power in that plugin.
I just tried it and, OMG! Kudos to Adobe for this.
High praise. it’s awesome and very useful. I can use my plugin for other things AFTER I’ve dehazed in LR.
I hadn’t even looked at the DeHaze in Adobe Camera Raw. Thanks for a great tutorial Blake! Going to go try it out:)
I hadn’t taken much time with it either when it was released, I really discredited it as another Contrast type slider. Very useful tool!
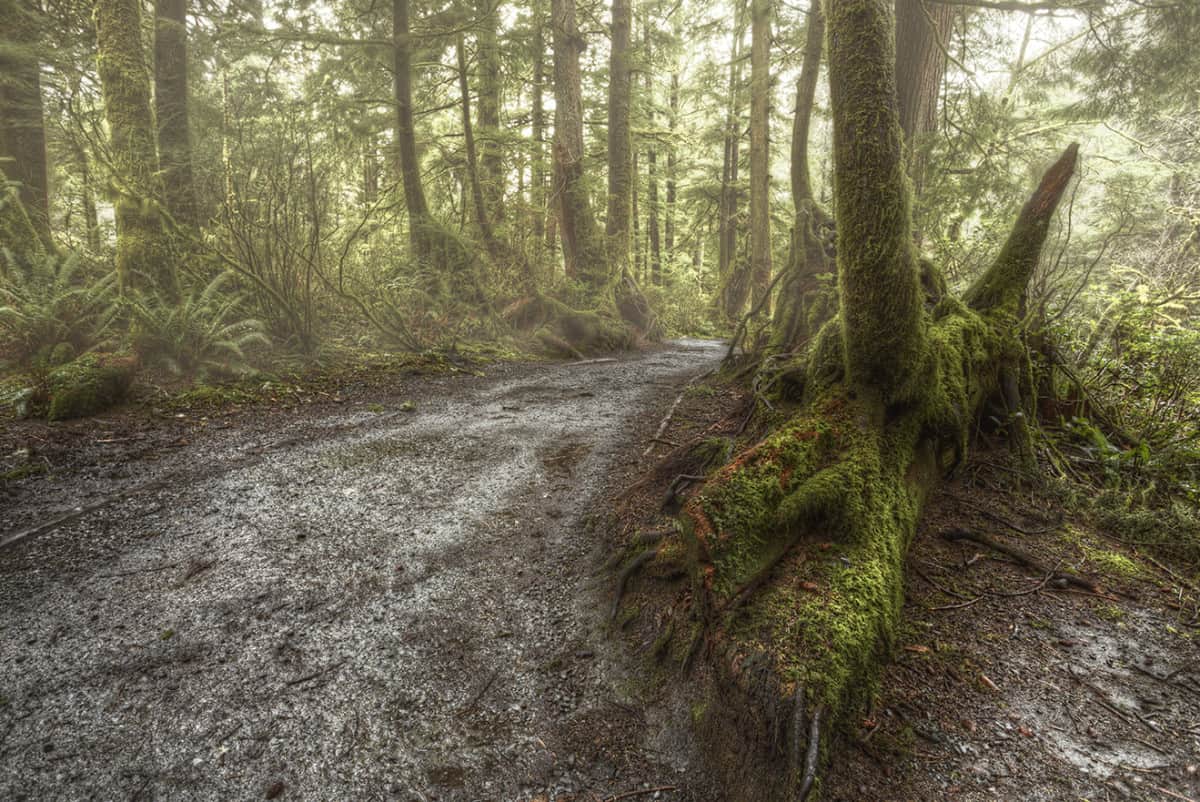
Blake I watched your video on making dodge and burn brushes last week. Both are great! When I saw your settings on the top I immediately made myself haze and de-haze brushes for Lightroom. I then watched the video and will keep tweaking them as I use them. Great idea to help decrease the chaos in the forest!
Dee
That is great to hear. I really do enjoy that Dodge and Burn technique. Lately I have been using them to make detail brushes. Sounds an awful lot like your haze/dehaze brushes.
Anyone can be a tool collector. But it takes a craftsman to understand and use them properly. Thanks for sharing.
Thanks, John!
I feel the exact same way.
Really enjoyed the “DeHaze” and your wonderful tips and manner of explanation.
Blake – Thanks for this fascinating insight. I had read that it was available in Lightroom but until this tutorial I hadn’t realised it was also within ACR, albeit hidden from immediate sight.
I have just developed some images and used this new feature. What I was pleased to find was that it also made a blue sky more pronounced, but, as you pointed out, it effects the whole image as it cannot be selectively painted in. I have found myself using ACR, adjusting everything except Dehaze, opeing in Photoshop and creating a layer which I bring back into ACR just to use Dehaze which I then save and mask the layer for the bit I want.Thanks for all you are doing to help our advancement. W(HDR Insider)
Awesome ideas there. Thinking outside the box for sure. Thanks for the feedback!
Great tutorial Blake. I just learned about the Dehaze filter in LRCC from Joel. But this idea of using it to ADD haze and the masking some out is brilliant.
So glad you learned something new here! That is awesome. I appreciate the feedback!
I use a different approach to de-hazing photos similar to yours, but without using the clarity slider as it isn’t really needed to mimic the effect.
I did however find a way to use de-haze to mimic HDR. I might do a tutorial on it soon, if I fond people are interested in it.