A while ago back in October I posted a tutorial on how to clean up HDR skies. It turns out that I am not pleased with it at all, and would almost say it sucks, however, it does have it’s uses at times. I will leave it up. The new and improved method is much easier, and yields much more satisfying results with edge glow, horizon halos, sky flares, or just damn annoying white areas. Whatever you want to call them, I figured out a really quick, “DOLT! Why didn’t I think of that?” method for fixing them. Many times I will process two HDR images from the same exposure set, one for the detailed landscape, and another for the tricky skies. Sometimes I forget, sometimes I am lazy, and sometimes I really like that sky going on except for the glow around the horizon. If you have ever had this problem this method is for you!
Even Better HDR Skies
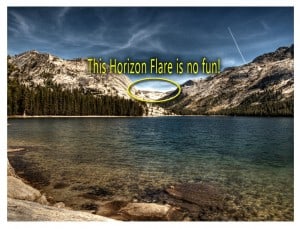
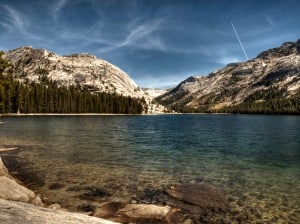
Here is another image from Yosemite that I loved but the horizon flare was killing me. Now you could cut and paste a sample from above or use the stamp tool, but all of those are difficult to get as natural looking as possible. I prefer to use the stamp tool for very small details, this one isn’t so small.
How it is done:
- Open your image in Photoshop, you know the one with the bad nasty sky flares.
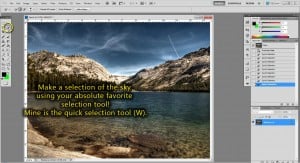
- Make a selection for the sky on your background image. I like to use the Quick Selection Tool (W on the keyboard), but by all means, use the lasso, or the “Anything BUT Magic Wand”.
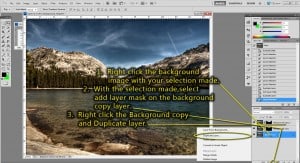
- Right click the Background layer with the selection still made and select Duplicate Layer.
- Once the Background Copy is present, add a layer mask to it.
- You have just put a layer mask on your background copy, the land and water mass have now been replaced with a black mask. Removing the background from view will show your background copy is just the sky.
- Right click the background copy and once again select duplicate layer.
- You can de-select the selection now, we have 2 layers with masks.
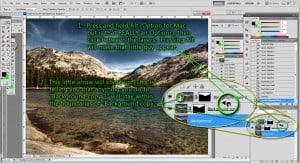
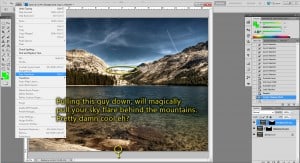
- Press and hold Alt (Option key for the inferior Mac users), and in between layers Background Copy 2 and Background Copy, left click the little line.
- This should bring an arrow on the Background Copy 2 layer that points down to the Background Copy layer.
- You have just told Background Copy 2, “Hey, whatever I do to you, no matter what it is, move you or increase your size or skew your perspective, make you so big you go off the screen…. absolutely no matter what I do to you, you MUST stay within the boundaries of the Background Copy. HA….Ha“
- This is where the magic happens, I am excited for those who have never used this capability. Really, I am, you should see the smile on my face.
- With Background Copy 2 selected, press Edit>Free Transform, or ctrl+T (command+T for Mac aliens).
- Now pull down the middle box on the bottom, just enough to cover up those ridiculous Horizon flares.
- Press Enter or double click in the transform box when you are done, and… oh wait, you are done!
- Well you could always put some adjustment layers on there too.
- There she is, complete. This may not be new to you, but I thought it was worth the tutorial.
- That took me about an hour and 20 minutes to create the tutorial, it should only take you 3 minutes to do the steps, no reason not to try it eh?
Have a great, but safe, Holiday weekend everyone! And while you are up for the Black Friday Sales, can you grab me a Zuiko 9-18mm Lens please?

