On EverydayHDR I have had the pleasure of reviewing almost every print option available from Metallic Prints, to prints directly on Aluminum and insanely large banners and canvases. Recently, I have had the opportunity to look at another medium to print your images on, Glass. Yep, directly onto glass.
These interesting keepsake pieces are affectionately known as “Fractures” from a website called FractureMe. At Fracture they print your images directly onto glass. Here is a look at the process from their website.
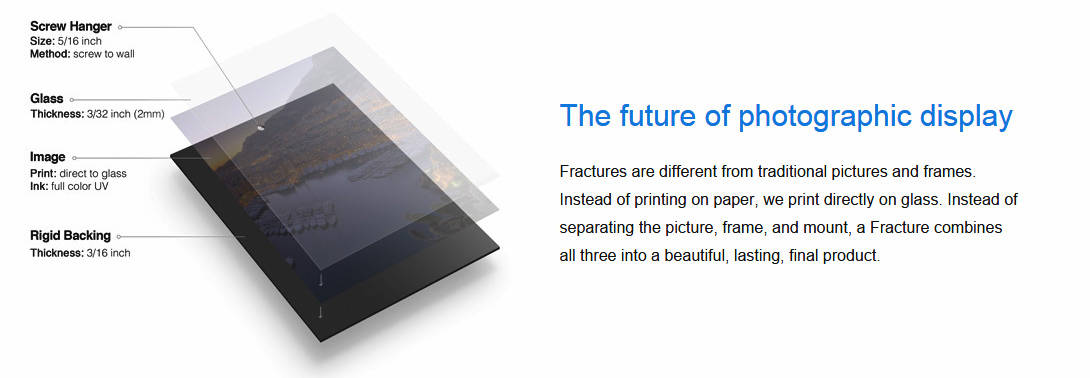
- A Screenshot from the FractureMe website explaining the process.
After seeing this new printing method I had to have a look for myself. Their friendly customer service staff were very helpful and granted me two prints for further review.
Website Experience
My overall experience on the website was excellent! I first went there with the thought… “What the heck is a Fracture?” That was very quickly answered with the informative page “What’s a Fracture?“. After watching the video and reading about them my next thought was pricing. That thought was quickly answered by the Sizing & Pricing Page. The website was clearly built, designed and presented with the inquisitive customer in mind.
When it came to the purchase and uploading process everything went very smoothly. I think my upload to cart completion time was less than 5 minutes. The sizes are a bit odd, but as I type this I just received a helpful email from them about Aspect Ratio. While I do understand aspect ratio as a photographer, this is great for casual shooters who have no idea what the words Aspect and Ratio together even mean.
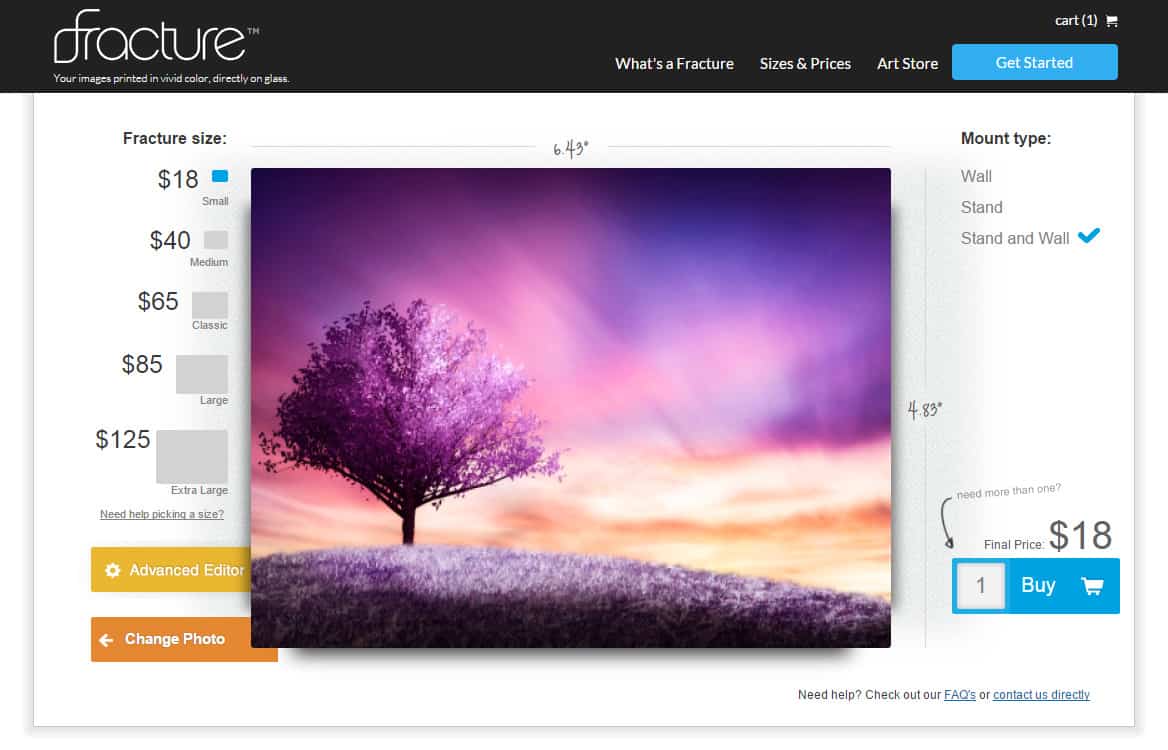
I ordered a large print (15.6 x 20.8) and a small print (4.8 x 6.4) with wall mounts so I could take a look at the mounting method and quality differences in the various size prints.
Shipping & Packaging
I was very pleased with the shipping speed and the packaging with Fracture. From the time I completed my cart transaction to the time it was on my front porch was about 7 days! That is pretty quick in terms of receiving a print without selecting expedited shipping.
When it arrived it was in a branded box, no different than many other printing companies. This one cleverly says, “Your Fracture Has Arrived”. That definitely added to my anticipation. However, I was quite surprised that the box did not say Fragile or Glass Inside. “Do Not Stack” and “Please Don’t Break This Box” are listed, but I think instinctively no one wants their boxes broken.
The inside was very reminiscent of Alcatraz so maybe that is why the words Fragile or Glass are not necessary. I was pretty impressed with the packaging actually and was very curious how I received free shipping with the amount of care and material that went into the packaging. Definitely an added plus and a true benefit to ordering over $100 worth of prints.
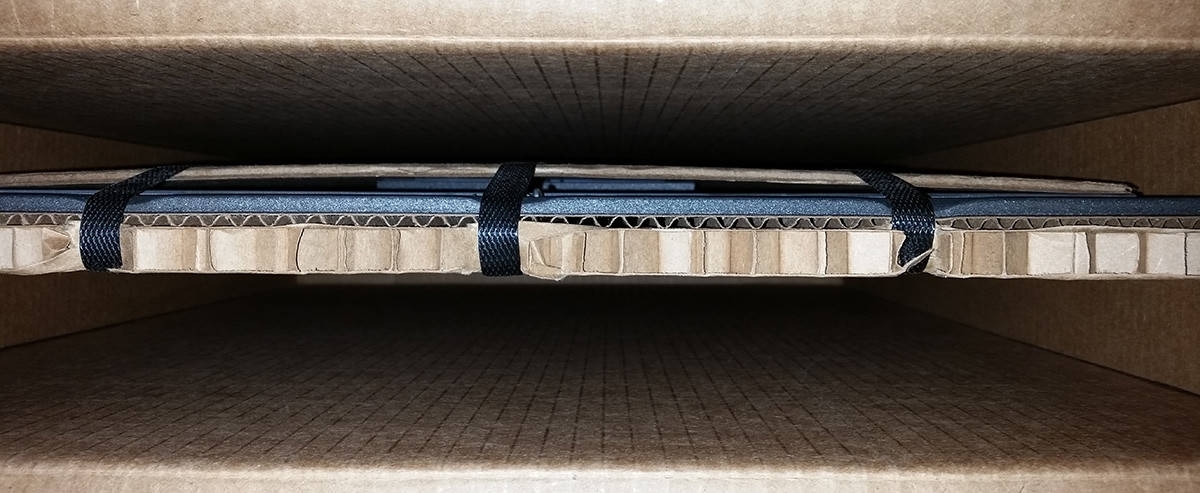
The Inside of the Box as I opened it.
The prints were securely fastened to the box which was very nice to see. I have seen all kinds of varieties of shipping from the bad to the excellent, like Fracture. Be prepared to have a pair of scissors, an exacto blade, or a small saw to get into the packaging!
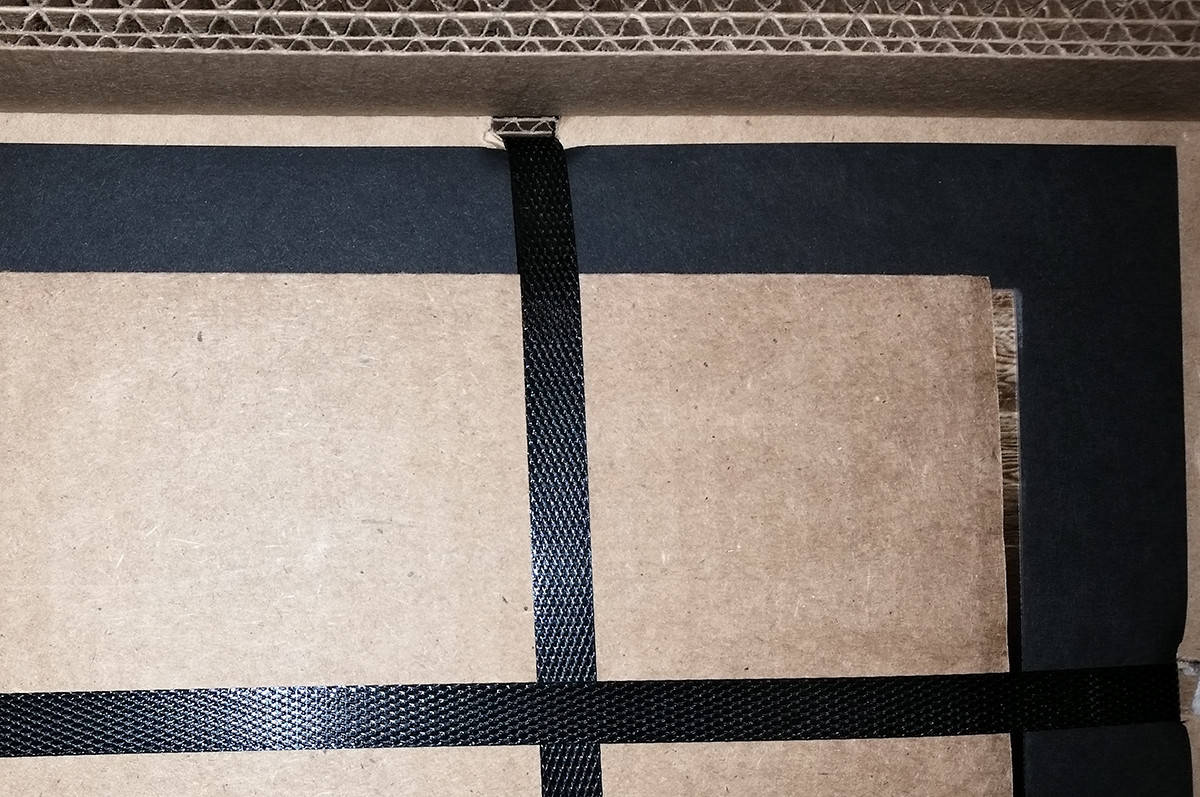
Securely fastened prints in the packaging.
Print Quality
The Print Quality of the Fractures left a bit to be desired. I was impressed by the overall presentation of the print after it was hung and seen from a distance, but up close the print appears to be pixelated. Blacks are made up of a series of dots from different colors.
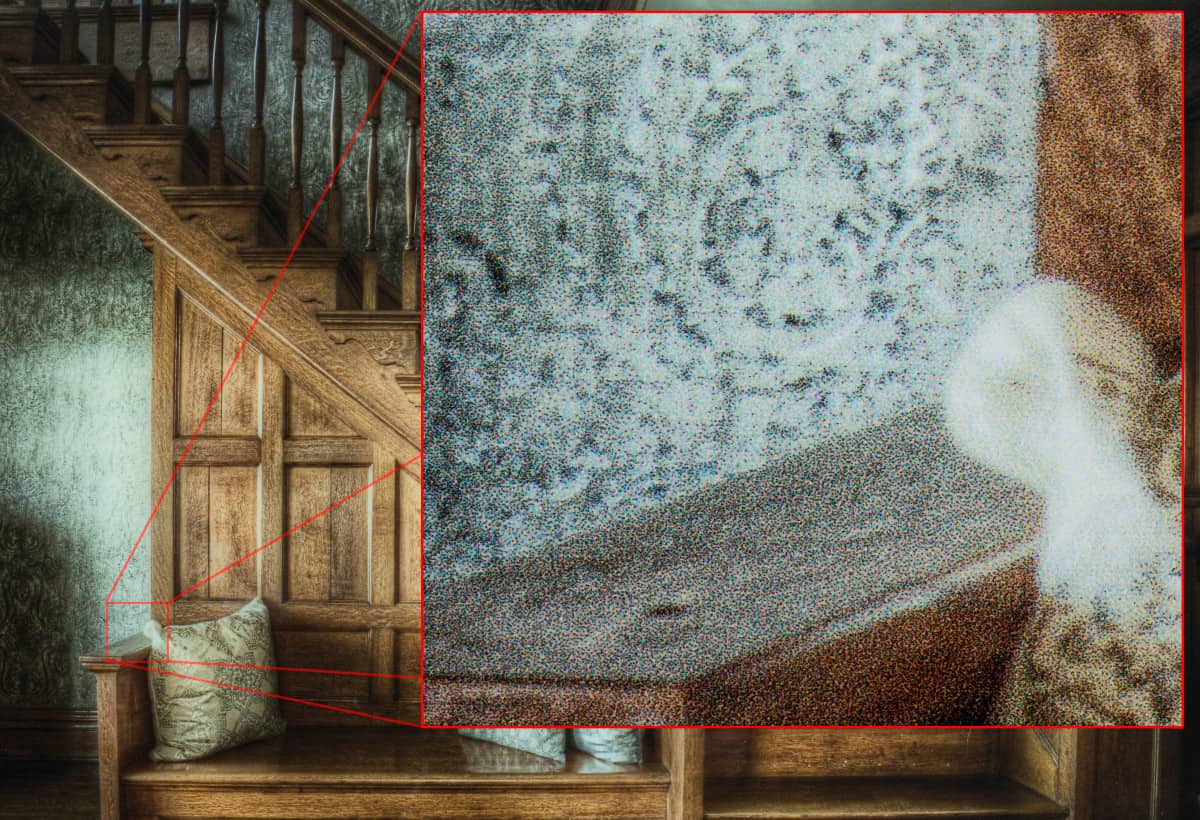
Detail of the Fracture Print with 3x Macro Magnification.
I noticed this rather quickly on the small print. This print was not much of a photograph, it was more of a design. The tree and foreground were rendered in Photoshop and I added a sunset from an old picture to the background. In the detail you can see that the black areas are made up of several colors with a certain fringing that was not present in the original design.
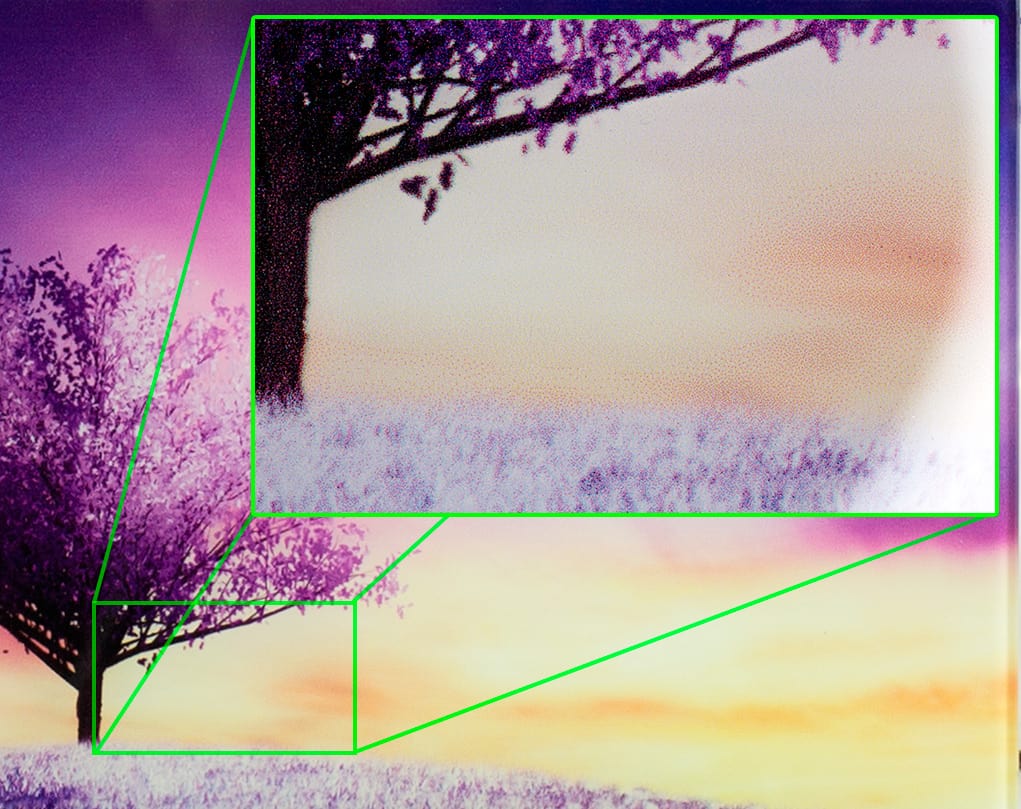
Detail of the Fracture Print with 3x Macro Magnification.
I would expect this from a large print as larger prints tend to show more of the grain in a photograph than small ones. This pixilation is present in both large and small images.
As I said before, the images look amazing on the wall and from a distance as the pixels run together. With that being said, these prints are more for the individual who wants a clever, clean, and modern way to present their images, but is not overly concerned with print quality. I would venture to say they are home-worthy, but not gallery worthy.
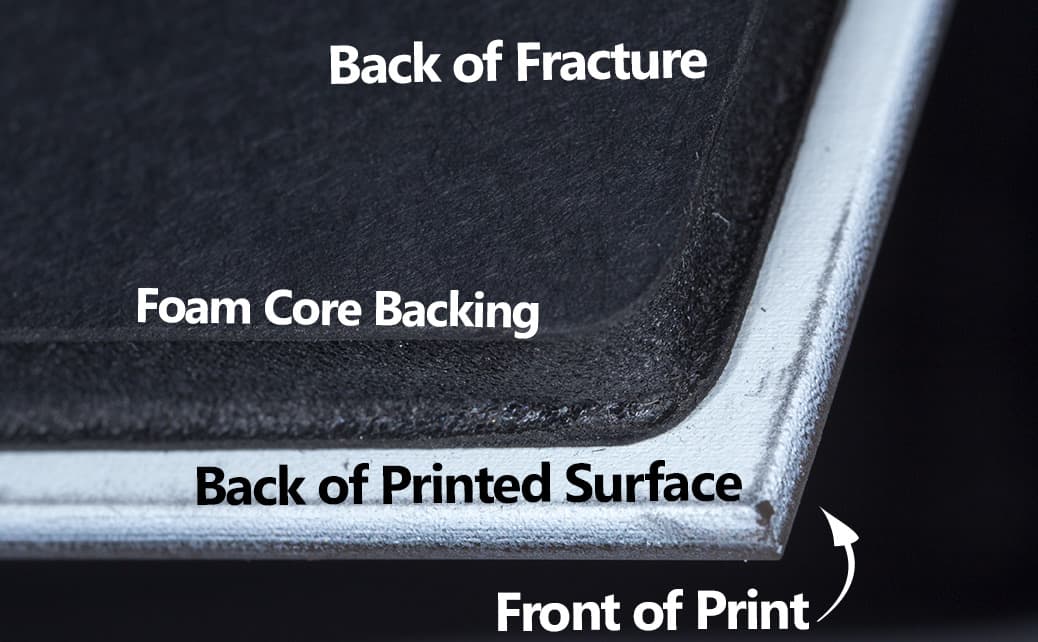
The reverse side of the Fracture Print.
Hanging Method
One of the areas that separates mice from men in the printing industry is the method used to hang the print. Some methods are very sturdy and make it easy to install, while others may leave the integrity of the work on the wall in question. Each Fracture print comes with a screw to hang it in the wall. This is not your normal screw, it is a pre-anchored screw designed to penetrate drywall but give it enough body to not fall out easily.
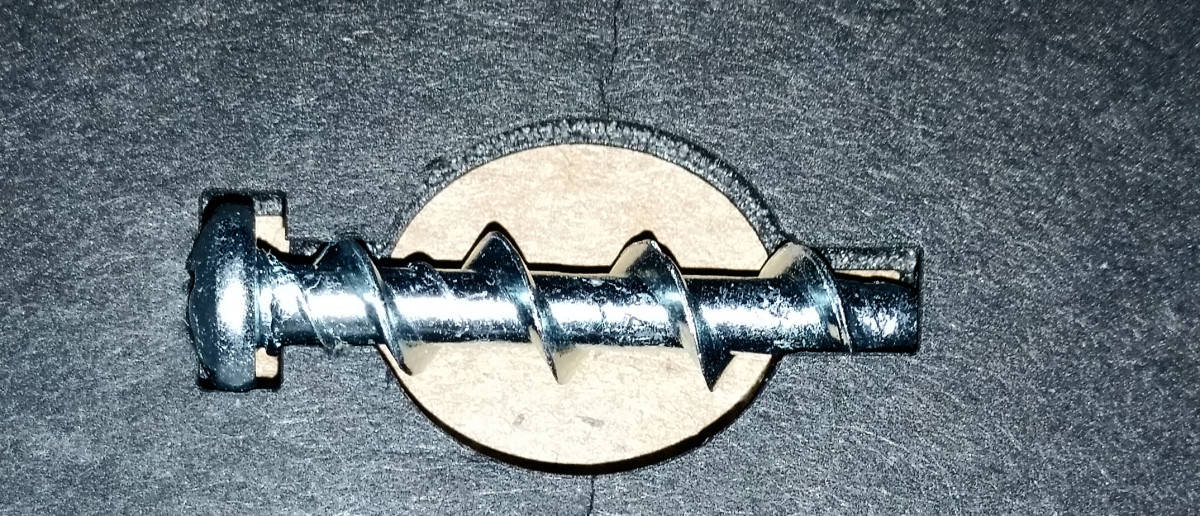
Screw included with every print.
The small print came with a rather easy hanging method. It is a pre-dug out portion of the foam core that fits the head of the supplied screw. Once in place, just slide the print down and the print is hung. While this seems logical, I am curious as to how many times one could hang the piece before the foam core begins to erode away. Or how many unlucky attempts you have at lining it up perfectly before the foam core hole is damaged.
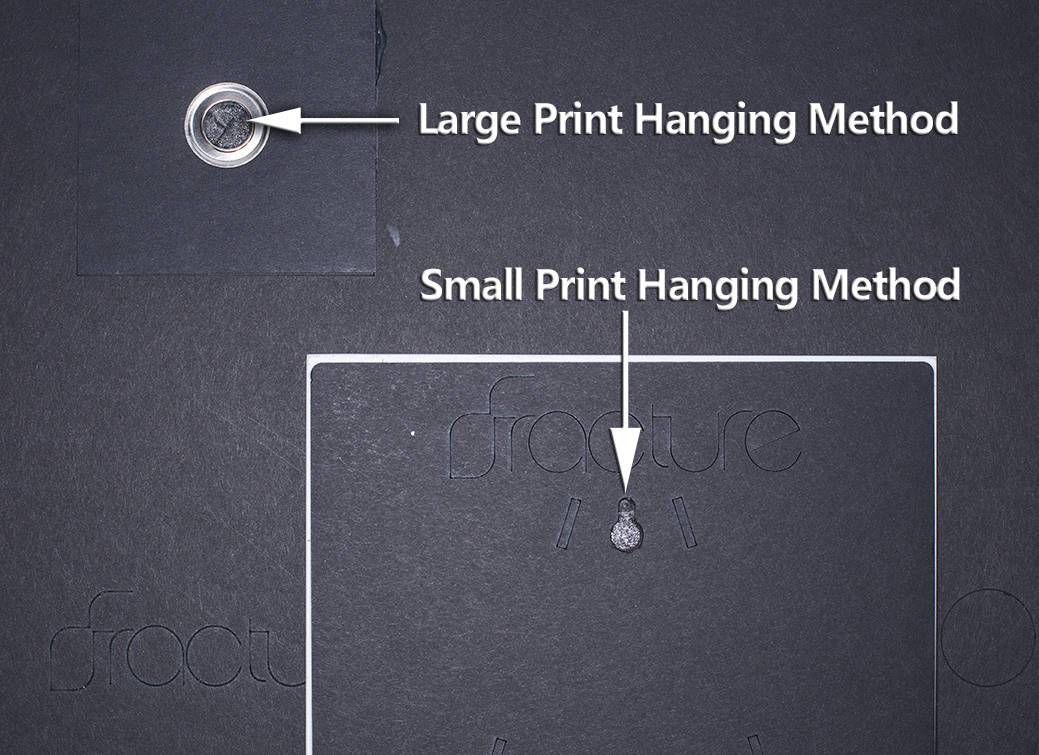
I was much more concerned with the hanging method for the large image. It did not have a pre-dug hole but a piece of foam core with a grommet attached. At first glance it looks stable enough, however there is not enough of a bevel in the grommet to safely hold the screw.
I drilled the supplied screw into the wall, placed the image on the wall via the grommet and it nearly fell to the ground. Luckily, I had some fast hands and was able to grab it. The problem arose with the print simply resting on the screw and not being locked in place. Below is a dissection of the issue I am discussing.
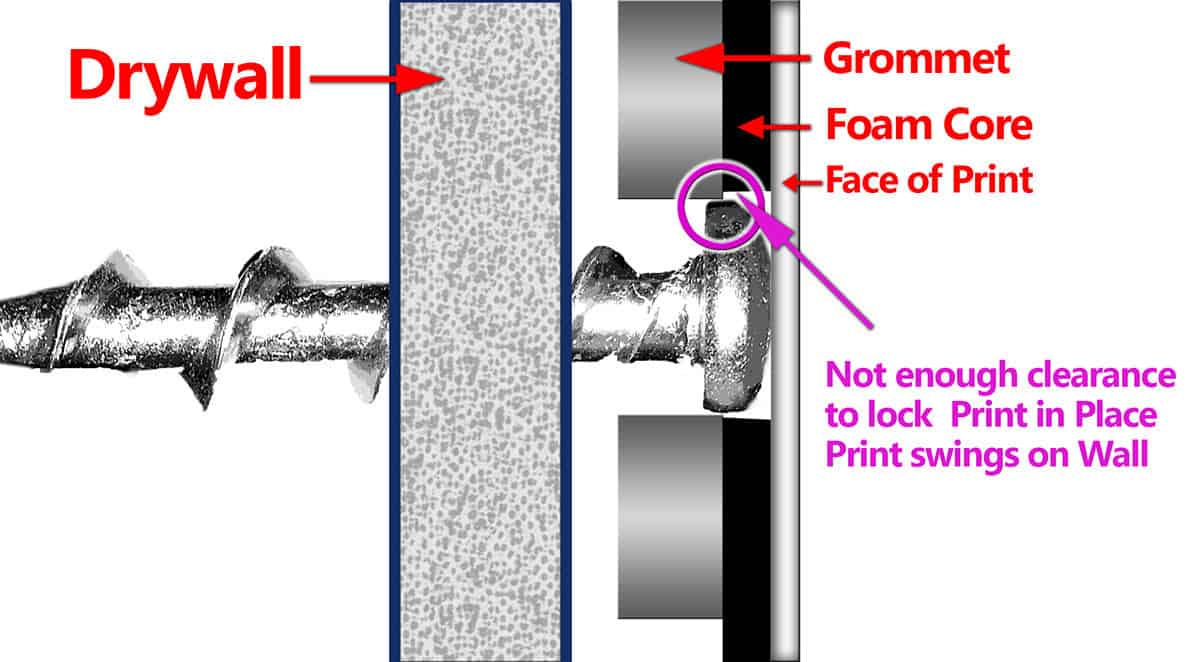
Dissection of Large Fracture hanging on the wall.
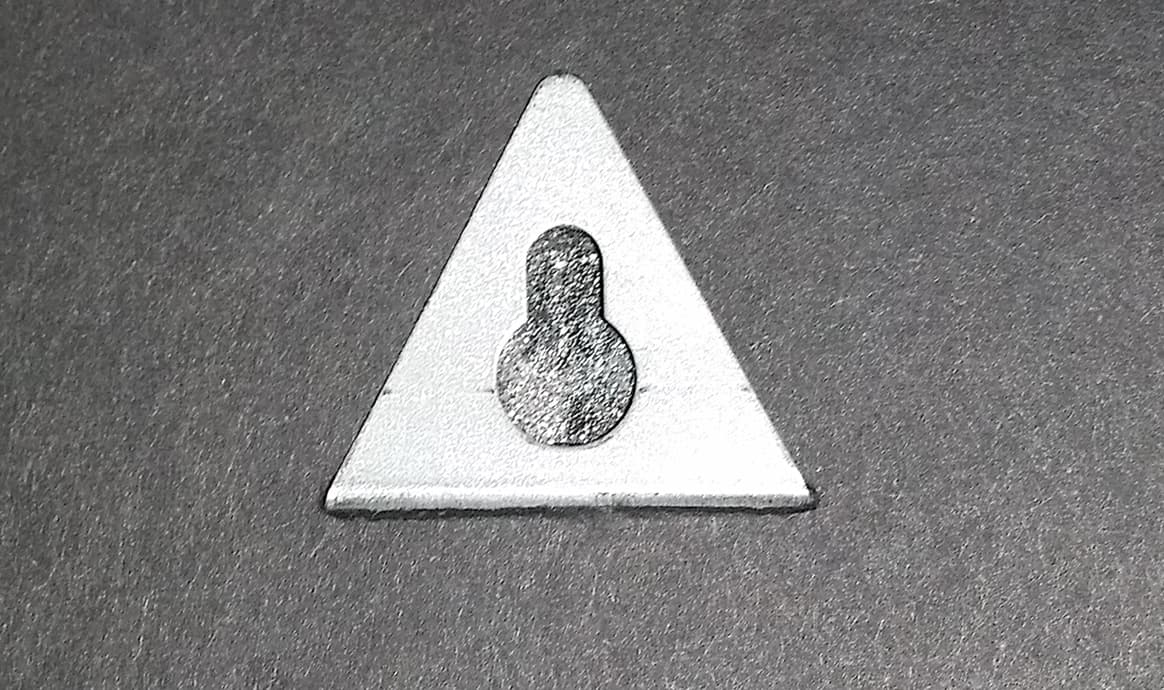
After writing this review I was informed by the company that the grommet method is the old hanging method. Turns out I was one of the lucky ones to get one of the remaining few. Here is the new hanging method for larger prints… it is a HUGE improvement!
The new hanging method for larger prints looks much like the hanging method for the smaller print depicted above. It is now made of metal and is much easier to attach to the wall. It also leaves you with a sense of satisfaction knowing the print is securely hung on the wall. While it does take a bit of work to get it lined up properly, it is a huge improvement over the grommet method shown above.
Bottom Line
I like what Fracture is doing here with their prints. I think it is a clever way to print a photograph. It is also an inexpensive way to hang a beautiful image on a wall without worrying about a frame. The print quality could use a bit of adjustment to be gallery worthy, but that is really not what this printing method is for. I am more than comfortable hanging these at home and wouldn’t mind a few more around the house.
For the price, you really can’t beat it. They look great from a distance, which is how photographs are usually seen.
After detailed analysis “Who are Fractures for”?
- The casual photographer who wants a modern looking image on their wall at a very fair price.
- The person, like me, who does not like buying frames for photographs as they are often more expensive than the print.
- The proud parent who wants to show their family memories in a unique way.


Thanks for doing this Blake, I think I was the one who had mentioned it on the FB group. Im glad you took the jump and got some home worthy images, but equally as glad to learn that they aren’t “gallery worthy”.
-TG
Thanks for the excellent review Blake. As an amateur photographer, I am always looking for new and better ways to display images. While the “home worthy” image displays are nice to have, it would be great to find “gallery worthy” display options to display images relatively inexpensively at home.
From a distance these images are gorgeous. Really, the quality is not noticeable from about 2 feet away. Just up close.
Thanks for clarifying Blake. I appreciate the detailed reviews and your excellent tutorials.
Fracture website shows a guy with their prints lining both sides of his hallway, eye level, a foot away… probably not the best viewing method.
I saw the Facebook posting, went to the website and ordered a print on glass. It took about a week. The packaging was some of the best I have ever seen for shipping prints, especially glass. I would call it “museum” quality shipping. I will have to wait to see the new mounting. I ordered mine so I could stand it or hang it. The quality of the image was very good. However my print came to dark. I wrote to the customer rep via the website and received an answer with in an hour. I asked if they had an ICC profile so I could make sure the image matched what I sent. They did not have one. They asked that I take a photo and send it. I took one and matched it to what I was seeing. They agreed to reprint it for me and I should be receiving it any day now. Customer service is excellent. I look forward to seeing this company grow as they do have a very unique product that can expand to my clients options for prints.
I would have to agree, their customer service is top notch and their packaging is some of the best I’ve seen, very well done! My print looked very similar to what I sent, slightly more yellow, but it takes a critical eye to see that. They are a great company to watch grow.
Great review, I found this after receiving my first order from Fracture, wanting to verify that the ink spots and, in my case, visible lines (up close only) were not due to low toner or something.
I would discourage anyone from printing smaller prints, since those are normally viewed at distances where you will notice the printing flaws.
The large print looks VERY clean and classy on the wall, but up close I will confirm that they’re definitely not what a photographer hopes for.
Also, wondering if anyone else noticed, but my prints were slightly greener than other printers I’ve used(MPIX, Walmart, Easy Canvas Prints, Butterfly Photo).
Great, innovative idea, hopefully it improves, but currently not worth their prices.
Also, I received mine with the updated grommets, and have no complaints on hanging.
Fracture sent me a nice pile of broken glass and didn’t respond to customer service requests.
Just to give you guys some insight as to why the photos look grainier than that of a traditional printed photo. First, you must realize that these photos are printed directly onto the glass. There are very few printers in the world that are capable of printing directly to the glass. The printer that Fracture uses to print on glass is used regularly for printing up to 5’x10′ boards – they are flatbed sign printers. The problem with Flatbed printing (UV printing) is that the technology just isn’t quite as good as an inkjet printer. To give you an idea – most high-end inkjet printers produce a droplet around 2 picoliters (measurement). That is really small compared to top-of-the-line and well respected 9 picoliter flatbed printer. So don’t be too hard on the guys over at Fracture because it doesn’t look flawless close-up. Enjoy your prints.