Gradient Fill vs Gradient Map: What’s the Difference?
Every time I say or hear the term “Gradient Fill” I can’t help but think of an old photography buff named Phil who comes around and spreads his knowledge. All his friends say, “Oh yeah, that Gradient Phil, what a guy!” Okay, that was a bad joke, I promise that the rest of this post and the following tutorial WILL be better.
A few weeks ago someone sent me an email asking me the difference between a Gradient Fill and a Gradient Map. They were struggling with the concept of the Gradient Map and didn’t understand exactly what the gradient fill was doing. I figured that would be a great video tutorial because while they both involve the term Gradient, they couldn’t be farther from each other.
In simple terms:
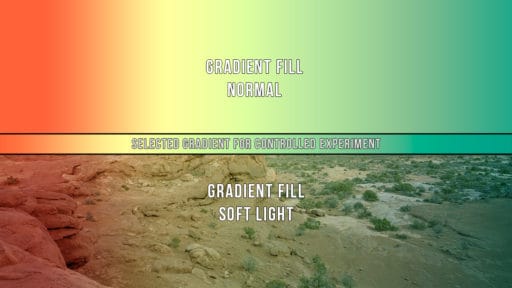
- A Gradient Fill adds a directed wash of color. It can be directed in many ways, from a linear gradient to a radial gradient, to a reflected gradient. It is most useful as an adjustment layer and can be used in harmony with Blend Modes and Opacity for a killer look on your images. At anytime the gradient can be adjusted, it is pretty darn intuitive!
- The Gradient Tool is like the paint bucket with a directed wash. It is best used with black to transparent and on masks because once you put it down on a layer it is difficult to adjust.
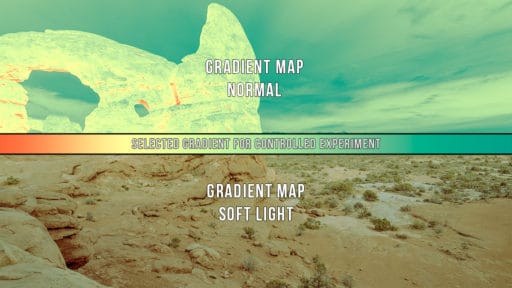
- The Gradient Map is unlike its cousins, while they have the same name they come from a different bloodline so to speak. The Gradient Map actually maps out the tonal values in the image to the gradient that you decide. If you choose a black and white gradient, the darkest areas in your image will be black and the lightest areas will be white (Blake’s favorite Black and White base). If you choose a red and orange gradient, your darkest portions of the image will be red and lightest portions will be orange.
If you are still confused, reference this tutorial and see how they all operate. While they may not be a staple in your workflow now, I am sure this tutorial will change your opinion on them, they are pretty darn powerful!


Great info Blake! This is something I’ll keep on the back burner as I can see many possibilities with these nifty tools.
Awesome! Just keep the in mind, they can be very helpful!
Thanks, Blake. I was just wanting to refresh my memory on the gradient map. I used one with great success on a waterfall panorama image I shot in Hawaii. Keep up the great work with your tutorials.
Great info as always Blake, thanks for clarifying Gradients.
Great explanation of the Gradient Tool, Fill and Map. Easy to understand and helpful in considering possibilities for my own uses. Thanks!
Thank you once again Blake for an excellent work through on a quite complex subject, If it expands my knowledge by just one key skill(and it always does)..Then it is of great benefit … amazing as always and good fun.
I’m going to try this with some shots from Utah.
Great tips. I sometimes use the mirrored gradient tool in an adjustment mask to modify an adjustment toward or away from the horizon which can be helpful in very wide angle photographs to maintain the sense of distance or depth. In my mind, it’s similar to the circular gradient tool, where instead of a horizon I’m modifying the effect toward or away from a single point.
As usual. another great tutorial . You are a PS legend
Thanks Blake–this was soooooo helpful! I finally get it now.
Super!!
Great explanation. This clears it up for me.
Thanks.
I always wondered what the differences were, now I understand. Thanks.
Awesome information Blake, and well presented, Thanks
Thanks! I found it interesting and did share it in a Facebook group.
Super job again Blake.
Blake, we are so lucky you are such a nerd, trail blazer whatever. That was another superb tutorial. Thanks.
Excellent tutorial. Removes a mystery an opens new Avenue of post processing.
Very cool tutorial, Blake. Thanks for putting it together.
Fantastic tutorial Blake.
Thanks for another great tutorial!
Thank you very much for the awesome tutorial, I do have a question though, when applying a gradient map to a video file that you’re editing in photoshop, how can you get it to appear as a separate media file in your timeline instead of having it affect the entire clip and only exist in the layers’ panel, whether it’s clipped or not? I remember all adjustment layers used to show up separately in the timeline but not anymore, my current way around this is by cutting the clip, duplicating the gradient map layer and changing the opacity for the darker scenes, I’m not sure if it changed after an update or a settings change.. I’d appreciate any help on the matter.
I love the statement in the black section below the video ……..
Your presentation of all things gradient was excellent. Thank you.
This is absolutely brilliant. I have used the gradient tool, but this expands my brain indeed!
Clear and concise as always. You get the point across.
Blake, you rock! This is awesome stuff and great for our brains. Keep them coming
Many thanks for another great tutorial Blake.
I love gradients, but do you have any tips to reduce banding in those gradients when printing ??
Linear and radial are my favorite gradients in Photoshop.