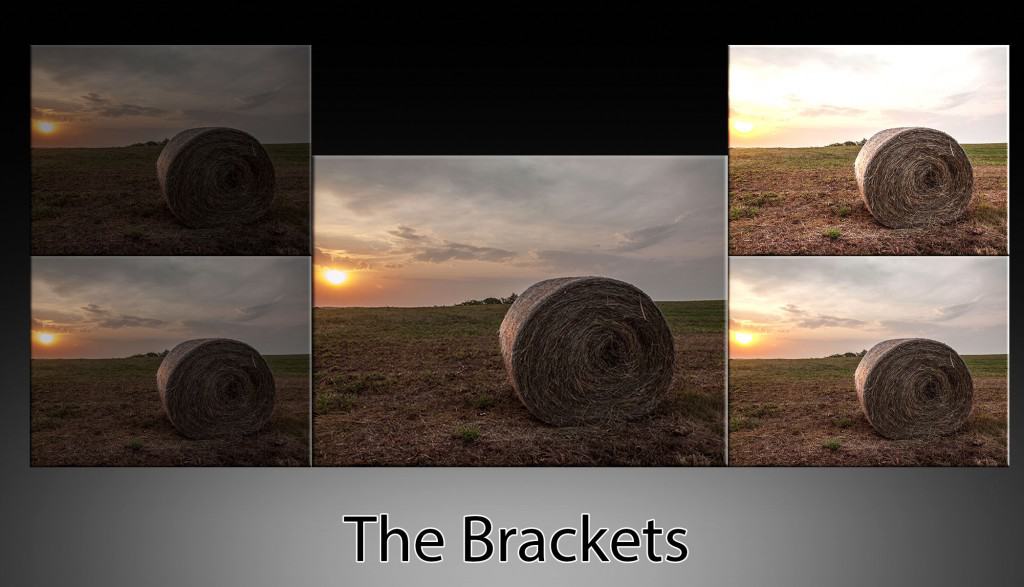
This Concert was a blast and really hosted some very creative results! I was thoroughly impressed by the submissions this month as the Concert requirements were a little bit more tricky than usual. For those of you who are tuning in for the first time, the idea was to take the brackets from above and add your own personal image(s) to it. I stated that textures and borders were acceptable, however, I really wanted to encourage compositing as that was last weeks tutorial focus.
I must say again I was impressed by the submissions this month, more so than usual. Not that the other concerts did not yield great results, but this one allowed me the ability to see others creative vision. It is interesting to see what others saw when they looked at these brackets and how their final product reflected their initial response to them. Ladies and gentlemen, Concert #5:
In the order they were received:
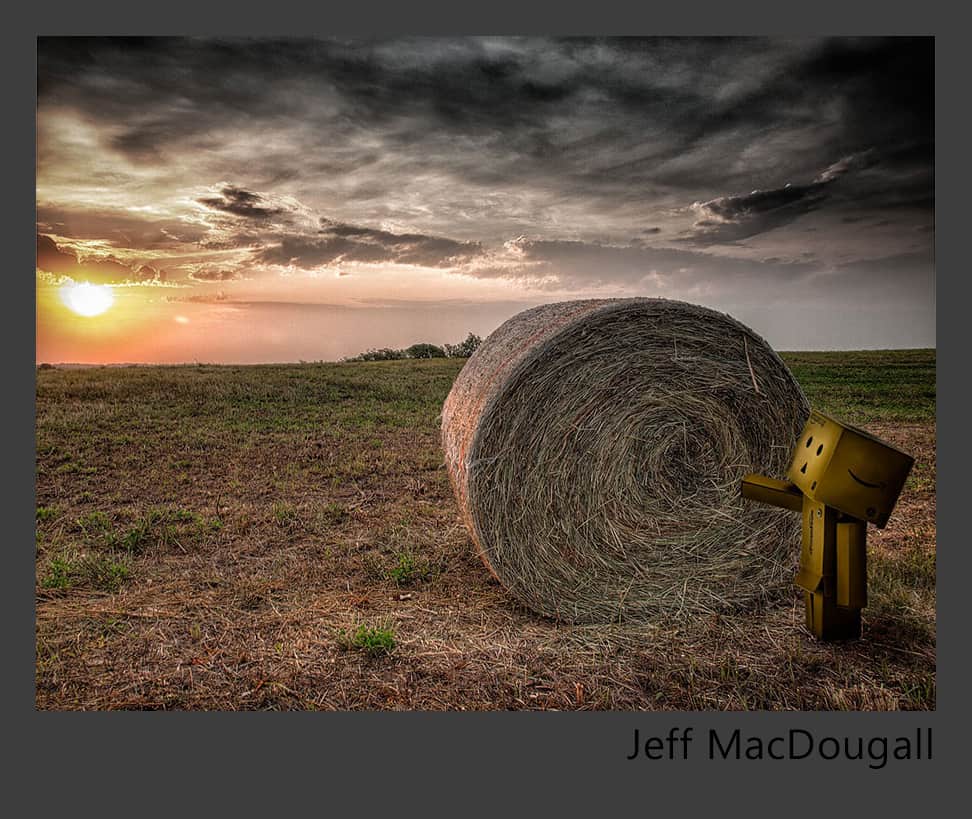
Jeff MacDougall
Location: Henderson, Nevada, USA, Earth
Serious hobby photographer, not bound by rules and open to new ideas, with the prime directive of having loads of fun. Oh, and constantly learning, too
Processing Highlights:
- After opening the 5 images in Adobe Lightroom, I tonemapped them in both Photomatix Pro and Nik HDR Efex Pro, saving both resulting files and importing both back into Lightroom.
- I then opened both HDR files as layers into Photoshop CS6 and exchanged the Photomatix image sky with the one from HDR Efex Pro, using a gradient mask which was extensively adjusted.
- Next I performed High Pass Sharpening technique using Overlay blending mode on a duplicate layer.
- Opened image containing Danbo into Photoshop, and cut out and pasted Danbo into HDR layer… employed free transform and quite a few image adjustment layers to integrate Danbo seamlessly into the background. Dodge and burn was employed using a 50% gray layer to make Danbo feel at home in his new environment.
- Exported image back into Lightroom, where I invoked Nik Color Efex Pro using Detail Extractor, Tonal Contrast, and Vignette Lens.
- Final image export to jpeg with size reduction via Nik Sharpener Pro.
Where You Can Find Jeff: Flickr
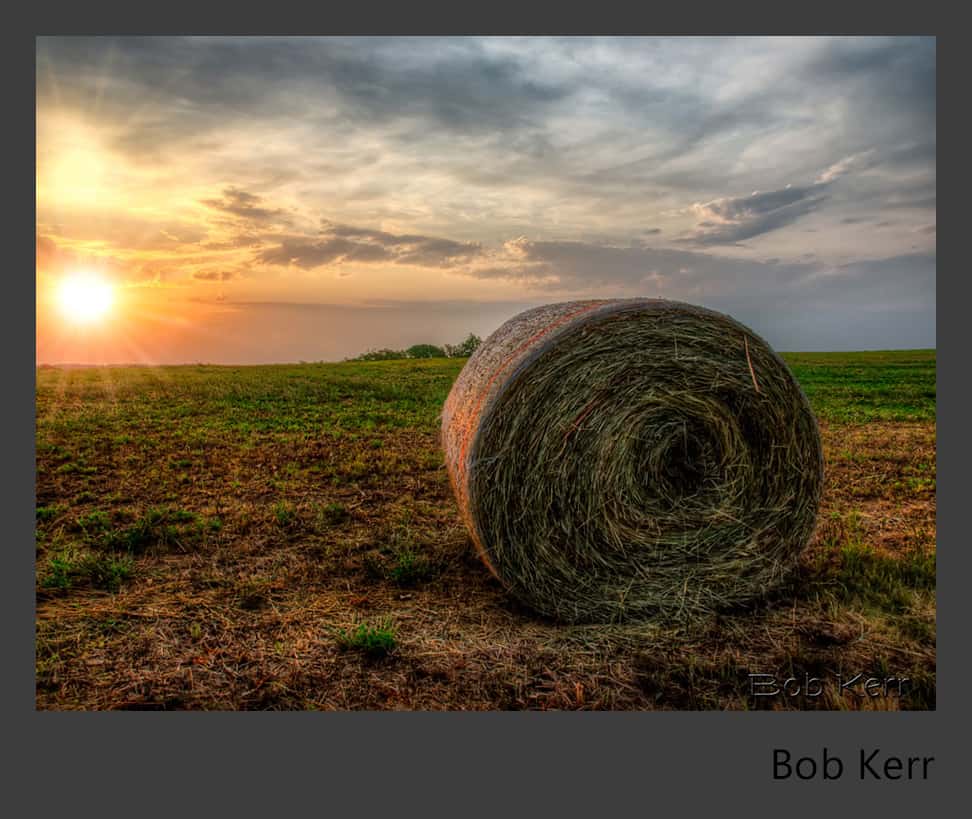
Bob Kerr
Location: Austin, TX
Interest in photography from late 1980’s. Travel, nature photography, IR and B&W are areas of most intense interest. I have been fortunate to travel and collect images from 98 different countries. Began HDR processing several years ago and continue to find it exciting.
Processing Highlights:
- Processed .ORF images in PSCS6 Camera Raw — Adjusting Overexposed Highlights and Carity
- Merged resulting .Tiff images and Tonemapped in Photomatrix 4.2
- Nik Viveza — Adjusted Contrast and Structure
- Nik Color Efex Pro 4 — Pro Contrast Filter
- Topaz Labs Star Effects
- Imagenomic Noise 5
Where You Can Find Bob: Rokimages
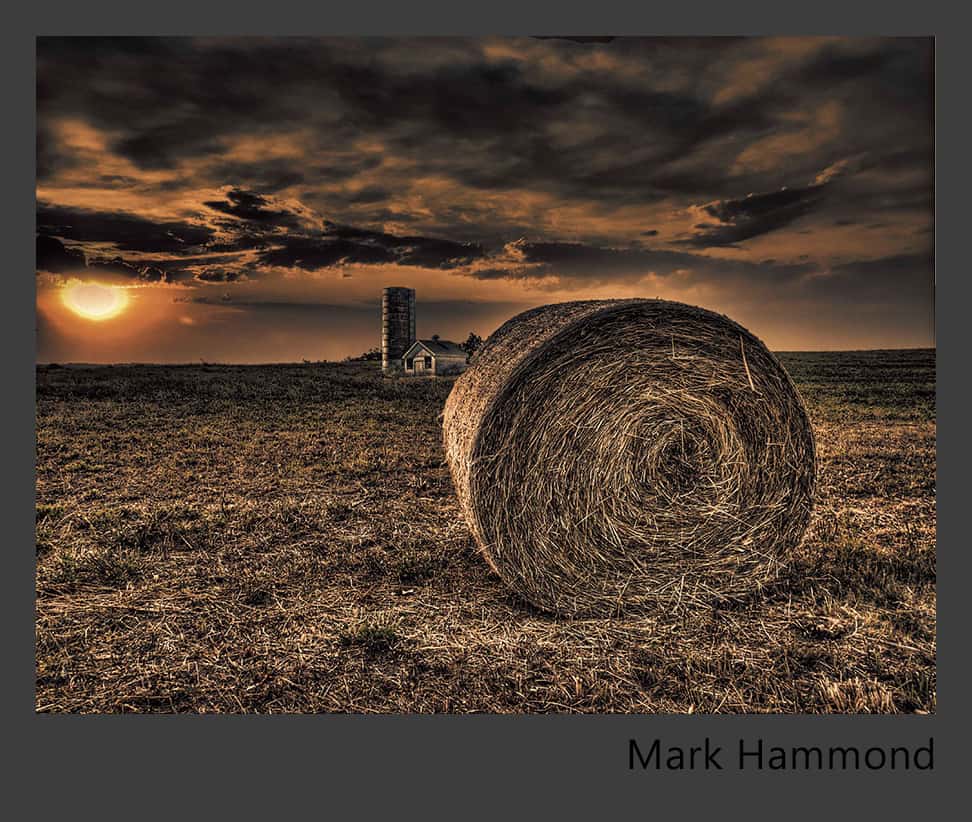
Mark Hammond
Location: Sedalia, MO, USA
I’ve taken pics all my life but recently got serious about it as an art form. As I read I found HDR and things have never been the same. One of the things I love about photography is that no matter how much I learn, it only shows me how much more there is to learn.
Processing Highlights:
- Photomatix pro, painterly preset with custom adjustments
- Topaz labs adjust 5, photo pop and spicify with custom adjustments
- Cut & paste the silo with a revel layer mask
- Brightness adjustment layer,masking all but the barn to make the barns brightness match
- Topaz B&W effects
- Lowered opacity on B&W layer to bring back some of the original color
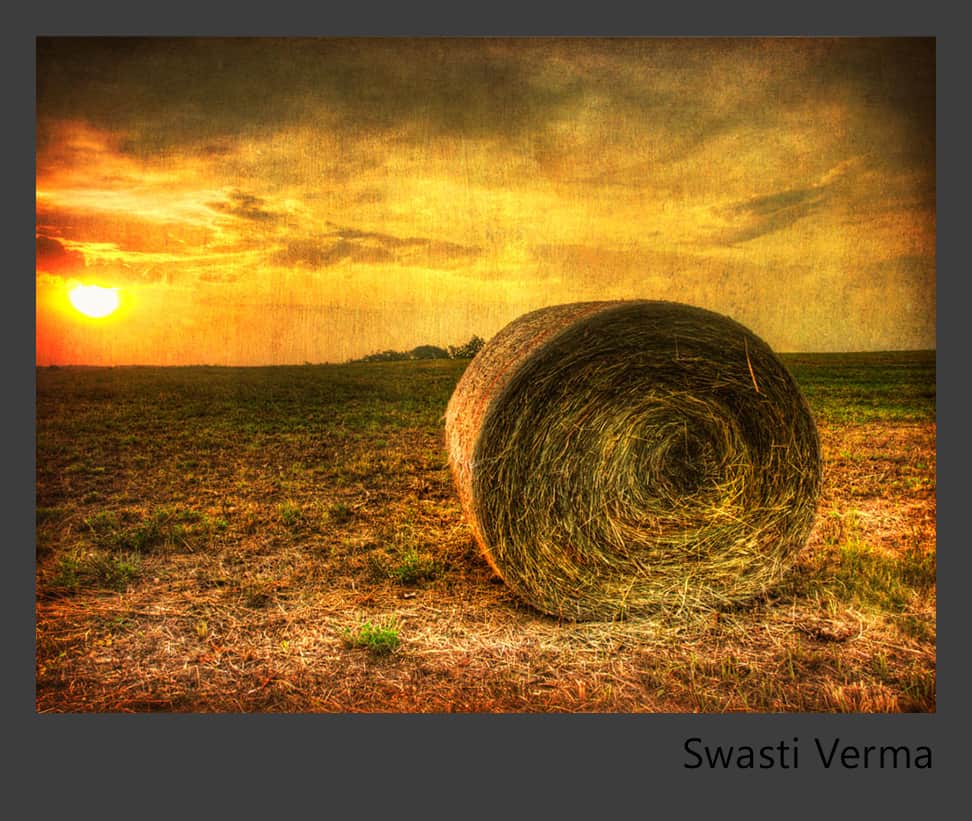
Swasti Verma
Location: Hyderabad, India
I am a Hobbiest Photographer and Telecomminication Engineer by profession. Apart from Travel Photography I have been doing Still, Portrait, Kids and Architecture Photography as well. My work has been exhibited at the Salarjung Museum Hyderabad and Muse Art Gallery, Marriott Hyderabad.
Processing Highlights:
- I fixed the white balance to my Liking in the Lightroom for the RAW files. The tiff were exported from the Lightroom for processing into Photomatix.
- In Photomatix I used Detail Enhance option and processed the image while watching the Histogram to get an image without clippings.
- Once I was satisfied with the Tone mapped image, I exported it into Photoshop. There I performed Noise Reduction on the Image.
- Later I applied a Levels local adjustment on the Sky and Foreground.
- Applied texture and used overlay blend mode with masking for giving it a textured effect.
- Lastly applied selective sharpening on the Image using High Pass.
Where You Can Find Swasti: Portfolio, Flickr, 500px
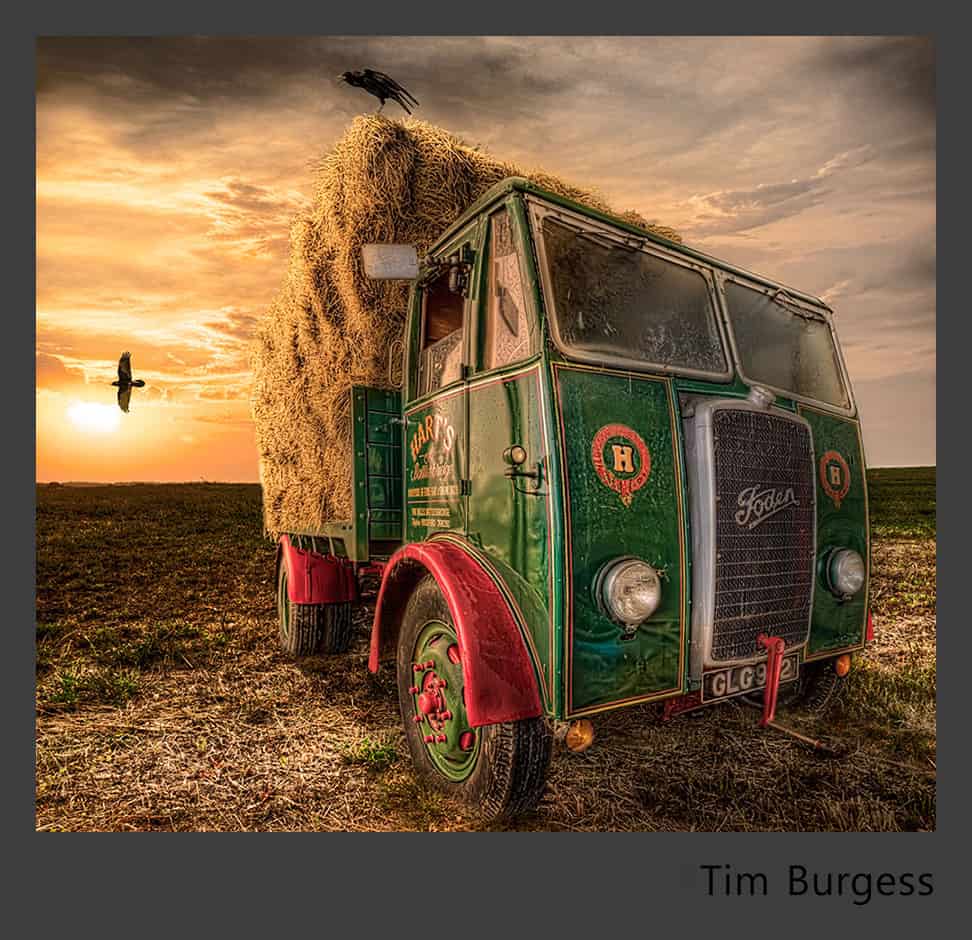
Tim Burgess
Location: United Kingdom
I’m a freelance Animator and Compositor . Photography has always played an important part in my work. In the past couple years photography and HDR has become more of a passion and i’m constantly looking to improve
Processing Highlights:
- Background Raw files loaded straight into Photomatix to process and tone mapped.
- Truck was 2 sets of 3 raw files processed in Camera raw Tone mapped in Photomatix and photo-merged in Photoshop.
- Background sky was extended and blended together.
- Truck cutout using quick mask and composited into shot.
- Crows from stock images also imported into scene.
- Dodge and burning to many parts of image and Warming photo filters to key image together.
Where You Can Find Tim: Redbubble
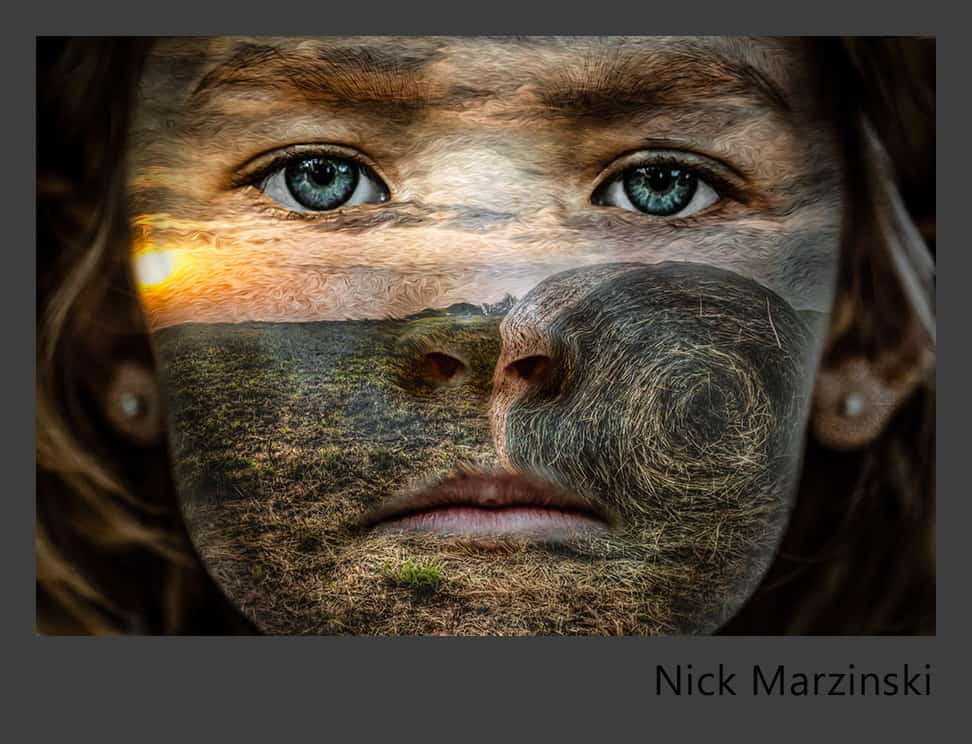
Nick Marzinski
Location: Milwaukee, Wisconsin, USA
I took up digital photography seven years ago, a few months before my oldest daughter was born. Macro, lansdcape, abstract, and HDR photography are particular interests. I started getting serious about learning about post production techniques and HDR about a year and a half ago. I shoot with a Canon Rebel T1i, and currently use Lightroom 4, Photoshop CS5, Photomatix, and Topaz Adjust. I used this concert as an excuse to teach myself about displacement maps.
Processing Highlights:
- HDR image was done in Photomatix with some noise reduction done in Lightroom.
- For the portrait shot (of my aforementioned daughter), I dropped the vibrance and cleaned up the face and hair and enhanced/brightened the eyes using adjustment brushes in Lightroom.
- I took the portrait into Photoshop, desaturated it, increased the contrast with an extreme layers adjustment, gaussian blurred it and saved a copy (and kept the original).
- Brought the HDR image into Photoshop, layered it on the original un-desaturated portrait (overlay blend mode), and ran a displacement filter on it using the desaturated portrait copy as my displacement map.
- Made a copy of the HDR image and ran it throught the oil paint Pixelbender filter.
- Using layer masks, I masked out the HDR image from the eyes, mouth, and hair.
- The original HDR image was used for the ground, and the oil paint version was used for the sky, again using layer masks.
- Dodged and burned the HDR images to add some depth to them.
- Ran a high pass filter that was masked onto the eyes and lips of the portrait.
- Finished with a few Basic panel tweaks and a vignette in Lightroom.
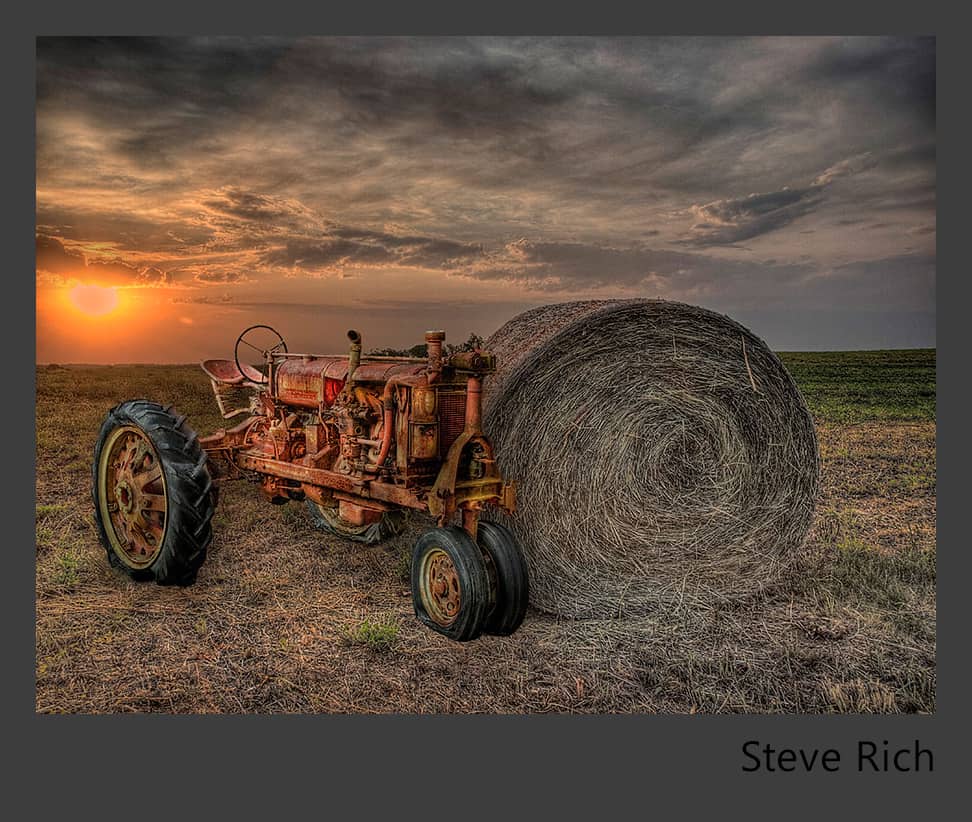
Steve Rich
I am 54 years old, married and have two daughters. I have a grandson and grandaughter on the way. I am a late bloomer when it comes to post-processing images using enhancement applications. For years I was a point and shoot with no post processing. With the birth of my grandson, this gave me a reason to learn something new. I use all the Adobe products, Nik products, OnOne and Photomatix.
Location: Aiken, South Carolina, USA
Processing Highlights:
- Five images were brought into Photomatix Pro 4.2. Tonemapped and saved as Tiff image.
- Tiff image brought into Photoshop CS6, created a sun ray using a photoshop brush. Duplicated the brush layer and removed some of the second sun ray to reduce the sun overexposure.
- Use Topaz Denoise, Topaz Adjust 5 HDR Grunge Heavy. Reduced opacity to around 60%
- I added a tractor from another image, tried my hand at compositing.
- I used the Dodge and Burn tool to cast shadows on the tractor in relation to the sun, I used a drop shadow to cast a shadow from the tractor.
Where You Can Find Steve: Steve Rich Collectible
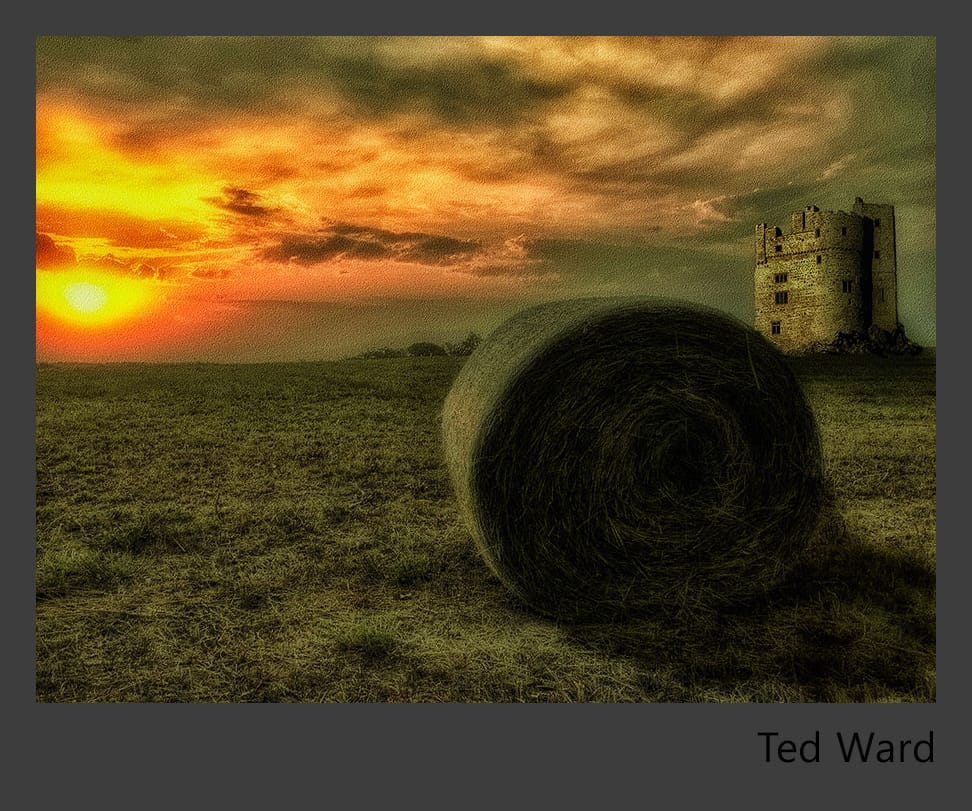
Ted Ward
Location: Wales, United Kingdom
I’m 27 years old, just finished Architectural Technology Degree and about to start my life as a self employed man. I have not been doing photography for very long, only since December last year but what I lack in experience I try to make up for with enthusiasm and willingness to learn new things.
Processing Highlights:
- At first I processed the brackets provided and started to wonder what I could include in the image.
- I watched Blake’s tutorial on how to do compositing within photoshop, which helped guide me though the whole process.
- The one thing we have in the UK is castles, so it just seemed right to put on in to this image.
- I have a limited amount of images I could use but I had one shot of a castle that could fit, so I cut it out and placed it on the image in the area I thought it would fit best.
- Masked out any parts of the castle which where behind the foreground object or the ground.
- Added a drop and internal shadow to the castle and masked them.
- Added various soft and hard lights to get the shadows on the castle and hay bail and masked them.
- Added grain and hued colours in parts.
Where You Can Find Ted: G+, Website Coming Soon!
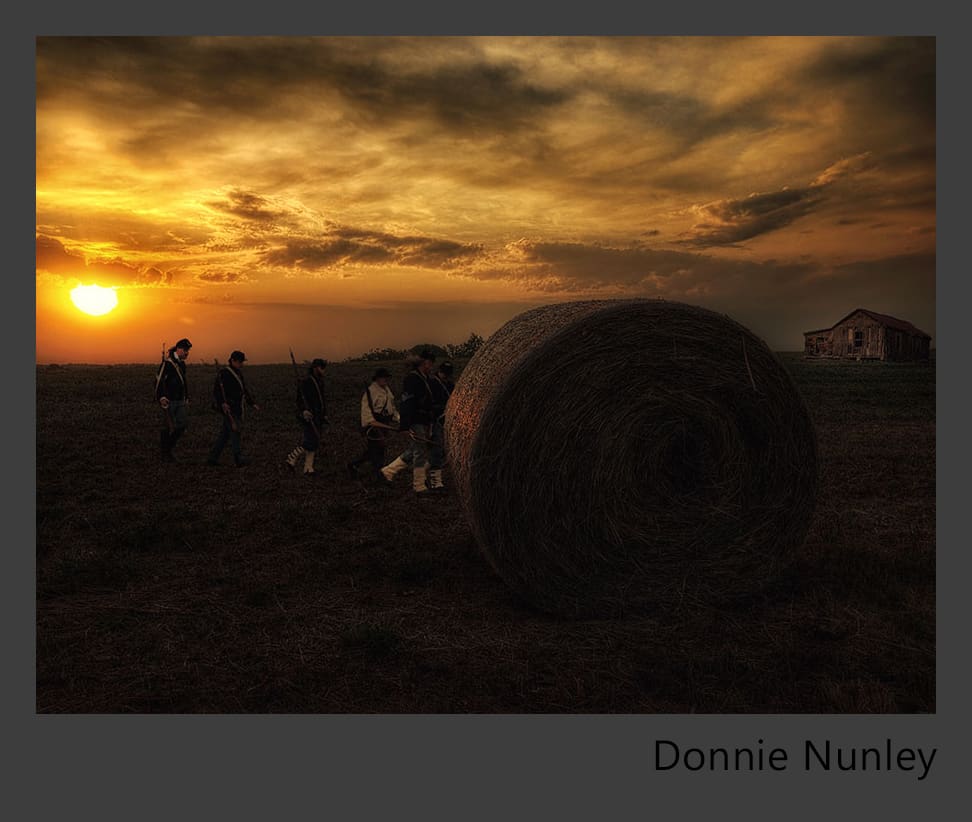
Donnie Nunley
Location: Boones Mill, Virginia, USA
I took up photography in 2009 and got my Canon 60D in 2011. I’ve been using the HDR process since 2009 as well. I learn something new with every shot. I use Photomatix Pro 4 to tonemap and Photoshop with Topaz and Nik plug ins for post editing.
Processing Highlights:
- I used Photomatix to build and tonemap the HDR image. In post I brought the house over from one recent shot and the marching soldiers over from a shot of a local civil war battle reenactment.
- I followed Blake’s tutorial for color matching the inserted images by making a new layer with the background and using the average blur filter. I used the multiply blend mode and brought the opacity down until the detail came back.
- The rest of the work was done using Nik Color Efex 4. I used the color contrast, low key and glow filters.
Where You Can Find Donnie: Flickr
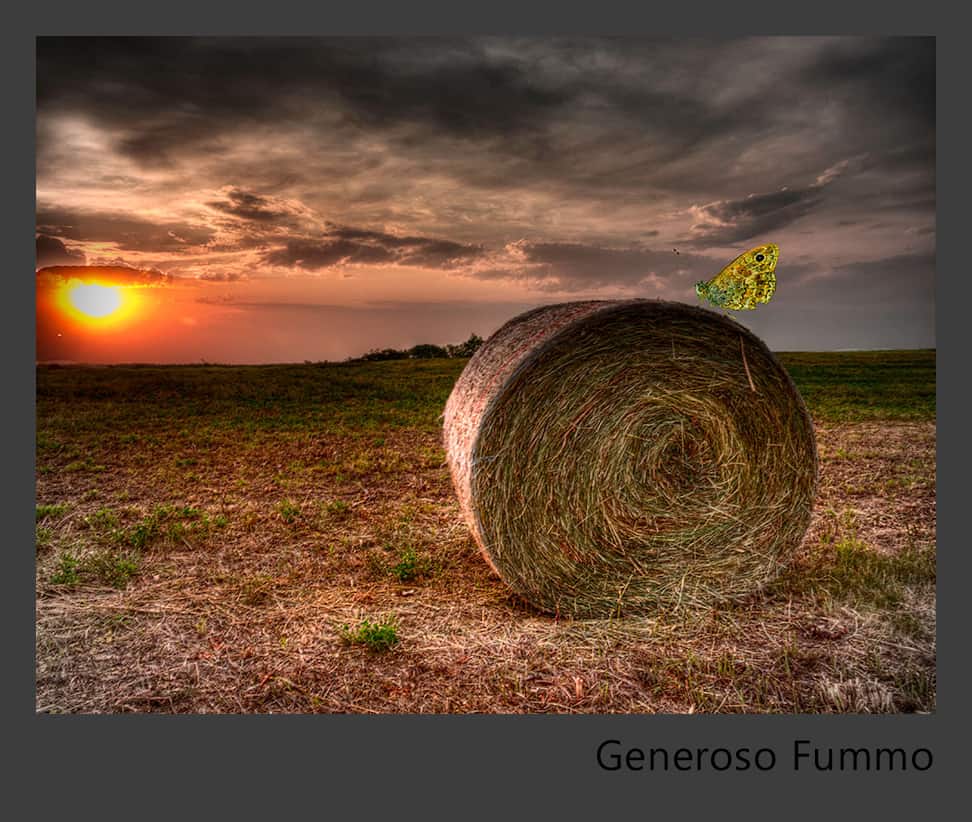
Generoso Fummo
Location: Italy
I’ m an amateur photogrpher. I Live in Salerno, Near Napoli and I have three sons and two grandsons.
Processing Highlights:
- I merged the five shots with Photomatix Pro 4.2 with Enhancer preset.
- After I opened the tone mapped photo in CS5, I duplicated the background and copied the Red channel.
- I stuck the red channel on the background layer with luminosity blend.
- 2 curves layer adjustments were added for the general contrast of the image.
- I inserted my hdr image of a butterfly and saved.
- I’ ve missed some passages….
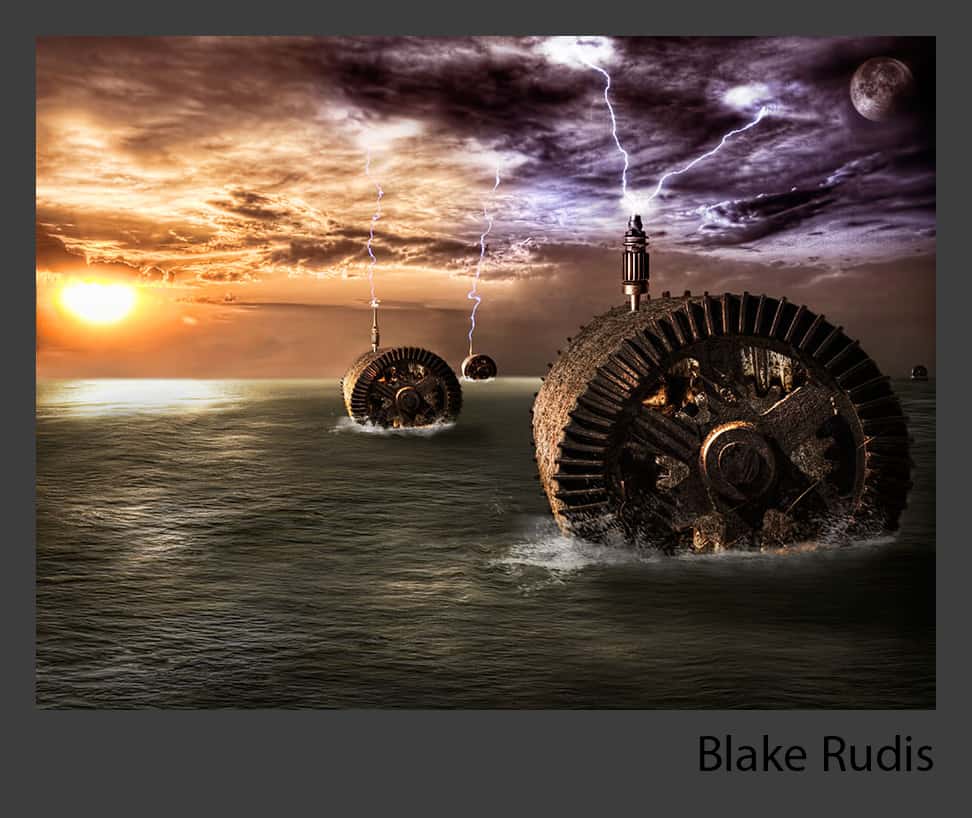
Location: Kansas City, Missouri, USA
Hi my name is Blake, and I am an HDR addict (in my most timid voice). This is my little space on the web…
Processing Highlights:
- Where to begin… I post processed the image in Photomatix 4.2, mildly tone mapped as usual to retain as
much of a real image as I could.
- I then pulled it into Photoshop and looked at the grass and though, how cool would that be if it were water.
- I added a few water layers and some adjustments.
- I pulled the hay bail off of the original image and made it it’s own layer.
- I then pulled in some images I shot in Bodie, California to get the gears and lightening rods.
- I duplicated that group of layers 3 times to make the boats.
- I then made a couple sky layers and threw in the moon.
- I wanted some crazy lightening, because lightening is cool, I pulled in some from an old lightening shot I took but hated the outcome, so I faked it with some crazy gradient technique I found on the web.
- At some point I used Topaz Adjust 5 with my favorite little preset I made that just barely heightens the detail but enough to make it look edgy without being overboard.
- At this point I was up to about 80 layers and was losing track of my layers so I flattened some of the boats down.
- Just as I though I was done, Nick Marzinski introduced me to Displacement maps so I used it on the water to make the wake effect behind the boats.
- I left out a bunch of steps for the sake of all of our sanity, take a look at the grocery list of layers in the thumbnail to get a better idea of the workflow. I took a snapshot when I was finished at 74 layers.
Where You Can Find Blake: Right here on E-HDR every Monday, Wednesday and Friday!
Great concert everyone, my favorite yet! Keep coming back for more!

