

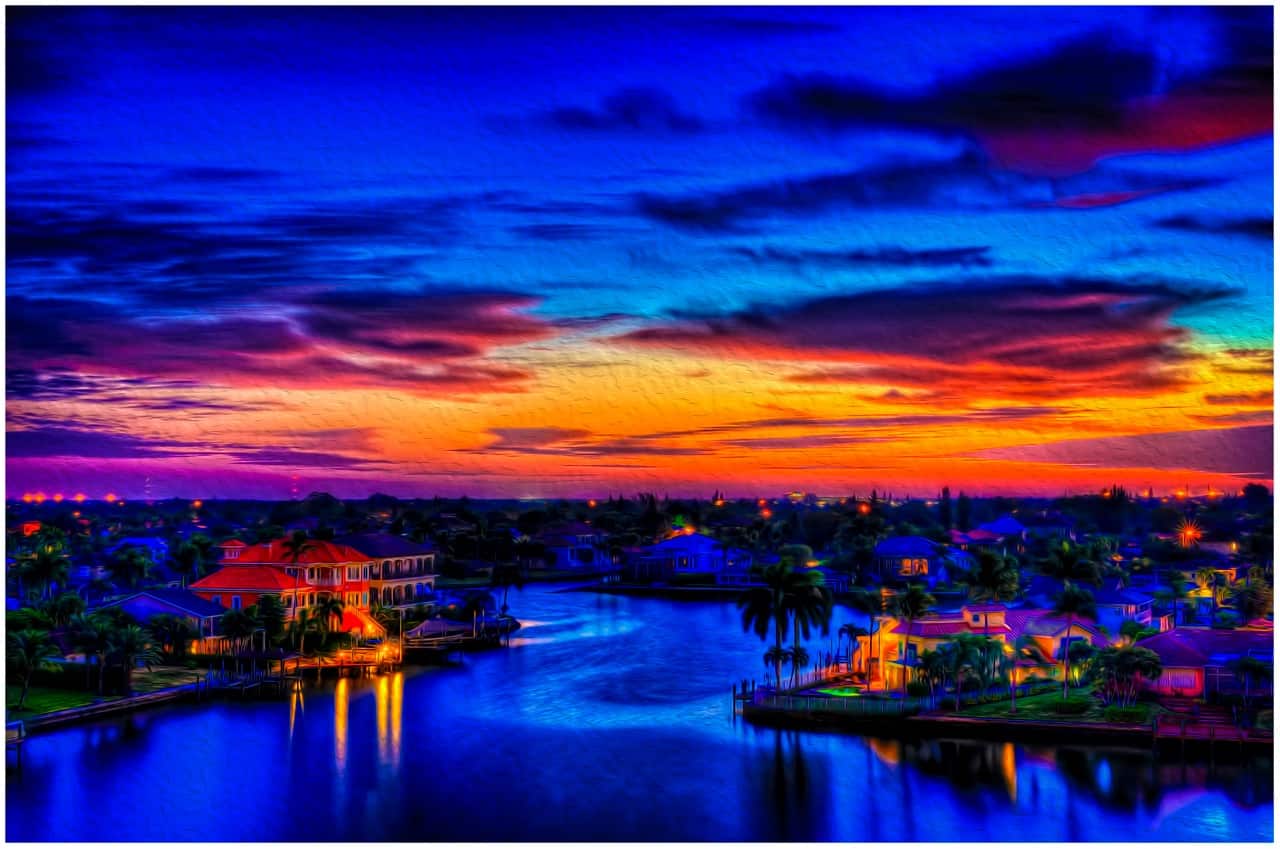
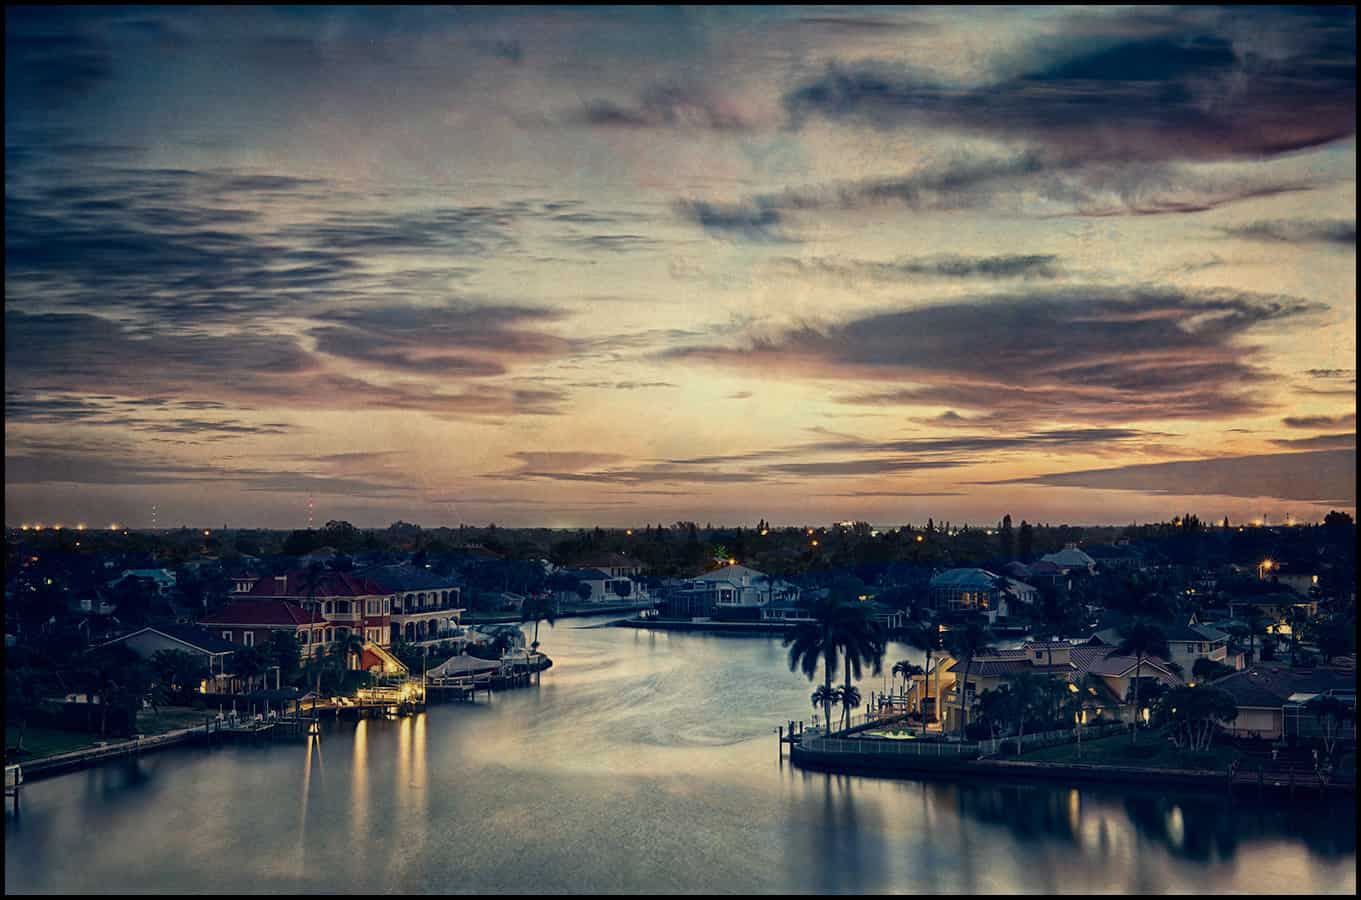
Len Murtha, an HDR Concert Alumni provided us with this fabulous set of brackets to work with. The colors are brilliant and the image is free of any technical flaws! The perfect blend of beautiful landscape and amazing sunset. I am assuming this was a sunset, it is hard to tell the difference between a sunrise and a sunset. Regardless, Len offered us all a great image to work with!
The rules were pretty simple, use one adjustment layer in Photoshop 4 different times somewhere in your post processing. I did this for a reason. When I post process I use the Curves adjustment layer 4 times, twice for the highlights, once for the Midtones and once for the shadows. This combination of control in the local areas gives me a great look and starting place for the rest of my HDR post processing.
I experimented quite a bit to obtain that workflow and thought it would be a good idea to try and get people out of their comfort zone and try experimenting a bit more with their workflow. I would say all were successful, here are the submissions starting with the man who provided the brackets!
Len Murtha
Location: Richmond, VA
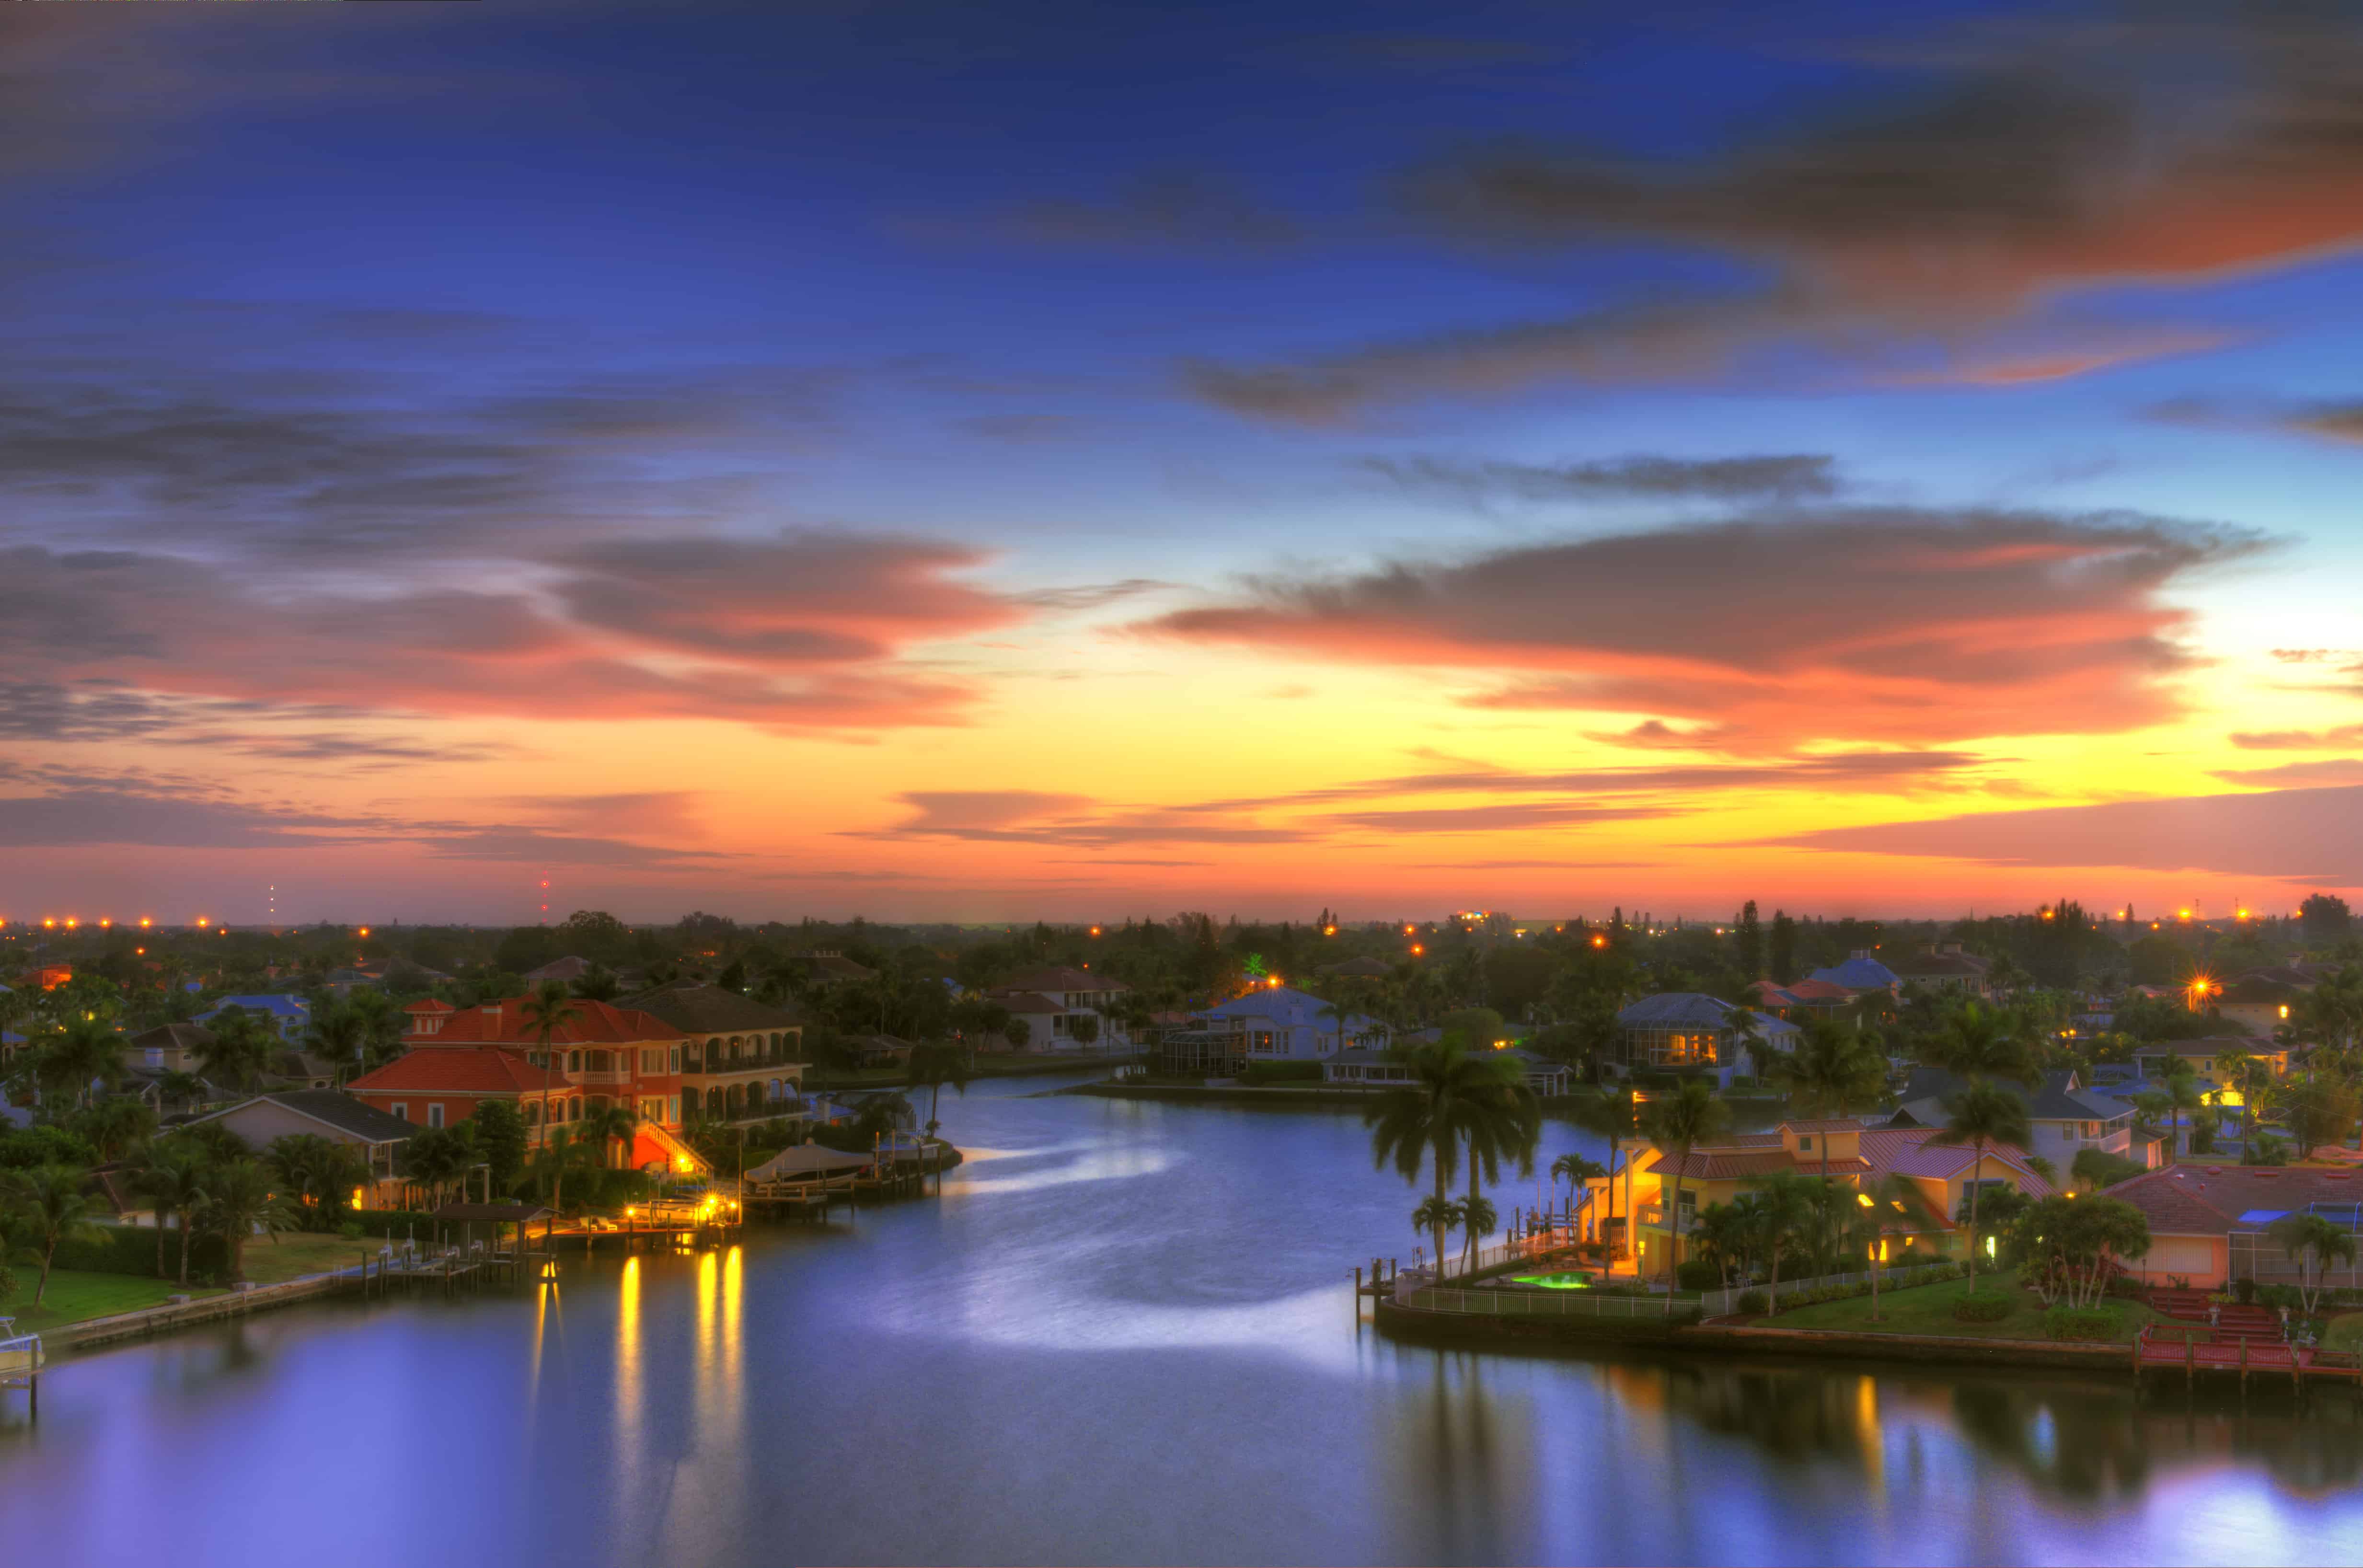
I am a novice photographer that enjoys manipulating photos to express feeling. I shoot with a Pentax K5 and my favorite lens is a 31mm prime lens. I just started this photography hobby in September of 2012 and this photo I contributed for Concert 13 was one of the first photos I took with the K5. It was taken from a hotel balcony in Naples, FL as the sun was rising
Processing Highlights:
- Processed bracket in Photomatix
- Adjusted HDR image in Camera Raw (amped up the vibrance and saturation) and then applied a modest S Curve in levels to bring out even more vibrancy in the image.
- Then I opened the image in Photoshop, and removed the noise through Topaz Denoise.
- Next, I opened the image up in onOne’sPerfect Effects 4, sharpened the image, added a vignette, and a simple white border to give it even more pop.
- Finally, back in Photoshop, I applied an oil paint filter to the image to give it that painterly look.
Where You Can Find Len: NAPP Gallery
Salvatore Amico
Location: France
Amateur photograph since 40 years, from darkroom to digital dark room. Great fan of HDR, as this method show all the beauty of the world. I love spending time in image processing.
Processing Highlights:
- I used Photomatix to merge the raw files with deghosting and chromatic aberrations corrections; save the tonemapped image as a 16 bit Tiff file
- Open it in Photoshop and processed it using 1st Color Efex 4 (white neutralizer tonal contrast and slight fog in the foreground)
- Then I added a level layer for setting the black point
- Another level layer decreasing highlights and increasing the mid point
- Another level layer for setting the red and blue channels
- Another level layer for setting the global RGB
- At the end a slight dodge in the trees.
Where You Can Find Salvatore: salvat17@gmail.com
James Bloodgood
Location: San Antonio, TX
When I’m not doing my IT work or chasing my kids around I really enjoy working on HDR images. I always like a natural look so I tend to shy away from heavily saturated, gaudy looking images. I need to break that habit someday and experiment with more creative post-processing – but not today.
Processing Highlights:
- My HDR workflow starts with tonemapping in Photomatix.
- I start by creating an “ideal” image. I save it then crank up the saturation and save that as a “vivid” version. I then take that original version and desaturate it then crank up the contrast settings creating a strong contrast monochrome version and save that as my “shadow map.”
- I’m too poor for the full Photoshop so I use PS Elements. I paste the shadow map onto the vivid image using the hard light blending mode and lowering the opacity to about 30%. Then the real work begins.
- I next look for any cleanup that needs to be done including defringing which is where I met the requirement for the one adjustment layer four times. The fence in the lower right and surround area had a bunch of color fringing so I created separate hue/saturation layers for each of the colors I was finding as fringe.
- After that I work on noise reduction and sharpening then move to Topaz Adjust and apply filters for that extra pop. I then apply a mild “glamour glow” and mask out the areas that I want to remain sharp.
- I then finish it up with any cropping, if needed, and a vignette, if appropriate, and any final sharpening if there’s too much softness in the image.
Where You Can Find James: Flickr, G+
Steve Woj
Location: South Brunswick, NJ
AMATEUR PHOTOGRAPHER WITH A PASSION FOR SPORTS AND LANDSCAPE PHOTOGRAPHY. I AM JUST NOW STARTING TO GET INTO HDR PHOTOGRAPHY (I KNOW, A LITTLE LATE TO THE PARTY).
Processing Highlights:
- TONE MAPPED IN PHOTOMATIX PRO (A FEW MINOR TWEAKS TO THE THE PAINTERLY PRE-SET)
- 4 SATURATION ADJUSTMENT LAYERS IN PHOTOSHOP AS WELL AS ADDING A LITTLE CONTRAST AND A VIGNETTE
- GRADUATED WARM FILTER APPLIED IN PERFECT EFFECTS 4
- TOPPED IT OFF WITH A CLARITY ADJUSTMENT IN TOPAZ ADJUST 5
- Where You Can Find Steve: See SAW Photogr

Johnny Santiago
Location: Redondo Beach, CA
I’ve been a Freelance photographer for about 12 years now shooting mainly coastlines, Sunsets etc. I love shooting long exposure pictures at night. I like HDR photos if they are done right. I’m trying to perfect the photo realistic look. I’m hoping I can fine tune my skills with this website. My Camera’s of choice are Nikon.
Processing Highlights:
- Layer 1 – Vibrance. I prefer this to saturation. it gives me more subtle color without over saturating the colors
- Layer 2 – Color Look Up. Selected “Fall Colors Look and put it at 68% opacity and masked in back some of the black tones.
- Layer 3 – Color Balance – Tweaked the red’s, blue’s and greens.
- Layer 4 – Selective color – On this is mainly focused on the Red’s. I really wanted the house on the left to stand out since it was the only red house in the picture.
- Layer 5 – Perfect Effects – Detail Brush and Color Brush for fine tuning minor details and make the colors pop a little more on the houses only. I did not touch the sky.
- Layer 6 – Topaz Denoise. I only used the main slider to 0.10.
Where You Can Find Johnny: fotostooge@yahoo.com

Tim Burgess
Location: United Kingdom
I’m a freelance Animator and Compositor . Photography has always played an important part in my work. In the past couple years photography and HDR has become more of a passion and i’m constantly looking to improve
Processing Highlights:
- Raw images taken into Photomatix for tone mapping ,tone mapped image then cleaned up in lightroom 4,
- Imported into Photoshop,
- Brightness and contrast layer added with mask to improve the centre of the image
- Curves Later added blend mode set to Luminosity small s curve to give extra punch
- Black and White layer added set to Luminosity to improve yellows and greens masking back in the syk
- Vibrance layer added to push up the blues and to reduce saturation
- Image copied and softened and masked over image
- Finally sharpened using the Calvin Hollywood method
Where You Can Find Tim: Redbubble

Steve Ebner
Location: Delaware (US)
I’m an enthusiastic hobbyist. Bought my first DSLR 3 years ago. Relatively new to HDR and to post processing in general, but eagerly learning. Just stumbled upon this website and love the concept. I’m especially glad that past brackets are still available for downloading and that everyone shares the techniques they used.
Processing Highlights:
- I loaded the bracket into Aperture and then straight into Nik HDR Efex Pro 2 where I did most of the processing.
- Made a couple focal adjustments in Viveza 2, such as toning down the red house on the left and the palm tree in the back center.
- Used the brilliance/warmth filter in Color Efex Pro 4. Added a couple more light “stars” with Topaz Star Effects
- Noise reduction with Dfine 2.0 and sharpened with Sharpener Pro 3.0.
Where You Can Find Steve: None yet…stay tuned!
Steve Morley
Location: Southern Ontario, Canada
Longtime amateur photographer who enjoys the journey as much as the destination.
Processing Highlights:
- Processed using HDR Efex 2
- Brought into Into Photoshop
- Used Silver Efex Pro 2 for B&W layer
- Blended B&W layer from 3 with HDR Efex 2 layer (35/65)
- Put into OnOne’s Perfect Effects
- Added cloud texture layer
- Added modest split toned layer (red/blue) layer
- Added additional texture overlays using multiply at low opacity
Nick Marzinski
Location: Milwaukee, Wisconsin, USA
Started with digital photography eight years ago, a few months before my oldest daughter was born. Macro, landscape, abstract, and HDR photography are particular interests. I shoot with a Canon Rebel T1i, and have an unhealthy obsession with using Lightroom 4, Photoshop CS6, Photomatix, and a bunch of Nik and Topaz plug-ins to wreck perfectly beautiful pictures.
Processing Highlights:
- Double tone-mapped the image in Photomatix: Once to get most of the image right, and a second time to clone out some blown highlights.
- In Photoshop, I cloned out some distracting elements in the image.
- I used four masked curve adjustment layers to boost contrast in the clouds, water, buildings and foliage.
- After the curves adjustments, the water started to look a bit crunchy, so I masked in a gaussian blur layer.
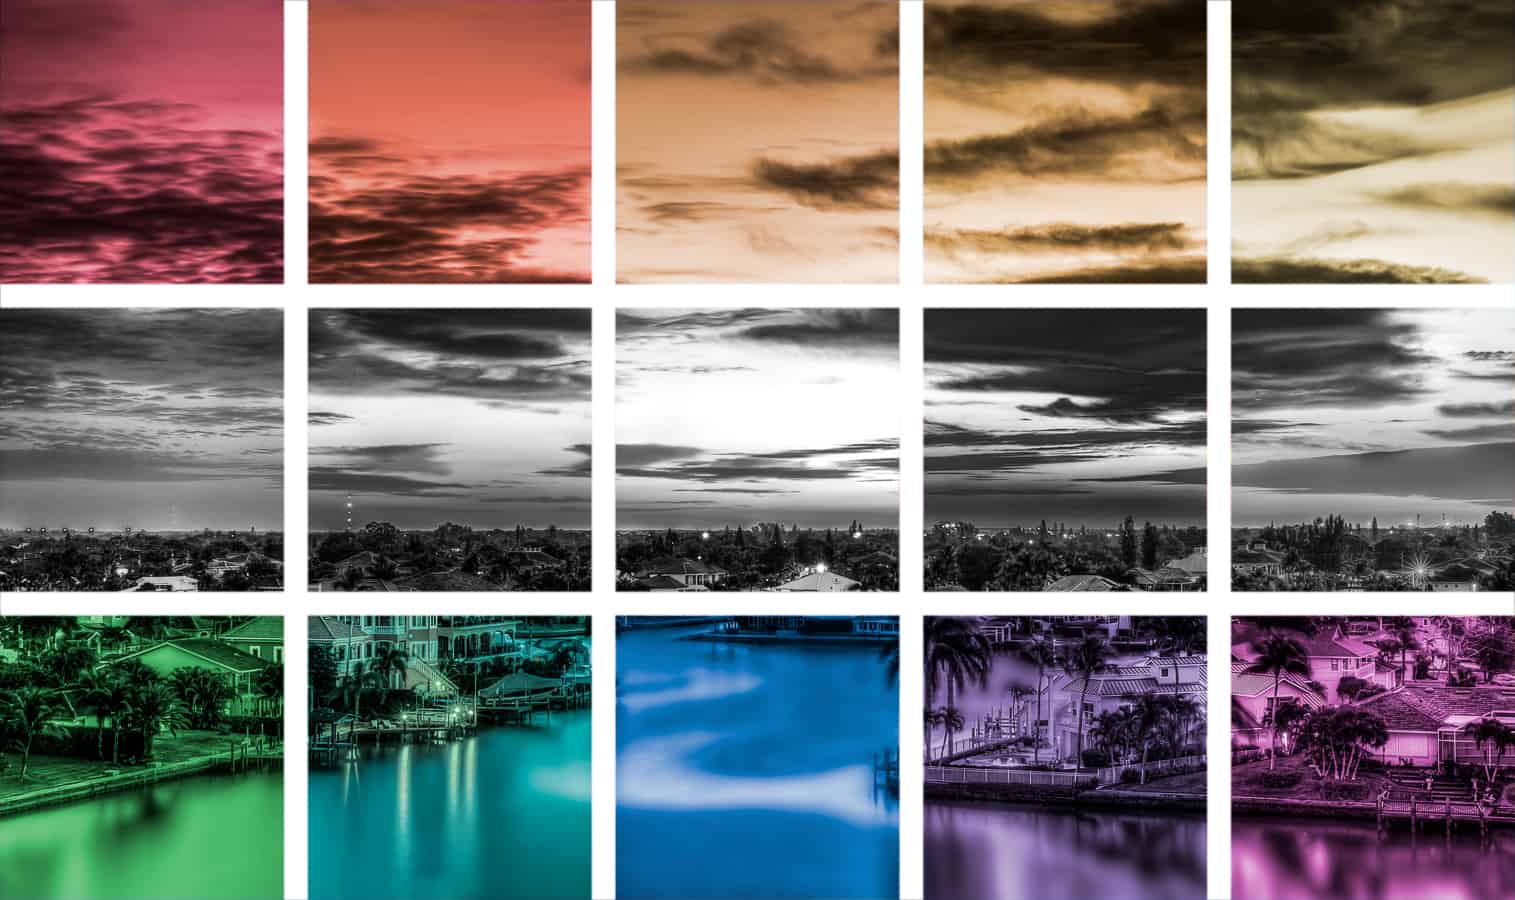
- To get the image to divide into squares, I did some calculations to determine what height/width ratio I needed, and cropped the image.
- I drew guides across the image for the squares, and used 10 masked hue-saturation adjustment layers on the top and bottom rows with the colorize boxes selected. Masking was done with the rectangular marquee tool. Another 5 masked black and white adjustment layers were used on the middle row with different filters applied.
Where You Can Find Nick: Trapping Light, G+
Blake Rudis
Location: Just outside of Kansas City, MO
Avid HDRtist that has a love for everything HDR. I have been doing this stuff for a little over 3 years and haven’t breathed a second without thinking about it since. Addicted, yes, but completely functional I promise!
Processing Highlights:
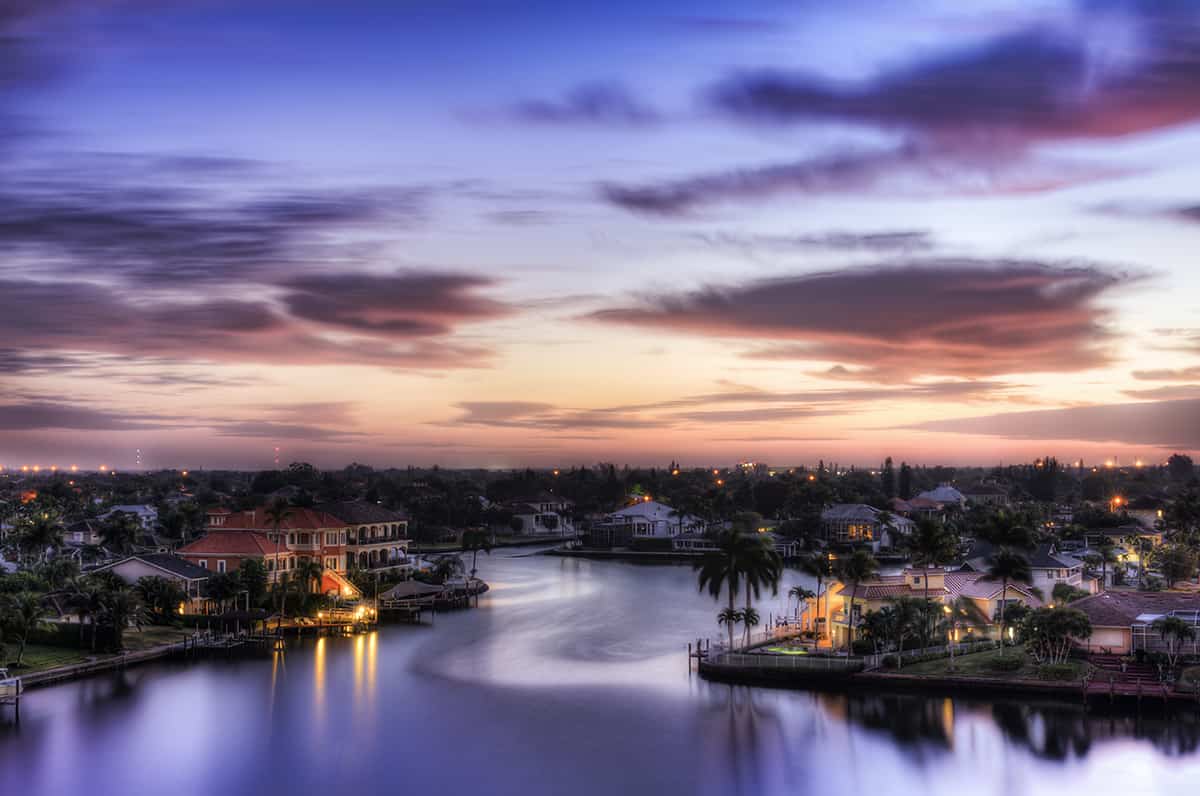
- Mild tone mapping in Photomatix PRO
- Brought it into Lightroom and fixed any noise problems, not a whole lot, the usual RAW noise.
- I also added 2 graduated filters, one for the sky and one for the reflection of the sky on the water.
- From there I moved onto the adjustment brush, selected the water and brought the clarity down to about -70. This made the water appear as if it were taken at a longer exposure reducing the water ripples and dramatizing the shadows. Video tutorial to come!
- I brought it into Photoshop where I selected the Highlights, Shadows, and Midtones independently making a Curves adjustment masked out for each. I heightened the highlights with the curves for the highlights, heightened the midtones with a slight s-curve, and dropped the shadows way down to bring out the shadows that were destroyed by the tone mapping. I used one more curve for the highlights to reduce the color blowouts in the highlights.
- I then applied a slight High Pass filter to the foreground masking out the clouds.
- I topped it off with a Gaussian effect for the Highlights and Midtones only… Video Tutorial to come!
Where You Can Find Blake: Right here on E-HDR, or you can buy my book if you want to support the site!
