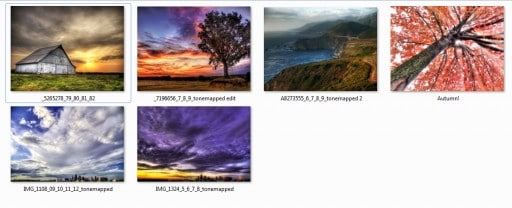
On August 2nd I will be showing my work for the first time in over 4 years! I am a bit timid and excited all at the same time. However, I am more prepared this time than I ever was the last time! I had a horrible experience at the gallery where I showed my work in San Francisco, I will not mention any names, well not at this time anyway 🙂
So in preparing for the upcoming show comes the joy of saving my files for print. There are several ways to save a photo and each one has its own reason. Saving as a 16 bit TIFF for future editing, saving really small as JPEG for the web, and last but not least, saving for print. There are a couple of things to consider when saving your images for print:
- The size of the image and how far you can stress it before it is too much. Typically I will not take a 12 Megapixel image beyond 24″ x 36″, however that does not mean you can’t either. Just remember that the larger you make the print the more risk you run of artifacting.
- The appropriate Crop ratio for the print size.
- The Test print with the company you are using, you may have to adjust the brightness.
- High Pass sharpening.
In this video tutorial I will cover all of the above areas and even show you how to create an Action to increase your workflow productivity to ensure you do not miss a beat when saving your images for print!


Your work is wonderful. Good luck on your show.
Thank you so much Jennie! I t was very difficult to find 6 pieces that I absolutely loved. I tried to find colors that would go well together as a whole. I appreciate you comments!
Thanks this is some good information. When you do your test prints, Do you do the same but use Bicubic Sharper (best for reduction) ?
Thanks Stephen, I appreciate the feedback! When I test print at home I make a small crop of a portion of the image, like a 2″ x 10″ crop and print a very small portion. When I test print with Mpix or an online resource I usually order them in 5×7 but send the large file. I usually order in bulk, I wouldn’t suggest printing one 5×7 because you will pay more for the shipping than the print!
A really fine selection of work and I certainly don’t think you have anything to be timid about with your coming show. Also, much thanks for the printing info. It’s always helpful to get other ideas and pointers on the final print process.
Thanks Daniel. I appreciate the feedback! No matter how confident I am in my work there will always be a pit of anxiety before a show. There is something about putting yourself out there in front of hundreds of people that will always intimidate me. Take care!