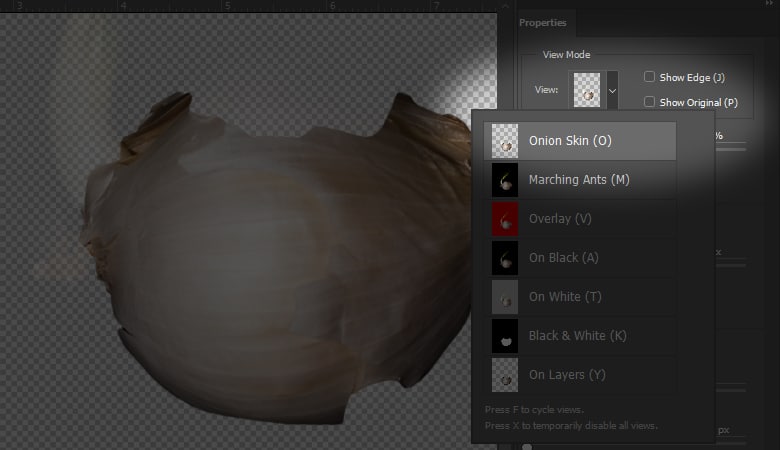
Making great masks with the Select and Mask Tool in Photoshop
With the new Photoshop CC 2015.5 upgrade, Refine Edge is now called Select and Mask. I thin this is a much more suitable name for the tool as “Refine Edge” may have been misleading to some. The new Select and Mask feature looks almost identical to Refine Edge, but it gives you a much better viewing window when you are making selections.
I mentioned that Select and Mask is like Refine Edge, but the new feature adds more functionality. Before PS CC 2015.5 when you made a selection you would click on the Refine Edge tool and use it to clean up the sloppy marching ants selection, and it worked well if you knew what you were doing. Now, Select and Mask allows you to open the dialog first and make the selection from within the dialog with a variety of features, like a sweet new “Onion Skin” way of looking at your image. In Onion Skin mode you can make the selection within the tool and watch you selection peel away from the background.

In today’s tutorial, I will show you how to use the new Select and Mask feature to make incredible masks very quickly. You will notice that I am using a rather easy subject to mask. I am using this image for a few reasons:
- I always shoot my subjects on a white, green or blue background. It makes them easier to composite. Sure, there is always the “Well that’s great but try using this on a tricky background with little teeny tiny hairs everywhere.” comment. Let’s be realistic here! The best subjects to pull from backgrounds are the ones you PLANNED for, not the impromptu “let me pick this girl and her wild hairs away from a background of forest trees” subject.
- Using a simple subject allows me to show you how the Select and Mask tool works more effectively. I could spend 15 minutes on all the features of this tool, or I could spend 15 minutes cutting out a complicated subject and 5 minutes showing you the tool. There are many courses out there for masking hair. This tutorial is not the place for that.
Sweet, now that the explanation is out of the way, let’s look at the Select and Mask tool! I bet you $5 dollars someone still complains that I used an easy subject 🙂


Thanks Blake for another great tutorial. I did find that if you use the refine edge brush when you are in the Select and Mask window (on the upper left side of the screen) that also helps pick up the hair really well.
Excellent. That new feature had me confused.
Very helpful. Really easy to follow and hits the exact right points. Thanks for not doing a complex hair subject – by keeping it simple I was better able to grasp the keys concepts. Thanks – keep them coming as I find everyone useful.
Thanks for this! I didn’t even know about this option. Exactly what I was looking for today!
Another timely tutorial by a terrific teacher! (Alliteration deliberate!)
Not entirely clear how you saved your mask as a channel, but I’m sure I’ll figure it out.
The channel mask, defringe and matting tricks are EXTREMELY helpful, thanks!!!
Is this going to be on YouTube so I can save it as a favorite?
Dave S.
Thanks for watching, Dave! It is embedded from YouTube, already there 🙂
Cool, like that tip about saving your mask to a selection to defringe. I’ll have to rewatch and practice that move, but I know I’m going to like it. Once again another fantastic video.
Awesome! Glad you liked it.
Great tutorial. I will definitely be watching this again and putting it to use.
Excellent tutorial Blake. Love the part of saving the mask as a channel, something I did not know.
Thanks.
Great tutorial this is what I’m looking from the F64 Academy.
What do you think about the issue to use Select and Mask?, I mean when I compare the previous version of Ps and how well the RE worked there! It is also slower then before.
Yeah, I know what you mean. It seems slower than the past. I think they are relatively similar, but I fear I got better results from the older version of Ps.
Found this tutorial to very useful. I will recommend your tutorials to my contacts and students
Great tutorial.All Photographs are looking very good and your captured skill is perfect . I’m impressed after seeing your post .
This is really helpful for me buddy, after long days i found some real thing where included lots of learning material. This post is short but very unique actually what i wanted. And video over here is presented in a very nice way. Excellent job man.
Motivation always influence learner Intention. Great information share here
Really Outstanding post. I love these. It will useful for any new comer and expert guys also. Thanks for your excellent stuff.
wow Really Outstanding post. I love these. It will useful for any new comer and expert guys also. Thanks for your excellent stuff.
Wonderful tutorial about how to use the select and mask tool in photoshop. Thanks for share.
Thanks so much Blake. Great Tutorial.
Thanks for sharing this awesome tutorial. With following these steps anyone can do Masking in Photoshop.
Excellent tutorial Blake. Love the part of saving the mask as a channel, something I did not know.
Such an amazing blog today I go through. It makes my day. Got to know a lot about photoshop. Also got to know lots of tips about the Select and Mask Tool in Photoshop. Thanks for sharing such important ideas and creative tips and tricks that were so helpful for us. I really enjoyed your blog