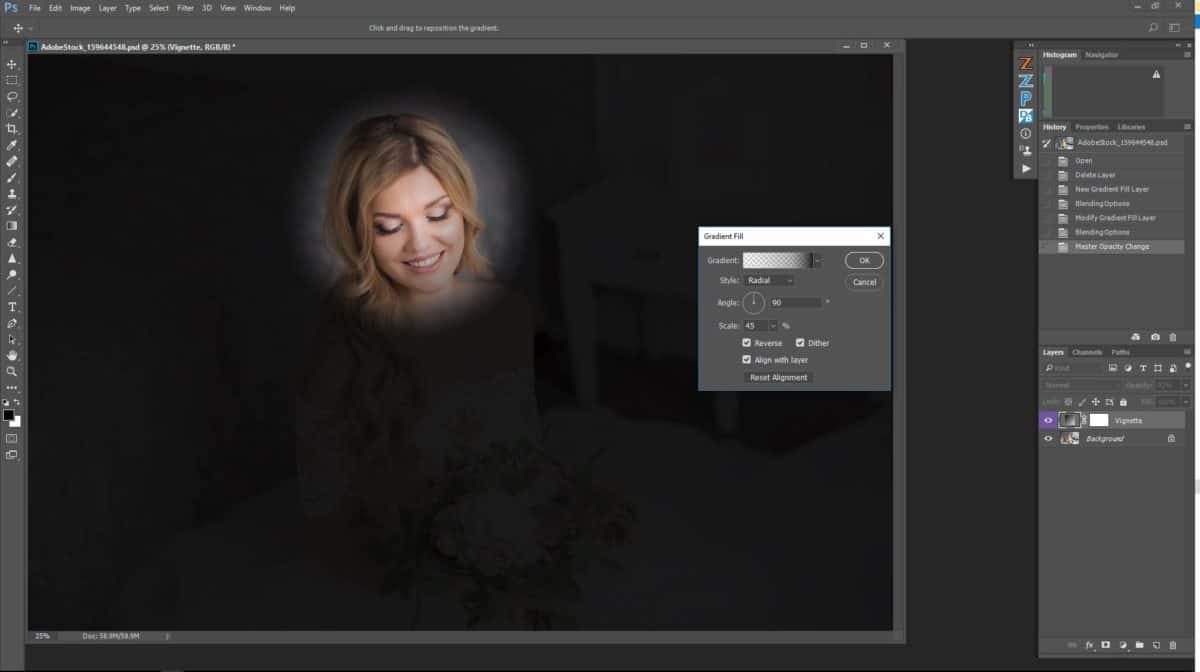
A new kind of Vignette – A Gradient Vignette
I have always used Adobe Camera Raw to create my vignettes, but recently I have been using a Gradient Vignette technique that I love. The traditional vignette in ACR or Lightroom is so restricting. Surely you can adjust the size, feather, intensity, and roundness. However, you can’t use Blend Modes, Blend If, Opacity, Masks, and get this… colors!
Using this Gradient Vignette Technique we will use the Gradient Fill Adjustment Layer to create a fully customizable Vignette. With it, you can set the feather, color, blend mode, opacity and blend if settings. Alternatively, you can add colors for a much more dynamic vignette. While the Gradient Vignette requires a few more steps than ACR or LR, it is much more powerful and worth experimenting with.

By first setting the Scale of the Gradient Fill very small, you can pinpoint exactly where you want the vignette point to be. After moving to the desired location, set the Scale higher to feather it out and look more natural.
In this tutorial, I will show you how to make a Gradient Vignette. I will show you how to change the color and size, set the feather, and use all of Photoshops powerful tools to modify the look. With this technique, you can pin point target EXACTLY where you want the viewer’s eye to go and not just make a vignette that comes out from the center of the frame.
This information comes from a new course I have just completed for f.64 Elite called Photoshop Foundations: Gradients. In this new course, I will show you everything you need to know about one of Photoshop’s most powerful tools, the Gradient. We will take a deep dive into all things gradients. Over 100 Minutes, 72 Gradients, and an Actions Package await!
Learn More about the Gradients Course


Wow! I think I’ll be using this method from now on as it provides tremendous flexibility. Many thanks Blake for another great tutorial!
I am right there with you! Very effective stuff!
Thanks Blake, This was very informative and useful on almost all images! Thanks for sharing your valuable info and time.
It is my pleasure, thanks for watching.
Blake, great inventive tutorial as ever! I have been using your gradient tutorials on highlighting/low lighting certain areas to to attract ones eye into the image. This I apply very subtly so the effect is subliminal.
I never thought of using this process for vignettes.
Of course I now use the Rudis blendif magic on many adjustment layers. I cannot thank you enough for pointing out this ‘hidden’ option.
Onwards and upwards, Blake!
Awesome! That is so great to hear. Blend if is incredible. I really don’t know where I’d be without it.
You are the man. This was very informative. I used to use Nik to control the placement and color but now that is not supported by google I need to learn approaches as suggested here. More time consuming and requires training yes. But this appears to work great. Thanks for sharing. Keep them coming Blake.
With Actions, it makes it so much easier, though. I made an Actions package for the Course on Elite and these will be included in the new ZSE 4.0 that should be released next month.
Amazing!!! Thanks a lot, Blake !!!
Great tutorial Blake. I will use this method from now on.
Just bought your new course “Gradients”. This weekend will be great!!!
Greetings from Brazil.
Great tutorial! Looking forward to using it – a lot!
What a great technique! Thank you.
You are welcome!
Absolutely fantastic, Blake!!
Thanks, Tal!
Once again, you’ve shown a wonderful “geek technique” to broaden our capabilities (and just a bit more work in CS6, but who cares).
One small step for Photoshop,
One giant leap for image enhancement.
Thanks Blake!
I geek out so much in Photoshop!
Will this method be included in the update (in the near future) of your Zone System Express?
Shucks! You figured me out ? yes along with many awesome new things. I am working on the new manual now and the education will follow.
Another great tutorial Blake. You seem to be able to extract/develop parts of Photoshop that I never knew were there! This will work so well with my bird photos.
I just experiment a lot, Paul! It is my job to report those experiments to you so you can keep pressing on!
Wow, Blake! Nicely done! What a Fantastic tutorial!
Thanks,
Dennis
🙂 Thanks, Dennis!
Fantastic as always, Blake. Many thanks!
Vinny
Thanks, Vinny! I appreciate it, as always 🙂
One of those things I always wondered how it was done!!! Thanks so much for sharing!!
Pretty neat huh? Vignettes in Ps can be very powerful.
Blake,
You just keep proving you are the “Photoshop Whisper!” Excellent, as always my Photo Engineer friend.
John
I love that nickname 🙂 Thanks, John!
Well, well! And, here, I thought I had pretty much learned Photoshop! LOL It is tutorials, and juicy tid-bits, like this that keep one learning, NON-stop, in PS! Thank you so much!
Su
Blake: Jaw Dropping. You never cease to amaze me with this Geekie stuff. I will now use this technique moving forward.
🙂 Geekie stuff, I love it 🙂