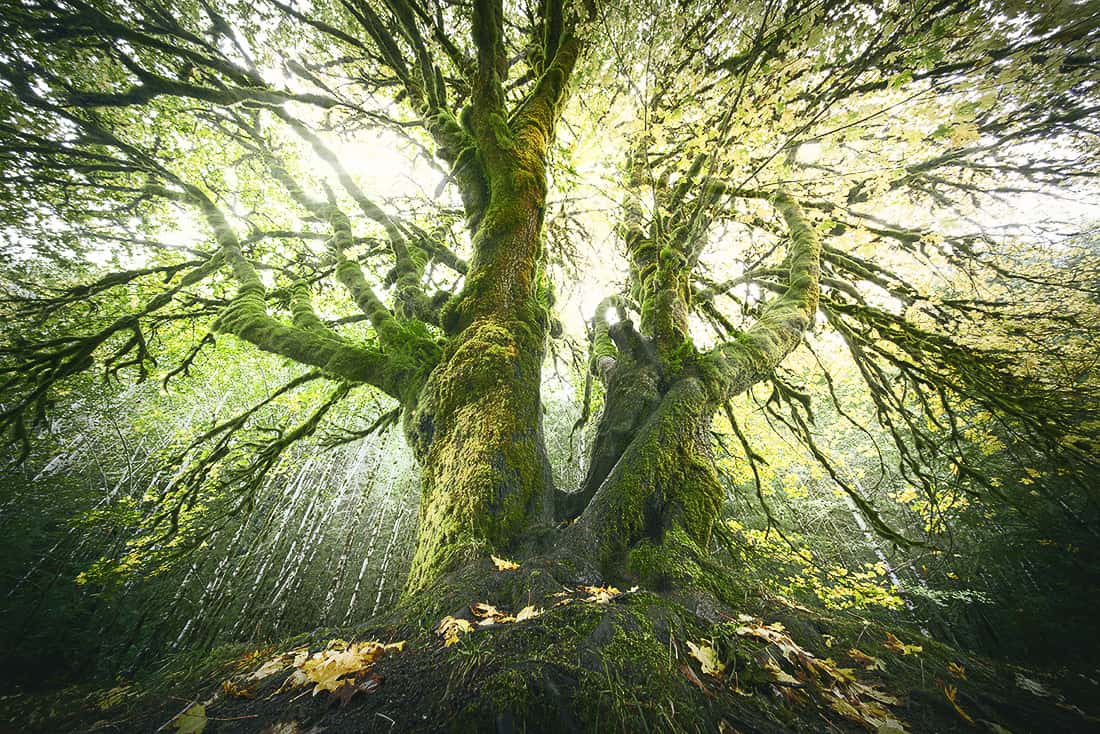
Photoshop is GREAT for Natural Light Rays
There are many programs and plugins you can use to make light rays bursting through your image. However, few have the control over the effect that Photoshop does. Using things like Blend If, or Opacity you can protect specific areas from receiving the impact. One of the dead giveaways that a filter was used is a contrived look that happens when shadow areas do not show through the bursting light effect.

In this tutorial, I will show you how to fake the look of sun rays bursting through a tree’s canopy. It is beneficial for this type of image, but keep in mind that not all photos are created equal! Some pictures will look fake even when you do put forth the effort to protect your shadows with Blend If.
I have included an Action and a Video Tutorial below, but here are the steps in written form as well.
1. Make a stamp of all of your work by pressing CTRL+ALT+SHIFT+E (CMD+Option+Shift+E on Mac)
2. Go to select in the menu bar of Photoshop, then navigate to Color Range
3. Choose either the “Sampled Color” and make a selection with the eyedropper for the highlights, or choose “Highlights” from the drop-down.
4. Use the Fuzziness and/or range to dial in those highlights just right
5. When you press okay Photoshop will output the selection with the “racing ants.”
6. Make a mask on your Stamped Layer for the newly selected Highlights.
7. Drag the mask to the trash and when prompted select “Apply.”
8. Go to Filter > Blur > Radial Blur
9. Set it to Zoom, and Best, and drag the slider as far as it will go to the right. Press Ok.
10. Open the Blending Options Dialog by double-clicking next to the text of the sampled layer.
11. Use the Blend if slider to protect the shadows. Pressing Alt or Option will allow you to feather the effect.
12. That’s it! Now you can lower the Opacity, Duplicate the Effect, or optionally Gaussian Blur the Effect for a more hazy approach.
Download the Light Rays Action


Outstanding tutorial Blake! Thank you.
I really appreciate not only the what, but how you teach.
awesome! Thanks so much, Brian!
Great tutorial, Blake. I have printed your written version of it, so I can practice. By the way, this tree is really fantastic. With some friends we did light painting, which turned out very nice. As US 101 runs right behind the tree, the lights of passing cars give it a wonderful composition.
I have a question. I have an image of a scene where the sun (out of the frame to the left) hits the top of some larches and illuminates some yellow cotton trees at the lake. How can I simulate some wispy light ray hitting the trees on the ridge and on the lake?
Awesome idea! I was there in the afternoon so I couldn’t light paint 🙁
You could use the same technique, but at the Blur part, move it to the upper corner and be more selective about where it hits with masking. It would be a good idea to Gaussian Blur it also.
Great video, Blake! This is by far the best technique I have come across for creating realistic light rays (and I have seen and used several).
You’re the inspiration that makes f64 Elite such a valuable learning experience!
Thank you!
Awesome! Thanks for the great feedback. I like this one because it uses the highlights to make a natural looking light ray. There are many methods out there though. All worth trying at least 🙂
Very interesting and impressive method – LIGHT RAYS in PHOTOSHOP.THANK YOU BLADE.
I kind of liked it more when you didn’t protect the shadows. I guess what I’m really after is that look that you get when streaks of light come through a humid or dusty atmosphere, like through the trees in a forest.
Sure, you could leave it without protecting it if you wanted that look.
Hi Blake, Great tutorial as usual…
I have accidentaly checked the box “don’t ask me again” when Photoshop asked for applying the layer mask. Do you know where I can find this setting please?
Thank you
That is a tricky one. I am not sure how to do that actually. It may be somewhere in your preferences. There might be a reset button for defaults like that.
Yes Blake, command K brings up preferences and you see the dialog box that reads Reset all dialogs.
Also another way is to invert the selection on the image and delete the actual pixies, it gives the same result
Cheers
Another excellent tutorial!
Question, does the ZSE and PE work with Affinity Photo?
Thanks Blake!
Thanks! No, Affinity does not allow 3rd party programmers to make plugins for it like Ps does. At least, not that I know of and if it does, it is probably different in production.
I like this!
Thanks!
Thank you for another wonderful tutorial!
Thanks Blake for a great tutorial. I especially like and prefer your writing out the steps to the action. It allows me to follow and remember easier. Keep up the great work.
So totally cool, Blake. Damn! I’m definitely learning a ton from your vids. Keep ’em coming! Thanks.
Thanks again for your sharing! Do you have any other name for light rays? Sometimes when I do aerials I get some natural light rays through the clouds. Some people call them Glories and Something like Kapersky …have you heard of these names?
I have heard them called God Rays as well
You never fail to impress!!
?
You just have a way! I like to understand why to do something, also. It becomes like second nature when you know why it is happening. You have this art mastered, my friend! Thank you!