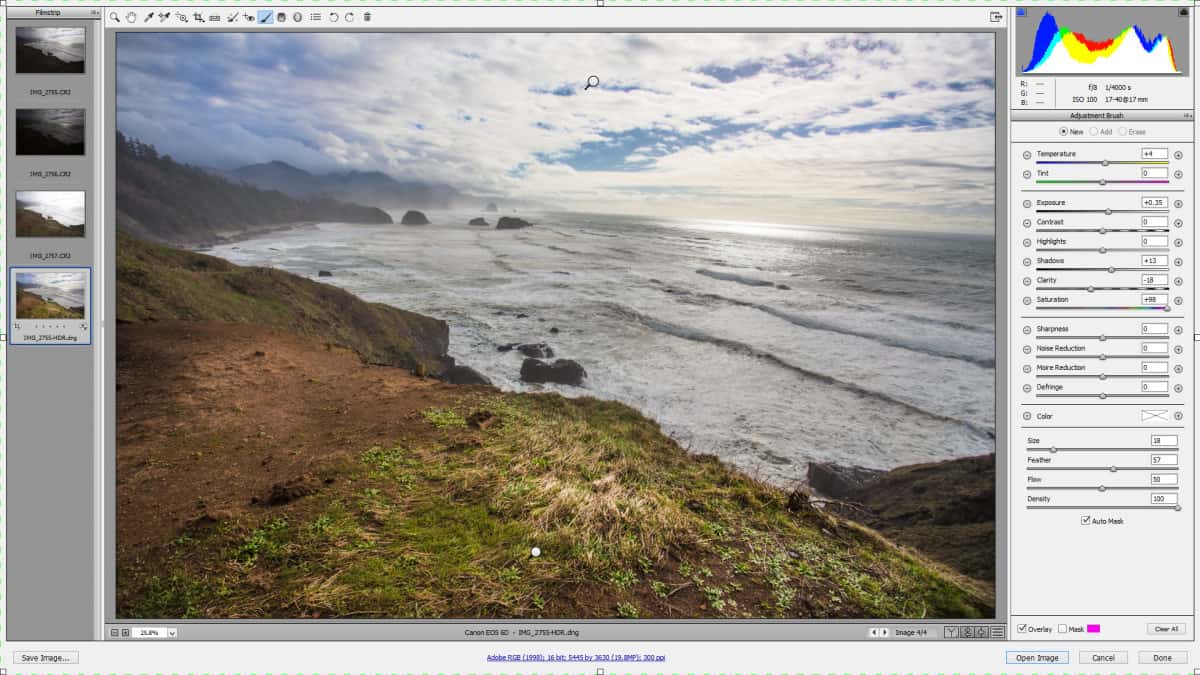
HDR in Camera Raw Rocks!
Lightroom received a lot of hype and hoopla over the awaited merge to HDR in Lightroom without going into Photoshop, which is a great feature. However, Lightroom is not the only Adobe product that received a makeover a few weeks ago. As many know Adobe Camera Raw (Photoshop’s Raw editor) is identical to Lightroom’s Develop Module. Typically if anything changes in Lightroom it changes in Adobe Camera Raw as well.
After the hype of Lightroom receiving HDR capabilities I received a plethora of emails wondering if I was finally going to make the jump to Lightroom. Before I considered it, I checked out the new Adobe Camera Raw 9 in Photoshop CC 2014 just to make sure the capabilities were the same and sure enough, they are! I think I can hold out on using Lightroom for at least a few more years 🙂

A few key Points here:
- This is not the same as Merge to HDR Pro in Photoshop. Merge to HDR Pro yields a 32 bit HDR image.
- Adobe Camera Raw produces a 16 Bit .DNG (Digital Negative File) to hold all of the HDR Data.
- I have not seen any significant difference in the 16 bit and 32 bit processing. As a matter of fact I ran this image in the tutorial through both the 16 bit and 32 bit process and saw no severe differences.
- Remember to utilize all of ACR’s capabilities when editing an HDR image. For example, Chromatic Aberration reduction, Noise Reduction, The Adjustment Brush, etc.
Check out this tutorials on how to merge to hdr in Adobe Camera Raw
Like the style of this tutorial? You will LOVE HDR Insider! Full-Length HDR Workflows, Critiques & More!
[hcshort id=”9″]


I like to see a comparison of Lightroom/ACR HDR vs. Photomatrix vs. HDR Efex Pro – which one create better results, pros/cons of each etc. And whether Lightroom HDR is good enough to dump 3rd party tools.
I think they all have a place in the workflow and all do something different therefore one could not be dumped over the other. For instance,
ACR, Lr or Ps will create a natural looking HDR image that needs a lot more work to make it better.
Photomatix is great for an edgy look and even a natural look if you are careful with it with the best capability for batch processing.
HDR Efex Pro is great for editing one image at a time because it can create stunning results, but it cannot batch process like Photomatix.
If you were to dump one or more that would be up to personal preference as I believe they all have a place somewhere.
Blake, I have not seen you mention the little buttons on each side of the top of the histogram in ACR. Clicking them on allows ACR to highlight where there is actual black and actual white in an image. I realize you can do that with the Alt key, but leaving the little buttons checked seems more convenient to me. For most images, the first thing I do is to be certain that there is actual black and maybe white in an image. Doing that, I seldom touch the “contrast” slider.
I usually use the Alt keys. I show that in a lot of tutorials. I used to do it every time, however, I have become comfortable with using the Histogram as a visual that I forget to show the alt keys sometimes! oops!
Thanks, Blake. I think I am going to give this a try with my next set of images instead of Photomatix.
Great tutorial as always and thank you for all you do for all of us.
Vinny
It is definitely worth the try Vinny. You are welcome, but it is always my pleasure!
Blake: I know you are extremely busy with your seminar and blog but I need some advice. I am going to invest in a new camera & lenses with a budget of $3K or $3500 at the most. My primary interests are wildlife (birds of prey) and landscape. I want to include 2 zoom lenses. Probably Sigmas 70-300 & 150-600 as they seem to have adapters for all the major brands of cameras. These are the hopes until I’m disabused of them. 😎 Looked at Sony 7a II. Seems like there are some issues. Any help will be greatly appreciated.
Keep up the good work.
Thank you,
Jim Buckley