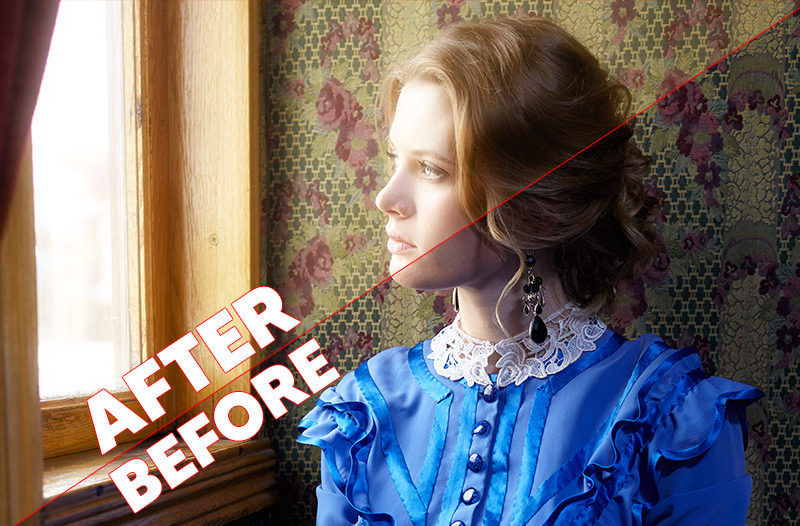
Ever wonder how they get those awesome dreamy/creamy highlights in movies and TV shows?
It’s a little magic trick called diffusion and it usually requires a special and expensive filter (or set of filters) for your lenses. However, there is an incredibly fast and effective way to get all that glorious diffused light in Photoshop.

As you can see in the before and after image above, Diffusion can add a dreamy and subtly creamy look to your photo. What is happening here?
Essentially the highlights are being exploited and blurred to cut the harshness of the shadows. The effect helps reduce harsh contrast and makes the subject a little more approachable.
The base of the diffsusdion effects is incredibly simple to create. From there you can add and build up on it. To start the Diffusion Effect follow these easy steps:
1. Duplicate your image or make a stamp above all your work.
2. Set the duplicate layer to the SCREEN blend mode. The screen blend mode will make the image brighter, effectively exploiting the highlights.
This technique works for EVERY genre of photography from portraits to landscapes to architecture and wildlife. It’s worth a bit of experimentation to see where this technique can fit into your finishing effect workflow.
Video Chapters
00:00 Intro
00:45 What is Diffusion
01:20 Diffusion Base in Photoshop
03:33 Modifying Diffusion Tones
05:10 Adding Color to your Diffusion Look
06:45 Using the Actions Blake Created
10:13 Using a Mask to Remove Diffused Look
Experiment with this technique today!
Click the button below to gain access to the Actions package shown in this video tutorial. Push-button Diffusion is at your fingertips with these incredibly easy-to-use actions.


Tried in one of my portrait ,absolutely love the amazing effect.
Thanks a lot, Blake for the action and for the knowledge shared here.
Murali
I just tried to download this action set but the page is not found. Is it still available?