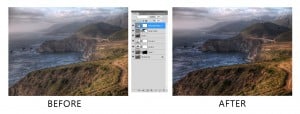
Last week I showed you how to process your multiple exposure image for HDR in Photomatix Pro 4.0. This week I will show you the basics of post processing In Photoshop CS 5.
httpv://www.youtube.com/watch?v=cPOzk0j4eGY
There are several thousand ways to post process an image. This is my workflow at it’s basic state, you are free to play with your images as you see fit.

f.64 Academy and f.64 Elite are the brainchildren of Blake Rudis. While he is a landscape photographer, he is most passionate about post-processing images in Photoshop and mentoring others.
For Blake, it's all about the art and process synergy. He dives deep into complex topics and makes them easy to understand through his outside-the-box thinking so that you can use these tricks in your workflow today!


Blake,
Thank you for sharing your work flow. This is exactly what I was looking for. I really like your technique for reducing noise and adjusting the picture’s alignment with the ruler.
Thanks Bibek, I am glad it helps. I have a ton of tutorials for post processing your work in the “Tutorials” section of the blog on the right hand side under “Categories”. Those should help in the future as well.
Blake,
Awesome tutorial! When you were checking your horizon you pulled down a line (level line?) from the top of your photo to check your plane. How did you get that line to appear? Thank you Blake and have a wonderful evening.
With Much Respect, Tal Pipkin
Thanks Tal,
Those are called Guides, you can make them very easily by pressing Control+R (CMD+R on Mac). This will toggle the rulers on your photo. Once the rulers are visible you can click anywhere in the ruler and drag it down for a horizontal ruler or go to the left of the image and click and drag into the image for a vertical guide. If you want to toggle them on or off you can press Control+H (CMD+H).
Take care Tal!