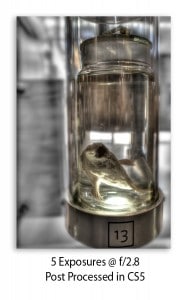
As promised, the tutorial for the “Lucky… 13” image posted on September 27. Masking is a crucial tool with Photoshop, if you are unfamiliar with it, the best thing you can do is get acquainted with it! I am not talking about speed dating either, you have to devote a lot of time and attention to it and get good at it. This is more than a one night stand type of tool, for best results, spend some time with it, and get to know it before you go all the way! With a little practice you will find it is Photoshop’s most powerful feature!
The Selective Color Technique Using Layer Masks
- Process your desired HDR image.
- Open the image in Photoshop.
- Duplicate the background image. We will do all of our editing on this guy so we can always go back to the original if need be.
- Run the typical layer adjustments. Refer to Two Beginner Post Processing Techniques for help.
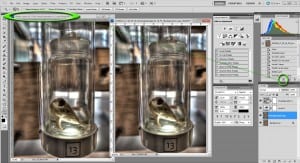
- Now we are going to open the state that we are in, in another window in Photoshop. To do this hit the button in the History Palette highlighted in Green as shown:
- We are going to desaturate the state we just created.
- Flatten newly created file, ctrl+shift+E on PC, Cmnd+shift+E on Mac.
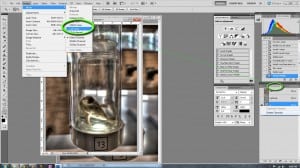
- Go to Image>Mode>Lab Color.
- Then select Channels in the Layers Palette.
- Click on layer A, hold shift, click on layer B.
- Right Click on A or B and select delete channels.
- Go to Image>Mode>Grayscale.
- You now have one of the best methods of converting an image to black and white. I learned that at Photoshop World! Those NAPP members are insane Photoshop Guru’s!
- Copy the Desaturated image back into the original file, or simply drag it and drop it in with CS5 (I love the time saving features of CS5)
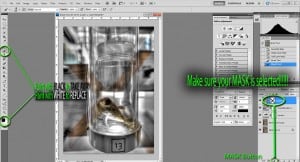
- With the desaturated layer selected, click the Add Layer Mask Button in the lower left of the Layers Palette
- This will add a blank box next to your image.
- If you paint with black it will take away information from the layer.
- Paint with white and it restores it!
- This is a non destructive way to take away portions of an image without necessarily deleting them.
- For demonstration purposes I painted an X in BLACK, notice the change that took place on the layer. I will restore the image bu painting those areas with white prior to moving on.
- I am going to carefully paint black in the areas I want to be subtracted.
- If I make a mistake I will switch to white, you can go ahead over to the palette and change to white….I will press the (x) key to swap from black to white on the fly! I suggest you do that too, the changing at the palette thing is silly, just plain silly!
- After I carefully painted the layer with black, I noticed the background was still popping out and taking away from my focal point.
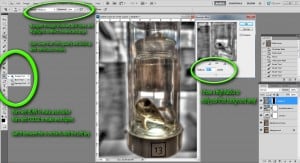
- I chose to apply a Gaussian Blur filter to this layer.
- Notice how it doesn’t effect anything beneath the void of painted black? That is the power of masking! Harness it! Love it!
- I also noticed the Shadows on the Desaturated layer were rather distracting from the fishy in the tube.
- I decided to Dodge and Burn the image to get a more striking focal point.
- I selected Shadows in the tool bar and about 15-18% to start on the opacity.
- With Shadows selected, the Dodging or burning will only effect the Shadows, likewise for the Mid Tones or Highlights. In this case I Dodged the shadows out to make them less prominent.
- I then switched to the background copy and Burned some of the shadows in to heighten the contrast in the foreground.
- Compositionally, I felt the image could use a tighter crop. I usually do this in camera, but every once in a while I slip, we all do, but that is why we post process!
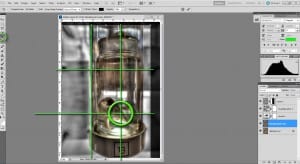
- Select the Crop tool and find your composition.
- Another why I love CS5 moment, the crop tool has the rule of thirds incorporated in it. This may have happened before CS5 but I went from CS 8.0 (circa 2003) to CS5, bare with me!
- I put the fish on the lower right point. Typically you want to offset your focal point, not all the time, but it is a very useful technique to keep your viewer interested.
- And there you have it! “Lucky… 13”! Desaturated and loving it!

