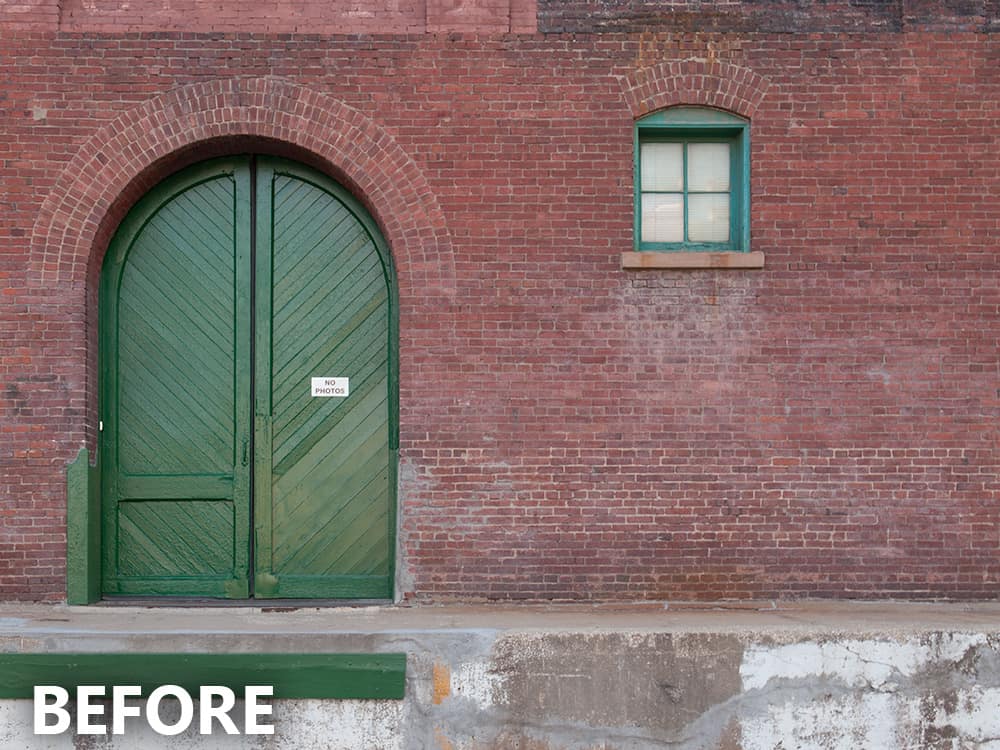
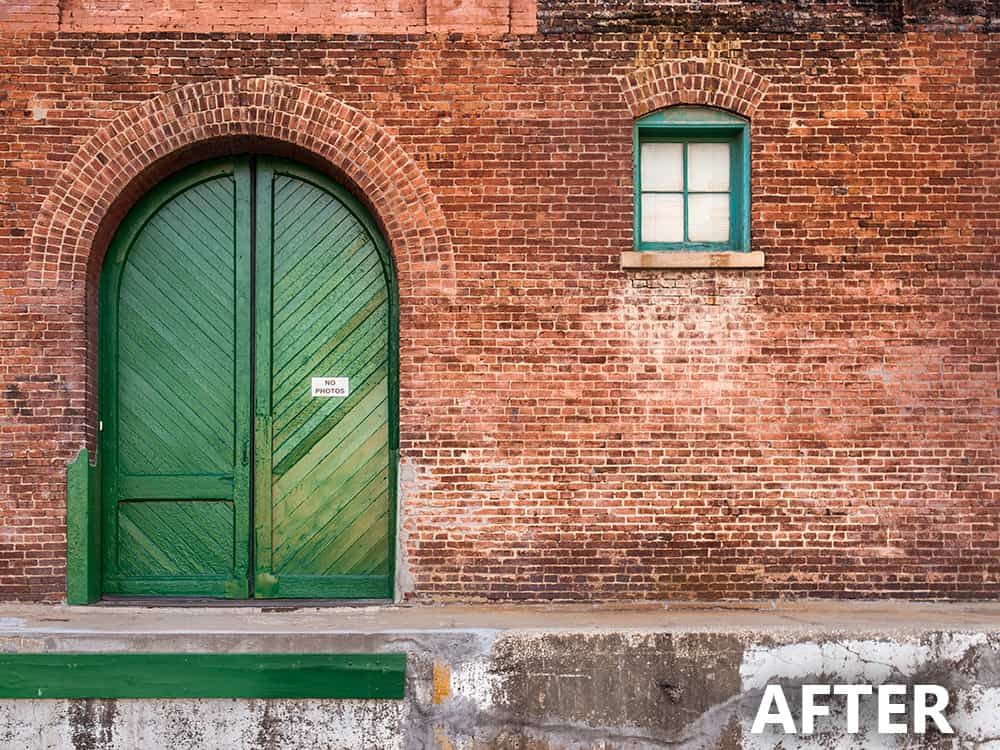
Tone Mapping Meets Painting
Recently on HDR Insider I showed a full length workflow tutorial on how to make a great HDR image from a single exposure. More often than not, we get way in over our heads with HDR processing that we forget that sometimes all you need is a single exposure to make an HDR work of art.
During the Insider tutorial I showed a pretty cool technique that I stumbled upon during the recording. You can paint-in HDR elements in your image with Adobe Camera Raw (I am using CC, this should also work in CS6). Yep, that’s correct, you can paint in the areas you want to look “HDR” in your image with some selective tone mapping in ACR. It requires the use of the adjustment brush and the finessing of the masks within it. This is such a powerful technique that I know I will use time and time again.
Like the style of this tutorial? You will LOVE HDR Insider! Full Length HDR Workflows, Critiques & More!


Fantastic! Amazing how much can be done just in ACR. I never realized this. As always, this was very informative and worthwhile. Great tutorial!
Many thanks,
Vinny
Thanks, Vinny! It sure is powerful, but I had no idea it was this powerful!
Thanks, Blake, this was really interesting! I don’t think I’ve been getting the best from Camera Raw, but really want to have a go at this.
Thanks! I know I was pretty floor by the results myself!
UNREAL! I had no idea how much can be accomplished with ACR. Great tutorial! I like plug-ins but I prefer to learn how to accomplish more manually. Definitely is going to be more a part of my workflow than it already has been.
Pretty sweet, huh? I agree, plugins are great because they make these things easy, but I am a firm believer in figuring it out on your own in the resources you have available. Most times you have more control that way too.
Thanks for another great tutorial Blake! Had to LOL at the “No Photos” sign…You are a rebel! 🙂
🙂 HEHE, that screams, “Take my picture!”
It’s the extra touch of refinement That can make an image come to life. Thank you for sharing.
Very true! You are welcome!
Very interesting. ACR doesn’t show layers. Could we do a snapshot to record process?The follow-up tutorial shows the layers that have been added. Then how about doing actions for creating duplications?
Keep it coming, Blake!
You are correct, ACR doesn’t do layers. You also can’t really do an action for this either. It is limited to one photo at a time.
Hi Blake, thanks again for your tutorial.
Regarding layers, create a new layer than go to Filters and use the ACR filter…
thanks again
Ah yes! That is possible for those with CC and a very effective technique. Another reason why it is worth the 9.99 per month for Photoshop CC, ACR as a filter is amazing!
Hi blake
and the ACR filter in Ps is even useful if you use it as a “smart filter” and as a layer you can use masking. So like you, I don’t use the develop module in LR, for ACR has the same functions, directly in PS.
I’ve learned a lot from you…
Thanks
That is true. ACR as a Smart Filter is definitely the way to go if you will be doing a lot of work to the image.
Blake I just suscribed to your HDRInsider. I have 2 questions:
1. The selective tone mapping with ACR could also be done with Lightroom? It would be great if you do a video of Selective Tonemapping with Lightroom.
2. I only know to open ACR as a filter in PS CC. Could you open ot directly without opening PS?
Awesome! Thanks for signing up!
1. Sorry, I don’t own LR, I find it difficult to sync with. I use Bridge PS. If LR has an adjustment brush it should be identical as ACR is the same as LR’s develop module. If LR has the adjustment brush, you should be able to do it as well.
2. To open .TIF or JPEGs, go to Edit > Adobe Camera Raw Preferences. At the bottom under TIF and JPEG management, change the TIFF to open all supported TIFFs and they will open in ACR. Raw files should auto open in ACR as well.
Mario,
Lightroom’s Develop module is a front end to ACR. So what you can do in ACR you can do in Lightroom’s Develop module (mostly). Try this and see what you think: open an image in Lightroom and go to the develop module (D key) and select the brush. Next to Effect: is the menu to select from presets you already have. Pick one, it doesn’t really matter, because you’re going to change the sliders below and then once you have the effect working like you wish, you’ll open the effect menu again and at the bottom, select Save Current Settings as a new preset and give it a name, like HDR Effect.
Anyway, here are the slider settings to use:
Exposure: 0
Contrast: -5
Highlights -70
Shadows 40
Clarity 40
Saturation 10
Feather to 100
Flow to 50
Density to 20
Try brushing some clouds and some buildings or whatever you have to work with and make sure it’s doing it gently. You can adjust the sliders to suit, and even when you save them, the next time you open your new preset, you can adjust flow and density and feather and size for the image to increase or decrease the effect as needed. You can always tweak the settings to suit and resave later if you find you are using a particular set of slider settings.
These are also available for all the local adjustments, including circular gradient and gradient tools.
Hi Blake,
I have seen that technique a few times before but every time I am watching your webinars I consider myself lucky to learn a new twist there. This time
it was the two brushes working together.
So keep on going. I am looking for your future webinars.
Thanks,
Eitan
I’ll keep them coming! Don’t worry! The two brushes working together is the key, you can really ramp up the effect!
Thank you for the time your spend getting information and education out. I use LR as I also subscribe and happily pay Adobe the $9.99 a month to have the latest and greatest. I was surprised to hear that you do not use LR, I am teaching myself LR and PS and will make sure I have a journal of this manual technique as this is awesome. Thanks again
Not a problem Tanya! I have the $9.99 subscription for CC and have access to LR, I just haven’t installed it. I don’t like how it wants me to setup a library and wants to micromanage how I import my photos. I find that frustrating. So I use Bridge and Photoshop which is essentially the same thing as LR. It’s just a personal preference.