
Flash Tutorial Friday! Instant Color Grading
Color Grading an image does not have to be a convoluted process. As a matter of fact you can do it faster than it takes to cook Uncle Ben’s Rice in the Microwave, you just need to know the basic steps to do it.
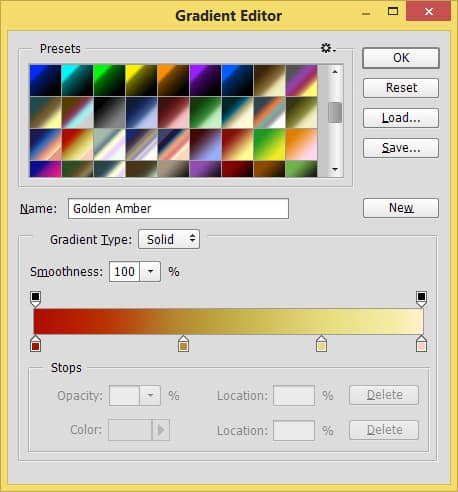
Color Grading can be done in many ways, but one of the fastest and easiest ways is to use the Gradient Map. This allows you to define the colors that will be applied to your Blacks, Midtones, and Whites.
The Basic rundown:
- Create Gradient Map Layer
- Set Blending Option to Color, Soft Light, Overlay (dependent upon the effect you want to achieve)
- Set Opacity to 0
- Slowly increase Opacity to taste
- Click on the Gradient to change colors at your leisure until the best option for your image is selected.
This is a very quick tutorial on Color Grading. If you need a more thorough course on Color Grading I have a full 45 Minute Course available for you in the Prerequisite information below.
Prerequisite Tutorial:
-
The Tonal Grading System: 45 minutes of Color Grading, to include my custom gradients.
Like the style of this tutorial? You will LOVE HDR Insider! Full-Length HDR Workflows, Critiques & More!
![]()
[hcshort id=”9″]

f.64 Academy and f.64 Elite are the brainchildren of Blake Rudis. While he is a landscape photographer, he is most passionate about post-processing images in Photoshop and mentoring others.
For Blake, it's all about the art and process synergy. He dives deep into complex topics and makes them easy to understand through his outside-the-box thinking so that you can use these tricks in your workflow today!
For Blake, it's all about the art and process synergy. He dives deep into complex topics and makes them easy to understand through his outside-the-box thinking so that you can use these tricks in your workflow today!


I like your concept, but I need to have my wife pick out my clothes so that I match colors correctly. Is there any system that gives you a starter color and then shows all the matching colors for your starter color?
I am concerned that with my poor color matching a garish outcome would happen if I follow your method. What is out there to help me match colors or colors that compliment others?
I understand completely! I use the Color Wheel to help me with that. It all relates to Color Theory and the concepts of the Complement and Split Complement. I cover this extensively in the Color Zone System Course . However, here is a free Color Theory Course that may help as well:
https://youtu.be/dcrJXAZQywQ
Just wanted to say thanks – a good tutorial on quick color grading. Also you did well with the “quick” part – I have done a few tuts myself, and it’s always hard to keep the time down. Well done Sir, and thank you for taking the time.
Sweet! Thanks James! I appreciate the feedback from a fellow teacher 🙂
Wow, you have got a winner with the under 3 minute tutorials. Keep them coming as I am learning so much so quickly. Your friend from Alaska
Woo hoo! I am so glad to hear that!
Great quick tip Blake. Gonna have to give this a try.
Do it! it is simple and you will love how effective it is!
Very good tutorial. Quick and to the point. I like the idea of bringing the opacity down to 0 and them slowly adding the effect. Now this effect is starting to make some sense.
Oh yeah! Very similar to Topaz Labs ReStyle. It is a powerful program but it has to be used from the 0 on up instead of starting from the top.
Wow you make this look so easy…and well it is…it is so easy I can even do this ….and it is fun . Love these short tutorials…
🙂 Yesss! Mission accomplished!
Speed learning! I love the approach and the content. Many thanks.
Vinny
🙂 I am loving these quick ones, a lot of fun!
Looks an interesting concept. Something I will be saving for future use.
Sounds good!
A quick note to thank you for the free tutorials. I am a poor photographer and find it hard to purchase your tutorials but someday yes. I would never attempt to tackle editing without your help. Thanks Again
Frank Raven
Sweet! Thanks for the feedback! I do as much as I can for free and would love to give the paid stuff away also, but I have diapers to buy and mouths to feed 🙂 Glad I can still help you along in the editing path!
Thank you for all your posts. I love your short but very informative photography tips. Your site is one of the best sites for improving digital editing skills. I look forward to your next post.
That is excellent to hear! I love the excitement in your comment. You just made my day!
WOW Blake as usual an excellent explanation. you have helped me to take my images to a another level.
Thank you for your teaching.
Your friend José
A hah! I see that this is a 3 minute tutorial, not that I will master this in 3 minutes. Thanks Blake, I opened up a few recent edits, I like what it is doing, but it is going to take a while to master this 3 minute tutorial. The more I play with it, the more questions I have. I’m downloading the tutorial so I won’t bombard you with questions here.
Thanks for sharing this with us.
Blake,
As always, right to the point with some great info!
Many thanks,
Jerry R
Thanks Blake for this great flash tutorial. I never used this grading system before and I love it!!! Thanks so much!
Like the flash tutorial. Helped a lot in explaining how to use the gradient map. Thank You Again!