
 Last Saturday I received a notification on my phone that a severe thunderstorm was on the way. I initially thought, “Sweet! I can try and get some pictures of it!” However, the storms usually come so fast without me being prepared that by the time the lightning gets here the rain has already started. That usually dissuades me from taking my gear out in the rain!
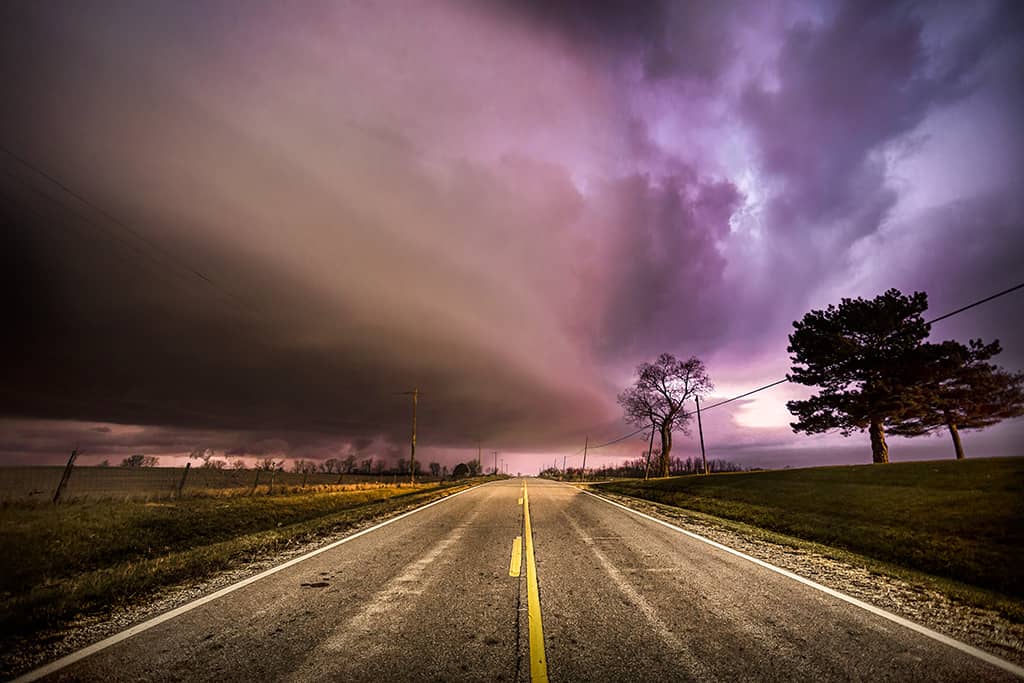
On this particular night, I went outside to discard the trash and saw there were about 25-30 flashes of light per minute coming out of the West. I ran in the house grabbed my gear, told the wife goodbye, and scattered to my favorite country road. This specific spot is only about 2 minutes from my house making it the perfect go-to spot in a pinch!
I setup my gear and started shooting, I noticed the storm was pretty far away. I could really only see flashes of light with only about one or two bolts the whole time I was shooting. It didn’t bother me too much as the sky had rainbow like colors being cast with every flash.

How To Make Awesome Lightning Photos
There are several ways to shoot just about everything, lightning is no different. I like the “Ghost Buster ” method. Do you remember the Ghost Busters? Remember how they caught the ghosts? They would throw a trap out in the middle of the room (your camera), they would step on the pedal to open the trap (your shutter), then they would blast it with their proton packs until the ghost went into the trap (your shutter speed, Bulb setting). Once the ghost was close enough to the trap, they would close it up (releasing the shutter) and have a ghost all caught and ready to go.
So how do you do this with your camera? Pretty simply actually, here are some tips:
- LOCATION – Location is everything with lightning photography, a bolt by itself is cool, but a sweeping landscape or monolithic cityscape in the foreground is even cooler! Have a spot already predetermined in your head. I have a spot for every direction weather could come from. Look at the radar before the storm and see which direction it is coming from and head to that spot for the shoot. A close location is always best as storms tend to move very fast!
- IMAGE CAPTURE MODE – I prefer RAW, there is a lot more that you can do with your lightning images when they are shot in RAW. Your color temperatures will be pretty tricky to deal with due to the bright bluish bolt and the more common tungsten light produced by street lamps. Shooting in RAW will allow you a lot more wiggle room later with the mixed color temperatures. A JPEG will capture and record the exact color temperature selected and not allow you to correct it as easily later. However, you shoot in whichever mode you are most comfortable with.
- LENS CHOICE – Since you never know where the lightning will actually strike, a wide angle lens is sometimes your best bet. I chose a 17-40 mm lens with the focal length set to 17 for the images you see here.
- FOCUS – Set your focus to manual and manually set the focus to infinity, ∞.
- ISO – I usually set mine to about 1600, you will need to set your camera as fast as it can go within a comfortable noise range. MY canon 6D is good at 1600. A fast ISO allows you to increase the sensor’s sensitivity to light allowing you to capture a lightning bolt in mid blast. You can use slower ISO’s as well, but you may get over-exposed lightning bolts if your shutter is open too long to compensate for the slower sensitivity. Experimentation is key!
- APERTURE – Set it to something fast and wide open, I had mine set to f/4.0 for all of the pictures you see here. Again, the key to lightning photography is speed!
- SHUTTER SPEED – Set your shutter to a Bulb setting. This means the camera shutter will remain open as long as you have the button depressed. A shutter release and sturdy tri-pod should be used in conjunction with this setting as your exposures could get pretty long, most of these were 6-10 seconds long.
With the camera on a tripod, shutter release equipped, and Bulb setting in place you want to open the shutter when it is dark and no lightning has struck. Hold the shutter open until lightning strikes, once it has struck release the shutter to see what you caught.
If the image is too dark you have several options. You could increase your shutter length by leaving it open a bit longer. Or you could increase the ISO, however, an increase in ISO could result in increased image noise.
If the resulting image is too bright, you could decrease the size of the Aperture (move from f/4.0 – f/ 5.6 or higher) or you could decrease the ISO.
You have to think of lightning photography in terms of Flash photography. If you take a picture in a dark room with no flash, it requires quite a few seconds to capture a usable image. Once you introduce a flash, that dark room can be captured much faster. Think of lightning as a flash. You are holding the shutter open as long as it takes for the “flash” to go off. Lightning acts like rear curtain flash (a flash that goes off just before the end of an exposure).
Moreover, experimentation will be your best resource when photographing lightning. You can take these tips and use them as a guide, but the best thing you can do is practice. We don’t often see lightning so use any opportunity you can to practice.
On the topic of experimentation, try leaving the shutter open for 2-3 flashes of lightning, you may need to decrease your ISO or the size of your aperture to compensate for the amount of light from three bolts. You could end up with some interesting results!

HAPPY ACCIDENT – I was walking toward the road you see in the images here and accidentally hit the shutter button for 1/5 of a second. Just as I did that, lightning flashed in the distance and acted like a “Flash” to give me just enough light to record this. Pretty cool!
Like these tips? Check out my eBooks, they are full of useful information just like this!

For Blake, it's all about the art and process synergy. He dives deep into complex topics and makes them easy to understand through his outside-the-box thinking so that you can use these tricks in your workflow today!


Another home run. Keep up the great teaching.
Thanks Nikon Bob!
Canon Blake 🙂
Blake,
Great post! And it is very strange how we were on the same assignment!! I grabbed my camera as quick as I could before this storm nailed us at about dusk. Little did I know that I captured a lightning strike on the left side of the image. Take care my friend and keep shooting!!
With Great Respect, Tal
http://flic.kr/p/eWK8HB
That is a great shot, that cloud looks very ominous!
There is often a pre-flash just before the main bolt. I’ve used that as an alert and captured some really great lightning shots shooting hand-held at 1/500. You miss a lot, but the results are often sharper than the bulb method.
Thanks for the intel, that is good to know. I will try that next time. The difficulty with experimenting with Lightning is that it only happens once in a while so it is difficult to experiment with it. It is not something you can just setup! Thanks for your input!
Mine was using long exposure at the expense of shutter count. EXIF detail included. https://plus.google.com/photos/117808204628570142396/albums/5942770896587614449
That is awesome! Great shots!