A wicked vignette in Photoshop in under 3 minutes? I am game 🙂
Vignettes are a tricky beast to tame. At first they appear so docile and easy to manage. They make your photo feel warm and fuzzy, but they have a tendency to steal the thunder of a good photo by enveloping it with those warm fluffy hugs. Be cautious of these vignette beasts, they are wolves in sheep’s clothing!
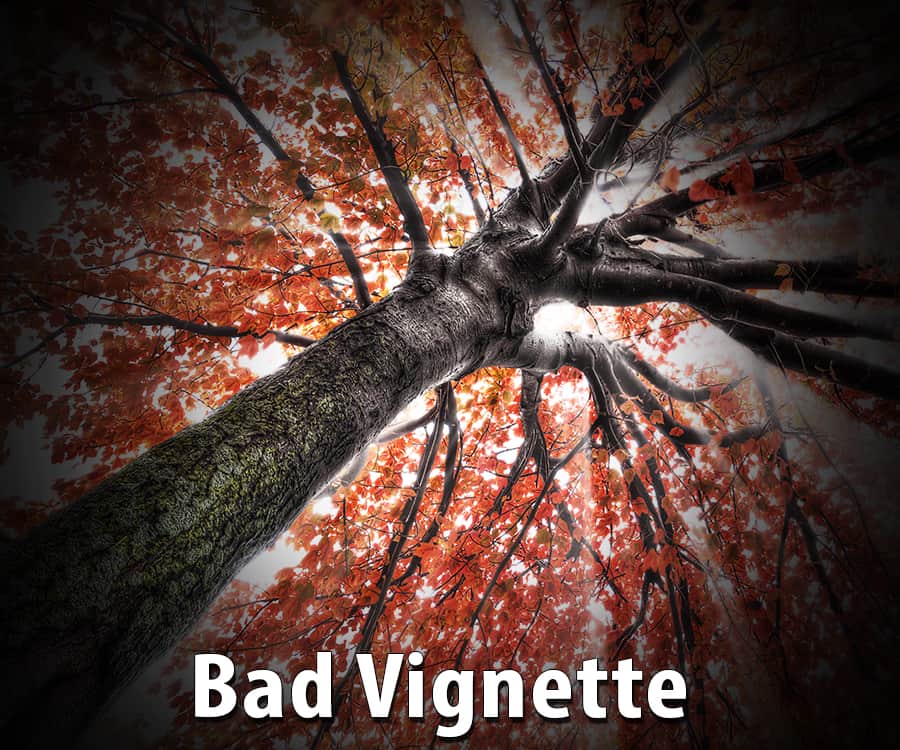
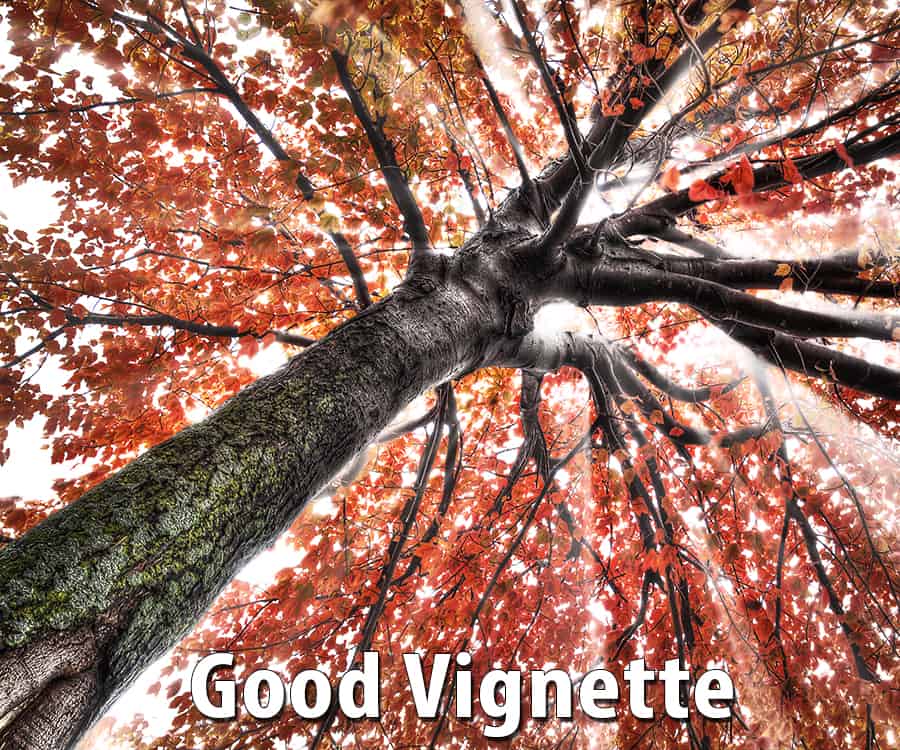
Making a vignette in Photoshop is one of the most powerful ways to control a vignette. However, you can make bad vignettes and good ones. Typically a bad vignette is one that is obviously visible. A good vignette is sneaky and does not appear to be affecting the image at all in its subtlety.
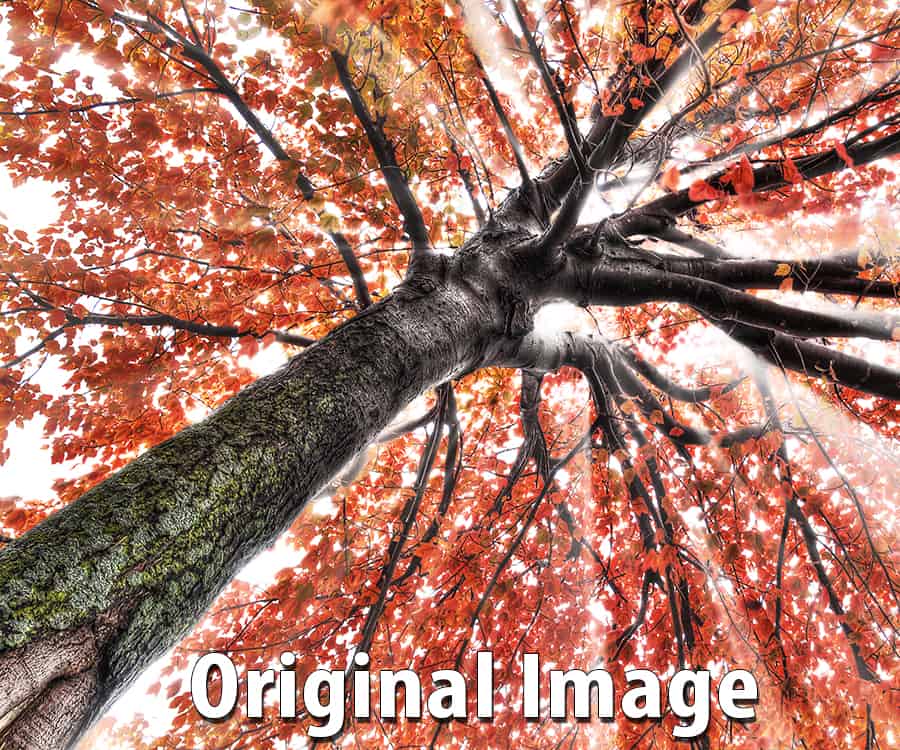
Take a look at these 3 images below:
- No vignette
- Bad Vignette
- Good Vignette in Photoshop
The problem with vignettes is most software out there does not give you the control of a manual vignette. It is relatively easy to make a good vignette in Photoshop, you just need to keep a few things in mind.
In this tutorial I will show you how to make an awesome vignette in Photoshop in under 3 minutes that will pull the viewer into the photo without even seeing the vignette! This is powerful. Who doesn’t have 3 minutes to watch?
Like the style of this tutorial? You will LOVE HDR Insider! Full-Length HDR Workflows, Critiques & More!
[hcshort id=”9″]


Hey, Blake
Like it! Often my vignettes look more smudged than effective, and even seem to add noise to the areas of the vignette. So I end up not using them. But I read a blog by a very good photographer (I think so, anyway, second only to you, of course) that said he puts a vignette on almost all his photos. I questioned it because I couldn’t see them! Well, duhhh, now I know why. It’s because he does it right! Thanks for showing me how.
Kay
That’s the ticket! Subtle, to the point you don’t even see it is the point. I love this technique and like the other photographer, I use them in almost every photograph.
Loved this! I am always learning something highly useful from you. Thank you!
Blake, always look forward to your tips, thanks for sharing so much useful info.
Thanks Blake, this is a great help. I recently began using Photoshop cc and your tutorials really help mu learning curve.
I know what you mean about returning home. I miss Kansas City so much but for me there is no going back. I enjoy your photography because I “know” many of your subjects. I once lived in Platte County. 🙂
Nice! I am in Platte City. Probably are some kind of neighbors in a parallel universe!
Good stuff, Blake. I find that using a setting of -9 to -12 in Lightroom usually gives me the vignette I want. But the Blending Option (something that still intimidates me even after years of using Photoshop) is a nice touch.
I agree, ACR/Lr can make some great vignettes, but they come with very limited control. I like this ability to have it on it’s own layer. I frequently make some odd shaped vignettes.
Hi Blake,
Love this quick tutorial!! In fact, I think I’m going to make an action for doing this with different marques, rect, circle and oval. I also just joined and received your 4 steps plan. I was out of town, but that I’m back I’m going to jump right into them!
Thanks,
Dennis
Sweet! So glad you like this. I have a few actions for this. The folks at HDR Insider received these actions a couple of months ago with their monthly access to the site. I tend to keep the action as a box to make it easier.
Hi Blake,
I tried making some actions, but ran into a problem. I’m just learning to make actions so It’s probably something I don’t understand. My problem is I want the action to stop so I can adjust the size of marque,and also to adjust the opacity and the blending. How do I do that?
Thanks
Dennis
That is tough. Usually you can make a stop Action for Filters and such, but I would have to put some thought into this to help. What about making 3 Actions for each shape, Small, Medium and Large? In the long run that would be mush easier. Or modifying the mask after it has completed.
The stop actions are good for filters, but for a marquee it may not be helpful and may stop the action altogether.
Hi Blake,
Thanks! I’ll try your suggestion. I’ll also go over HDR Insider and check out your actions!
Thanks again,
Dennis
Awesome as always, Blake. I love the flash tutorials like this. Many thanks as always and welcome back.
Vinny
Sweet! Thanks for watching, Vinny. Your continual support is incredible!
Welcome back Blake. I just spent several rain filled days in Branson and could not wait ti get back. Awesome tutorial. As usual you Rock.
Thanks again for a good reminder. PS is so powerful I forget some of the simple but worth things it will do.
In photo #3 in your intro I said “what vignette?”
I get it now. Finally, I might slow down and stop overdoing everything as I have with my Photomatix presets and my Lightroom vignetttes.
You have taught me so much. I am getting there re: HDR, Topaz, PSCC. Thank you, Blake.
I love Fridays,
Doc Buick
Yesterday I was struggling with a vignette and now I have the perfect solution. I was using the what if blending modes but didn’t think to use it for a border. THANKS SO MUCH.
Hi Blake I’m new to photoshop cc and I just watched your video on vignettes, but when I press shift F5 I get the brush presets
That’s interesting. You can also go to Edit>Fill. It’s the same thing.
Hate you Blake…………I have been using PS since version 2 and have been using vignettes all that time. You have made it simpler and better. Thank you, but it’s discouraging that young bucks can teach us old folks so much in such a short time.
Haha! It’s just the nature of things I guess. I started in 5, in 1999. I’ve been at it a while, crazy how things have changed since then!
Love the layer style technique to remove the black where not necessary. It definitely looks more natural. Thanks.
Great to hear you spent some quality time with your young family. We (your followers) look forward to your tutorials each week but I would hate to think your family was missing out on your attention because of us.
Thanks! Family first … always! I prerecorded this 2 weeks ago 🙂 we had a great vacation
Thanks for this 3 minute tutorial on vignettes. There may an occasion that when you use the marquee tool or the elliptical tool that it just does not look right to you. You can also use the lasso tool and draw around your subject-shape does not matter. This way you can make the vignette fit your photo if you need too. After you draw your irregular shaped vignette, just follow this procedure and it may work for your photo.
Yes! Great thoughts there. I tend to use a Black sheet layer to cover the entire image, then adjust the mask with a black feathered brush for odd shaped vignettes.
Blake: Great tutorial, as always. I have edited your CC Zone Editing System > Box Vignette action to include the Blend-If step. A great enhancement to an already good system.
Good shooting.
Nice! You are one step ahead 🙂 the new DZS, released next month with the Master Class is all about Blend If! It rocks! Glad you and I think alike!
Quick and easy Blake, great stuff as usual!
Thank you
This is a great tutorial. So easy and effective. Thanks Blake for sharing.
Thanks for the feedback!