
One of the most important parts of your workflow… automated!
Dodging and Burning is one of the most important parts of your workflow. I would put it right up there with Noise Reduction and Sharpening. It is a time when you get to dictate where the viewer pays their attention by pushing and pulling the photo in your favor. It is also a time when you can fix some lighting issues that may have occurred in the original capture. Anyway you look at it, Dodging and Burning should be a very important part of your workflow.
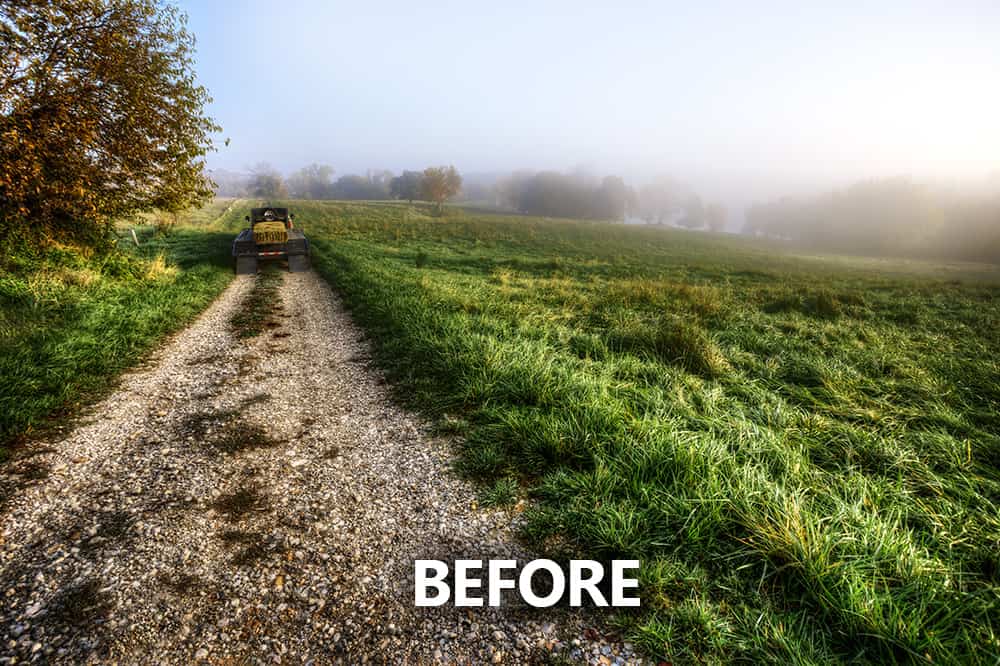
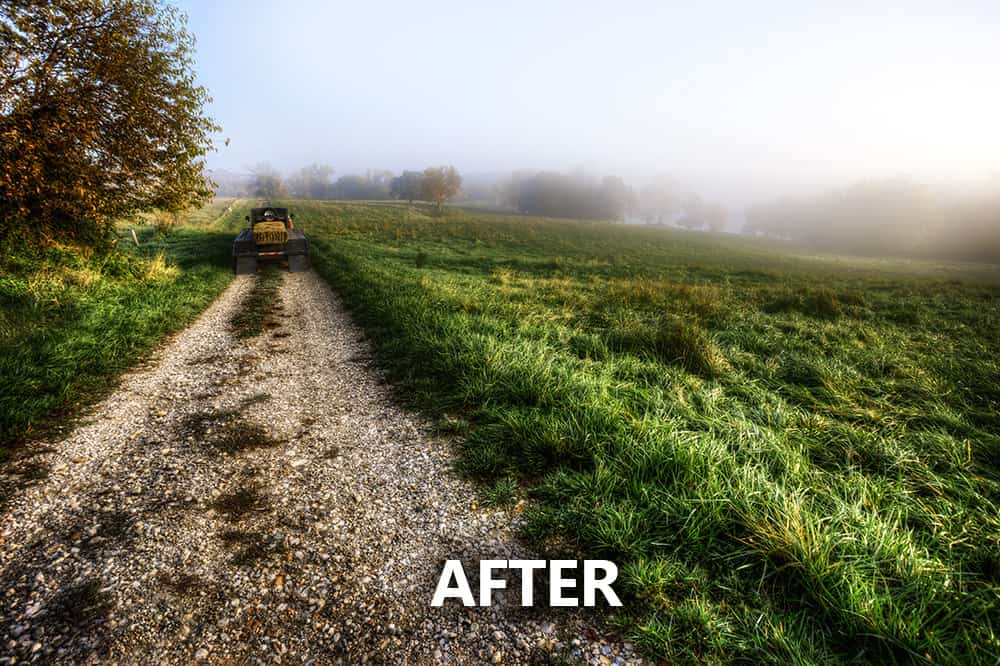
The effect may appear subtle in the before and after preview, but watch the video tutorial to see how effective it is.
This week I was adding a Soft Light Glow to one of my photos when I accidentally removed the saturation from the glow layer. At first I was tempted to press “CTRL+Z” to take a step back, but then I realized that the layer looked like a Dodge and Burn layer. After further analysis, I came to realize that I had automatically dodged my highlights and burned my shadows! While this is not quite selective dodging and burning by hand, it creates a VERY nice jumping off point for further dodge and burn work by doing the bulk of the labor for you.
In this tutorial, I will briefly show you Traditional Dodging and Burning (if you want more on this topic, see this tutorial) and then move into how you can automatically Dodge and Burn your images.

For Blake, it's all about the art and process synergy. He dives deep into complex topics and makes them easy to understand through his outside-the-box thinking so that you can use these tricks in your workflow today!


Wow, what an Action. Tested it on a few of my photos . Brilliant !!!!
🙂 Brilliant… it was an accident!!!
Blake, thanks so much, this is a killer way to dodge/burn!
No problem my friend! Glad you like it as much as I do!
Cheryl. Great lesion, I have used dodge and burn for many years. Love both new ways.
The great part of your tutorials is that you use real world images and show us what changes need to be made. Seeing you work on the image will make my work much better.
Awesome to hear! I try to be as down to Earth about the lessons as possible. I don’t try to pick “tutorial” images that make it easy, I try to pick photos that I would normally be working on like anyone else. Thanks for the feedback!
That one is really special, thanks for the great tips and actions.
No problem! Glad you like it.
Fantastic Action great job can’t wait for more
More coming!
Blake, another great action. Brilliant work, although it happened accidentally. The important step was your analysis. Thanks a lot for it. Can`t wait for more.
Happy, happy, and welcome accident! Thanks for the feedback!
Fantastic! Boy does this same time. Thanks so much!
Vinny
Not a problem!
Great work Blake. It speeds up my workflow without sacrificing control of the image. Thanks! Pat
Thank again, Blake! Fantastic. I do so much work with already saturated sunrises and sunsets that when I would add any soft light effects, I’d have to add a vibrance layer to lower saturation while maintaining vibrance in colors with lower luminosity and it was an extra step to remember every time, otherwise the colors get too saturated. And burning and dodging can also affect color saturation perceptions in sunrises and sunsets, so I think this action will combine several steps into one general step prior to final slight tweaks with the dodge and burn on local areas.
I understand your pain! It can get pretty contrasty up there in those skies, desaturating the d and b layer should help there.
Love the actions you showed. I downloaded thr zip file now how do I get them into Photoshop?
No problem.
1. Double click the .atn file
2. Then open Photoshop and press alt+F9 (option+F9 on a Mac), this will open the Actions panel
3. The newest loaded action should be on the bottom of the pile.
Great new action. Thanks Blake!
No problem!
I am so excited to be learning so much. I am definitely your remedial student! I have to go back and watch the videos time and time again, all the while stopping to write out notes word for word :). Thanks so much for all you do !
I like it. Did a nice enhancement of my shadows and highlights.
You’re qn idiot Greg
Fantastic! I love the way you explain things…detailed and crystal clear. Thanks for posting this tutorial. I’ll be back to learn some more from you!
Thanks for the feedback, you are welcome back anytime!
Thanks again, for this action which will save a lot of time.
It sure does! You are welcome!
Super Cool!! Will be trying this out. Thanks, Blake.
Not a problem! Remember, it doesn’t replace the need for traditional dodging and burning, it just sets you up on the right foot!
looks amazing , love happy accidents . thank you
I’ll take 100 more happy accidents like this please 🙂
Enjoyed this tutorial. You were right on when you made the comment about not remembering the steps! Thank you so much for the action, and keep on making these wonderful discoveries.
It is a bit tricky to keep them all in your head, especially if you have never done it before. Actions make it easier, but try and at least grasp the concept so you can carry it into other parts of your workflow later.
Awesome! Giving it a try now!!
I’m so happy I discovered your website. I have gotten away from HDR because I was frustrated with how difficult it was to get images to look like I wanted. Between your tutorials and actions, I am beginning to readdress some HDR images and am seeing pleasing results. Thanks for sharing your knowledge with others.
I am very interested in your
Long black and white and color zone lessons.
It looks like each mask for each of the 10 zones is hand painted. Is this true and / or do you have a faster way to determine where to paint the masks?
Are the 3 hr long tutorials too long to download to an iPad with a 2 or 4 GB hard drive.?
Sweet!
The masks are all automated. Push a button and it makes the masks. It varies based on the image.
The videos are able to be downloaded, however, you’d have to download then to a pc or Mac and then transfer them to the iPAD.
What a great action, thank you so much. Can’t wait to use it!!
Also, just a big thank you for your tutorials on YouTube, very clear well done tidbits of information that work! I’m also sharing the links with my camera club members because we’re always looking for good tuts and you don’t disappoint.
Cheers, Joy
As usual, your dodge and burn actions downloaded with no problem. Excellent Friday Tip. Thank you so much.
Thanks for the actions and workflow tutorial. It will be a good addition to my workflow.
Thanks for this sharing! I´m happy that i find this cool resource. Hugs from Brazil 🙂
I see no download, suspect link is corrupt
Thanks for letting me know! It is all fixed now and good to go.