
 Over the last 5 months I have been avidly working on perfecting a new post processing technique. It has taken every ounce of me to keep it a secret from my loyal viewers on EverydayHDR and HDRInsider. While I was perfecting the technique, I was also recording the process to share it with the community. The final product is Black White and Beyond: the Digital Zone System.
It is 3 hours and 40 minutes of killer Photoshop training that demonstrates the importance of making good black and white conversions and how to use the Digital Zone System to make incredible photographs. I am being sincere when I say this, I have been editing photos in Photoshop for nearly 15 years and I have never come across a post processing technique that grants me unimaginable possibilities.
So how does this process work?
It uses the principles of the 11 point gradient scale to make accurate selections on your photograph. Each zone on the 11 point scale is given its own Curves adjustment layer that controls the dynamic range in just that particular zone. These meticulous selections drastically increase your post processing efficiency as you are able to make very deliberate adjustments in a matter of seconds.

Why did I create it and how is it different than Luminosity Masks?
You have seen me use a similar technique several times on EverydayHDR where I select the Highlights, Midtones and Shadows and edit them independently. That is what got the gears in my head turning. I loved how much more control I had with those three selections, however, like most control freaks… I wanted more!
I studied the original Zone System for months, soaking in all of the information I could to better understand how it could be applied to the digital post processing workflow. I really ate slept, and breathed the Action creation for weeks. I created, destroyed, recreated, abandoned, and finally harnessed a process that could give me the technique I had envisioned.
While this may sound like Luminosity Masking, it is very different. It does not require the creation of Channel selections. Which, while powerful are a pain in the butt to manage. Especially when you get that stupid under 50% pixel error message that will not allow you to make a selection.
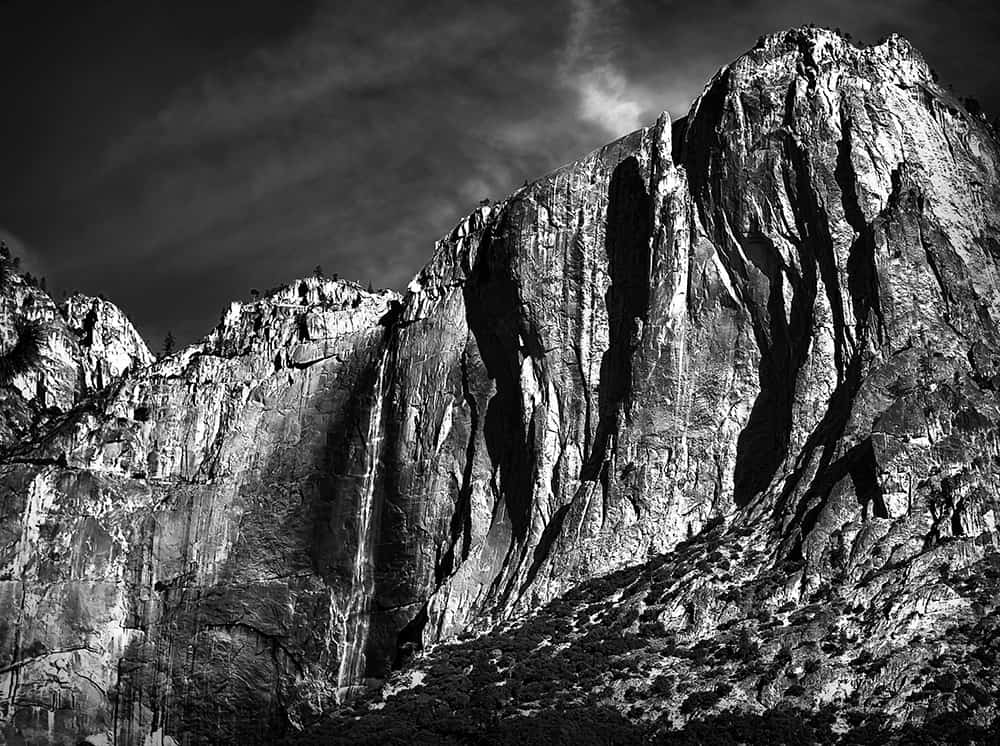
This process utilizes the simplicity of the Layer Mask and the Curves Adjustment layer. It is easy, very easy to understand. The image below would not have been possible without the Zone System, there were so many intricate selections that could not have been made without the selective nature of the Digital Zone System.
I could really talk about it all day, but you can learn more about it over at Zone-Edit.
![]()

For Blake, it's all about the art and process synergy. He dives deep into complex topics and makes them easy to understand through his outside-the-box thinking so that you can use these tricks in your workflow today!


