

I recently posted a Winterizing Your Camera inquiry to my fellow readers due to a recent trip to Alaska. I was trying to prepare myself, or my camera I should say, for sub zero temperatures. I did receive one good tip with the dry bag, however, I was unable to purchase one before the trip. I ended up winging it regardless of the manufacturers stated warning that the camera was not meant to operate below 0°.
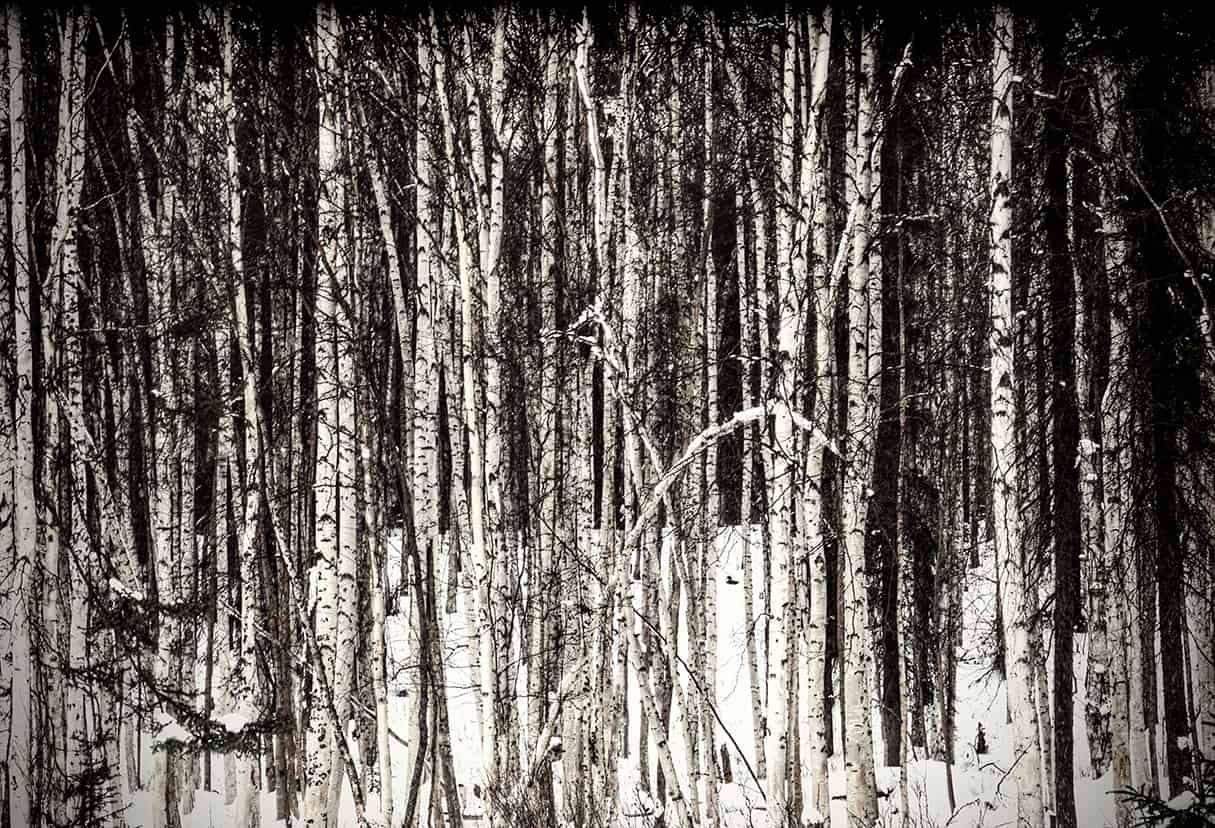
I was outside for well over 48 hours doing some camping of sorts. My goal was to get some incredible shots of the Northern Lights, however, I had no luck. Although I did get some great shots of the Birch trees out there. I have always enjoyed photographs of birch trees all in a line. As you squint and look at them, they begin to resemble a bar code that Jackson Pollock had a hay day with!
I was very surprised that my camera and batteries lasted 50 hours in below zero temperatures. How did I manage?
Tips For Preparing Your Camera (and Self) For the Cold Outdoors:
Prevent Batteries From Cold Soaking. Cold soaking occurs to any battery left out in the cold for too long. As the batteries are exposed to sub zero temperatures they begin to drain life at an exponential rate. You may normally get 6-800 pictures out of one battery (assuming you are not using live view too often). If they are left in the cold you may get half to a quarter of that leaving you with anywhere from 150-300 exposures per battery.I suggest you bring plenty of batteries for your trip and keep them close and on your person preferably between your wicking and warming layers. This will keep them nice and toasty, 98.6° to be precise! When you are ready to snap some pics, remove the battery from your layers and snap away, be sure to remove the battery and replace it in your layers prior to putting the camera away.
Clothing is Key! Proper clothing in arctic temperatures is a must! Not only for your own personal protection but for the protection of your gear as you saw in tip #1. What should you be wearing in the cold?
- A Wicking Layer: A wicking layer is any layer that will keep you warm by drawing moisture away from your body and into the the outer layers. Polyester and Microfiber are the best for the wicking layers, however, stay away from Cotton! It absorbs the moisture and makes you wet instead of warm. This action could expedite the hypothermia process, not good! A nice pair of synthetic fiber long johns, Top and Bottom, will do just fine for your wicking layer.
- A Warming Layer: The warming layer is the middle layer in your clothing sandwich. Wool, Fleece, and Down, work very well as warming layers. However, keep in mind that Down does not work as designed when it gets wet. This leads us into our next layer.
- A Weather Layer: The weather layer is designed to keep the elements in the environment off of your warming layer. The last thing you want is your warming layer to get snow covered. We all know what happens when snow melts, it creates water, wet clothing causes Hypothermia! Notice a pattern here, we are trying to stay dry! Your weather layer should be made of a fabric that does not absorb moisture, this can be something as simple as a trash bag or other water-repellent fabrics such as Gore-Tex.Head and Hand Gear: Wool works very well as head and hand protection. Heat radiates from your head at a rapid rate in a cold environment. You must have a nice warm skull cap to keep that valuable heat in. Unfortunately, skull caps tend to make for staticy hair, but hey we are hear to take pictures not to make a fashion statement! You may also want to invest in a pair of water resistant gloves that are a size larger than your wool gloves. These will keep your hands from getting wet.
- Loose: Keep these layers loose to allow the dead airspace to work with you. Heat will build up in the dead insulated airspace.
Camera Protection: Protecting your camera is very similar to protecting yourself. A sealed preferably weather proof camera bag will help keep it protected from the elements. You want to keep the camera insulated, warm and free from snow. I wrapped my camera in plastic grocery bags when it was not in use and placed it back in the camera bag. Instead of grocery bags you can also use a good solid camera “rain coat“.
Avoid Condensation! You may not know that your camera has condensation building up inside because you cannot see it. This can be very dangerous to the operation of your camera. When moving from a cold environment to a warm environment rapidly you run the risk of condensation building up inside the camera. You want to gradually introduce the camera to a warmer environment.I suggest leaving it in the cold camera bag when you go indoors. As the bag warms up on the outside the inside will slowly warm up as well. The last thing you want to do is immediately place the camera in the warmer environment. If condensation builds up inside the camera and you return to the cold the moisture will freeze and could possible freeze your camera from the inside out. Silica gel packets are great. Place them inside that grocery bag that you wrapped your camera in prior to placing it in the camera bag. Next time you buy a new pair of shoes save the silica gel!
Use That Camera Strap: I rarely use my camera strap when I am trekking along on a hot Summer day taking pics. I find it annoying and impeding. In the cold it is a whole different story! You will be pretty cumbersome walking around with all of that gear on and those wool gloves will make it very difficult to handle a camera.I know from experience, the first time I removed my camera with wool gloves it slipped right out of my hands and into a snow bank. What a great way to start a photo excursion in the cold right? After that, I wrapped that camera strap around my neck every time I brought it out.The cold environment should not be an excuse to remain indoors when there are plenty of awesome shots to be taken. Instead of being fearful or intimidated, take these tips and have some fun in the cold!


For Blake, it's all about the art and process synergy. He dives deep into complex topics and makes them easy to understand through his outside-the-box thinking so that you can use these tricks in your workflow today!


I love these birch tree images. Great job!
Thanks Len!
Great! Love the photos. =D