When I first started shooting HDR images my brain was convoluted with thoughts on how to effectively catalog my images for the most efficient post processing. I do not use Lightroom or any other program for cataloging my images, so I needed to come up with a way to catalog my images effectively. I have developed a way to successfully catalog my images from the start to the final post processed image in a way that I am very comfortable with. I know that all brains work in VERY different ways, the odd ball people I have working with me during my day job really help validate that comment. This way may not suit your brain, but hear me out because if you have no direction, some direction may be nice!
Effective Cataloging of HDR Images For The Most Efficient Post Processing (that was a mouthful)
- The first step is to shoot my images.
- I then plug my camera into my computer or pull them off the data card I used.
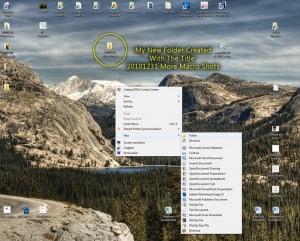
- On my desktop, I create a new folder and title it for the date the images were taken. I catalog my folders using the following format: YYYYMMDD “Title For Images” i.e 20101231 More Macro Shots.
- I then dump all of my shots taken into that folder.
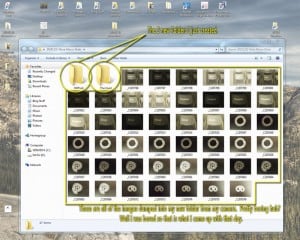
- Once all of my files have been uploaded, I create 2 new folders in the dated folder.
- I title the first folder “HDR’ed”.
- and the second “The Used”.
- Here is where things get tricky.
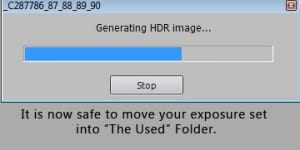
- I drag and drop one exposure set into Photomatix (I do mine in sets of 5). Once the exposures have been aligned and Photomatix gives me the “Generating HDR” message in the process dialog box, I move that set of 5 exposures into “The Used” folder. If you do it before “Generating HDR” Photomatix will not be able to find the images and will give you an error message. Oh wait, you can’t see your RAW file format images? Head over here to get the low down on how you too can see your RAW files in thumbnail format!
- I am all about speed when it comes to Processing my HDR exposures. As I got into the habit of moving the exposures I was processing into “The Used” folder as they were generating it made moving onto the next set pretty easy to find.
- After I have moved the insane-amount-of-well-made-slider bars in Photomatix and gotten to a point where I am ready to process, I hit the Process button.
- I go to File>Save As and save the new HDR image in my“HDR’ed” folder and move onto the next exposure set.
- I repeat the process for all of my exposure sets.
- I always process all of my images in Photomatix prior to moving onto the crucial Post Processing in Photoshop CS 5.
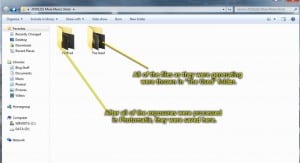
- My “20101231 More Macro Shots” folder looks like this now:
- All of my Raw exposure sets are in “The Used” folder and all of my Processed Photomatix files are in the “HdR’ed” folder.
- I now move into the “HDR’ed” folder.
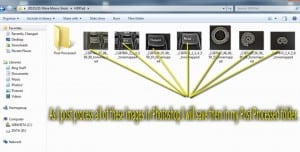
- I create a new folder titled “Post Processed”
- As I edit all of my Processed HDR images from Photomatix to Photoshop I save the Final Post Processed image into the “Post Processed” folder.
- Once all of my post processing is complete, I will move this folder into my Photos folder on my D: Drive in the Dated Photography section.
- It all looks something like this:
- Now I have all of my shots in order by date.
- If I were to click on any of those folders that had HDR images in them I would see the two folders “HDR’ed” and “The Used”
- If I choose to go into the HDR’ed section, I can see what images have and have not been “Post Processed” in Photoshop.
- I work this way because I am constantly shooting and not getting around to Post Processing as much as I shoot. Let’s face it, it takes 20 times longer to Post Process an image from start to finish than it does to shoot the set.
- This way of cataloging has drastically increased my efficiency in workflow.
- Give it a shot, it may be for you.

