
Infrared Photography – My Most Expensive Experiment Yet
I can remember the first filter I purchased for Infrared Photography. It was a Hoya 720 nm Filter for my Olympus E-30 about 9 years ago. I put it on my camera, pointed at a tree, expected great things, saw the blurry results and never used it again! Now fast forward to August of 2015. I was about to go on with jpeg2RAW and I watched a Podcast they did with Don Komarechka on Infrared Photography. I was hooked with the new possibilities.
After watching his show I put in a call to LifePixel and chatted with them for quite a bit about what I was looking for and the Infrared Photography possibilities. They have excellent customer service! After the call I purchased a silver Sony a6000 and shipped it over for conversion to the Super Color IR Filter. After what seemed like months (it was a little over a week) my camera was back and ready to rock and roll in the Infrared Spectrum of light.
Let’s Talk Infrared Photography Conversions vs Lens Filters
So usually the big question is why did you convert your camera for Infrared Photography when there are IR filters on the market you can purchase that don’t require a camera conversion? It’s easier to answer this if we look at a few key points.
Infrared Photography Lens Filters
These are filters that attach to the front of your lens similar to ND or UV filters. They block the visible spectrum of light you are used to seeing allowing the sensor to pick up on IR light only. The problem here is that the exposures can be very long even in broad daylight. Just like long exposures in the visible spectrum, any movement in the scene would be recorded along with the Infrared spectrum.
Infrared Photography Camera Conversions
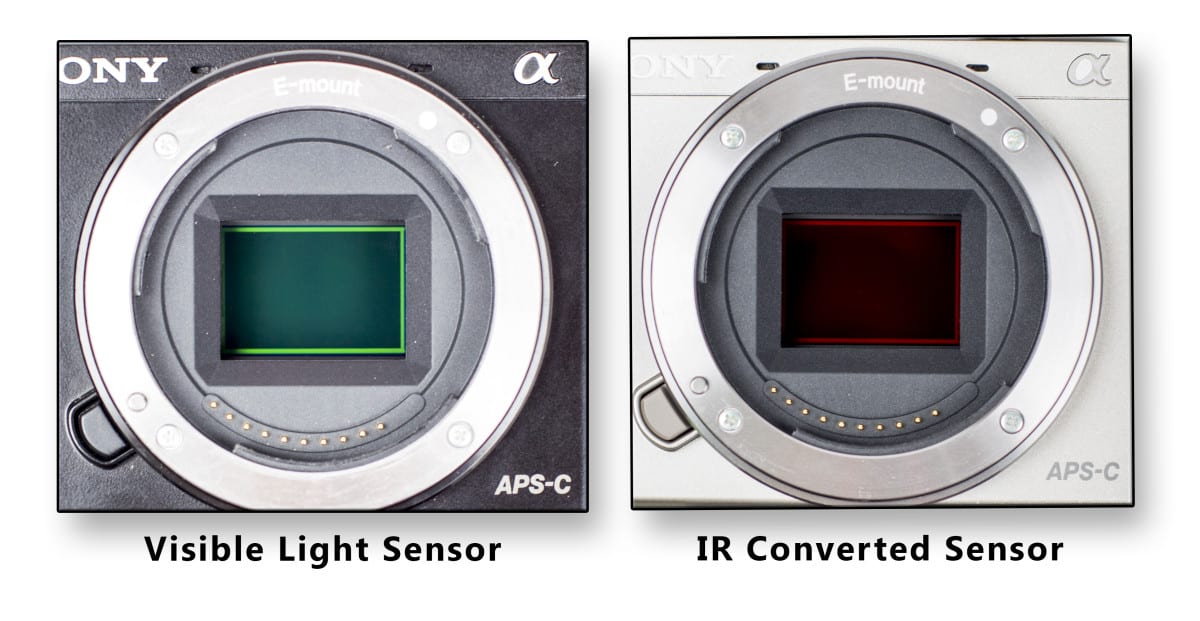
Most cameras have an IR blocker in front of the sensor that inhibits the recording of the infrared spectrum. In order to photograph the IR spectrum without a lens filter the camera requires a conversion. This conversion is destructive in nature meaning once you have converted to IR there really is no going back and that cameras sole function is to capture the IR spectrum. At LifePixel, they do all of that work for you and have many different conversions to choose from. After the conversion you no longer have long exposures for recording the IR spectrum, it shoots just like a normal camera.
I chose the Super Color conversion for my Sony a6000 as there are many advantages of having a mirrorless camera for Infrared Photography. One major reason for me was the ability to go into Standard IR photography (720nm) whenever I wanted by applying an IR filter on the lens. This opened me up to a wide variety of possibilities in the IR spectrum of light.
The Most Expensive Experiment to Date
I experiment a lot with Photography. As a matter of fact HDR started out as an experiment for me and look where that went! Usually I experiment with small expenses like programs and plugins. After seeing that Podcast I really wanted to experiment with Infrared Photography. Before I converted the camera I did a lot in Photoshop thinking I could recreate the IR look without actually owning an IR converted camera.
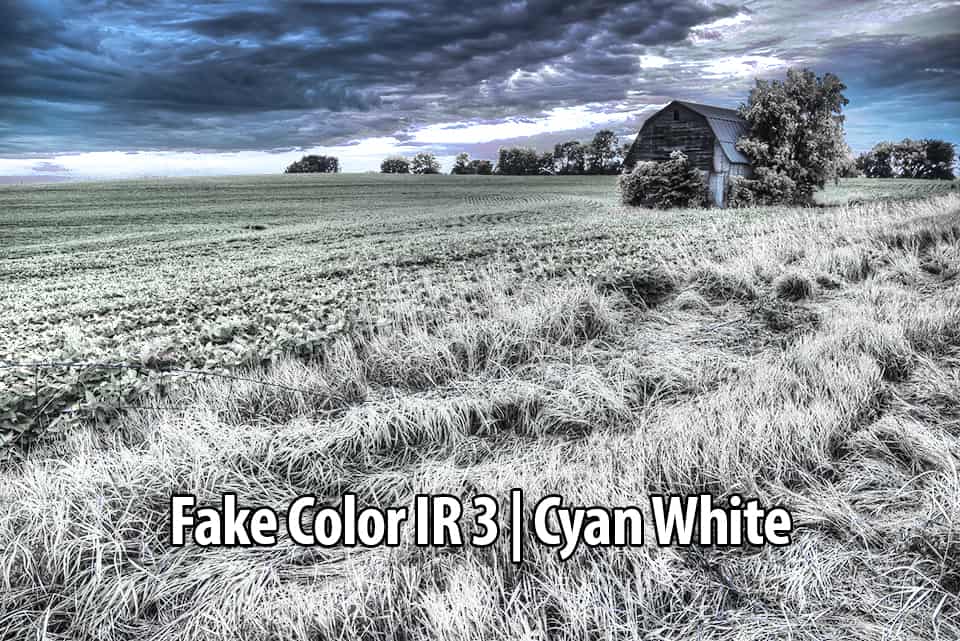
An example of a Fake IR Conversion from a non IR image in Photoshop. It’s close, but not quite the real IR thing.
Of course, I thought this was genius until Don explained that the IR world records light in a completely different way than our cameras normally do. It turns out that anything that produces photosynthesis will appear white in the camera. After spending hours making fake IR Actions that I posted for the HDR Insider’s last month, I realized I needed to just convert a camera for Infrared Photography.
If you know me well then you know I can’t leave well enough alone. I was trying to create a Faux IR action from one image that wasn’t exactly the same as the one I was looking at. The IR Action created above was made from looking at the images on 500px, Google Image Searches and the LifePixel website. The problem with my process was that every image had a different amount of color range.
I was trying to create an action that would work on every photo even though every photo is really different. This is kind of like using a Photomatix Preset on every scene. We know after a lot of HDR trial and error that every scene requires a different tone mapping touch. This is where the Infrared Photography Experiment came in.
I thought, “What if I had two identical cameras with two identical lenses taken at the exact same spot, then I could make the perfect IR Action that wouldn’t require a conversion kit.”
I certainly was not going to pay the hefty price tag of a Canon 6D to have it converted for the experiment and after discussing this with LifePixel it seemed like Mirrorless was the way to go because what you see on the back, even in IR, is what you get.
Enter the Twins
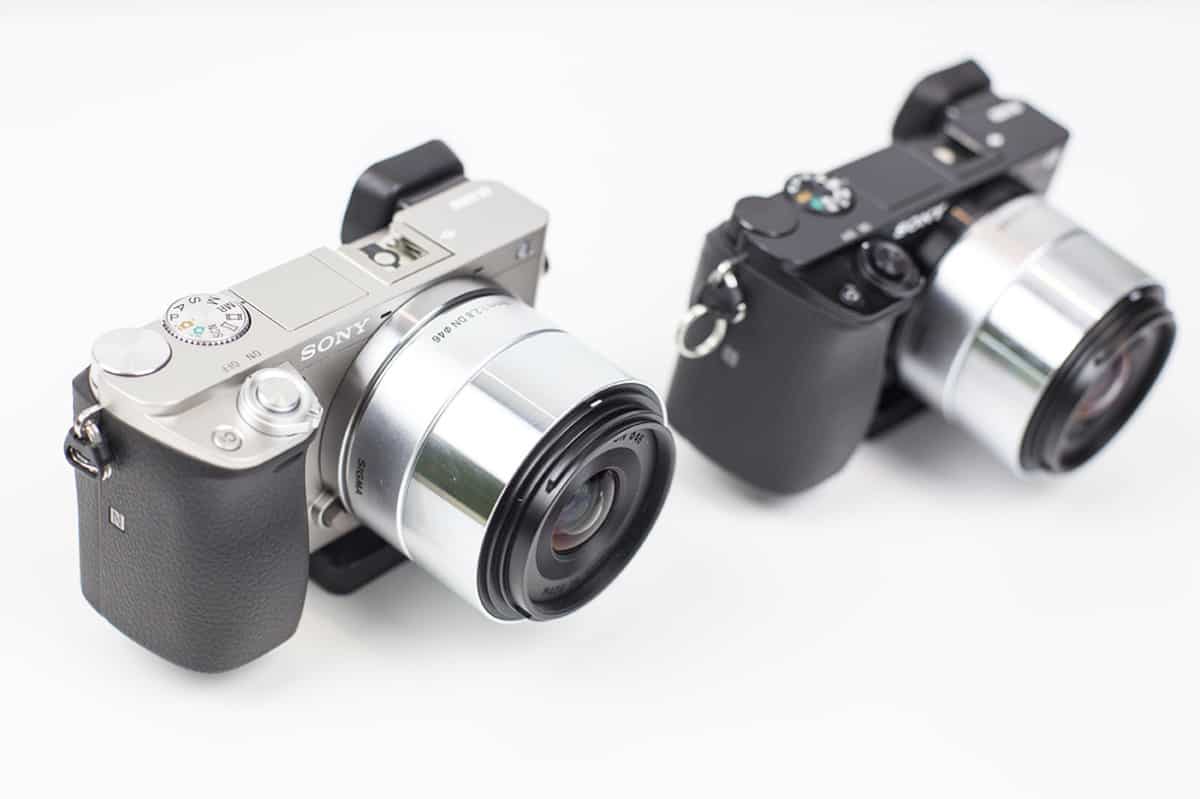
Twin a6000’s look almost identical on the outside, but the silver one is strictly for IR and the Black one is for visible spectrum.
Some experiments are worth the investment others are not. Basic science can tell us this. However, my theory on creating an IR action that could suit all would not be complete until I had an IR camera of my own. At this point the experiment is still an experiment, I have yet to prove my theory and am really only on the 5th step of the scientific method:
- Ask yourself a question
- Research answer to question
- From research make a hypothesis
- Test it for a while
- Observe while testing
- Analyze observation and make a conclusion
- Communicate your results
I continue to refer to this as my most expensive experiment yet, because at this point I have not proved anything to make the investment valid… especially with the wife 🙂 While the cost may be moot for the experiment, it is good for you to know just how much this conversion could cost you if you don’t have a readily available camera at hand to convert.
| ITEM | COST |
| A6000 w/out lens | $548.00 |
| 2x Sigma 19mm lenses | $398.00 |
| 64gb memory card | $35.00 |
| R72 720 nm Filter 46mm | $14.50 |
| Extra Sony a6000 battery | $27.00 |
| Sony a6000 Screen protection | $7.00 |
| Total | $1029.50 |
$1029.50, not too shabby but also nothing to sneeze at. But now I can successfully record an image in IR with the converted camera and replace the camera on the tripod with the visible light camera and capture the best of both worlds. No pun intended.
Infrared Photography Observations … So Far
- The most difficult part to wrap my head around in the beginning is White Balance. I have conducted hundreds of experiments with the White Balance of my camera and have yet to find one that makes me truly happy. Even when you shoot in RAW you still need to shoot for a specific white balance as the image is not ready right out of camera. You have to make a Raw DNG profile for your camera that removes the overly red tint to the photo. You then have to swap the red and blue channels in Photoshop and manipulate your images accordingly with the HSL Adjustment. This makes the experimentation process slow and tedious.
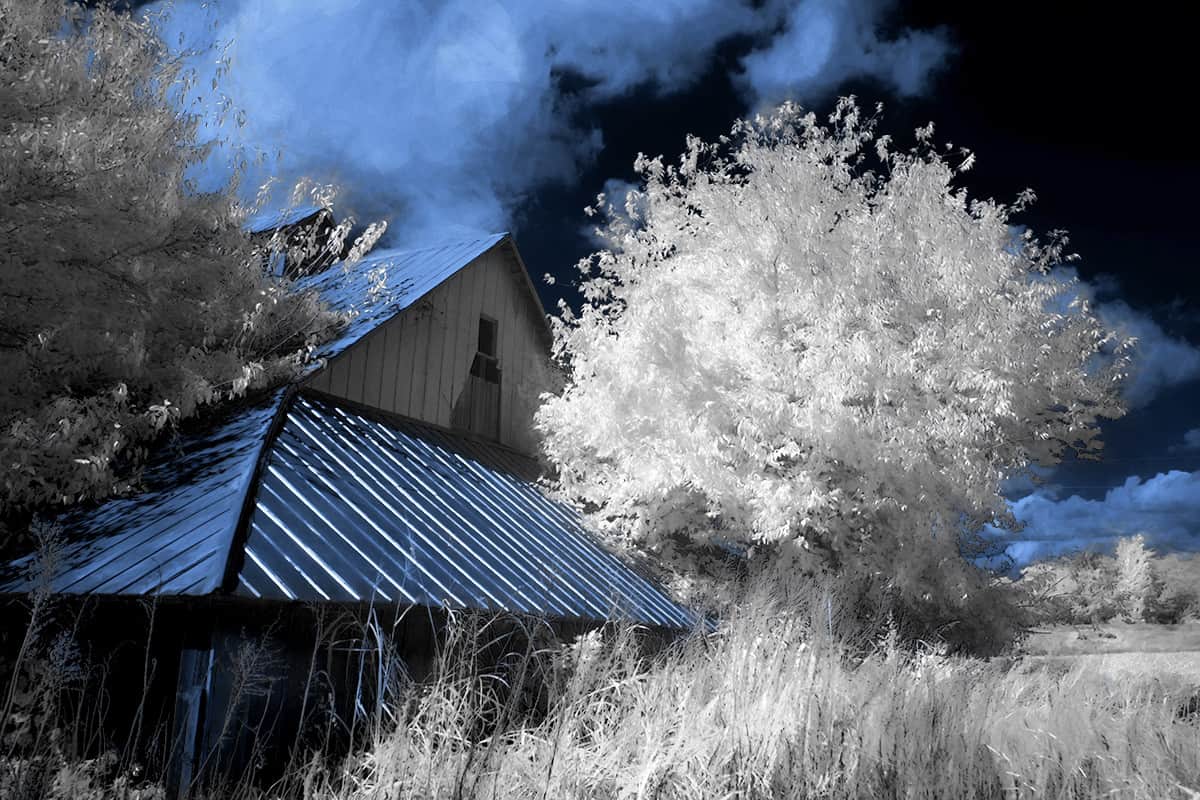
- I tend to like the finished look of the Infrared images. I like the overly blue tones and the whitening of all things foliage.
- The IR Workflow is a bear to deal with as seen in point 1. I find myself staying up pretty late at night trying to figure out the possibilities in my head. Yes, I am losing sleep over this.
- I feel like I am in kindergarten all over again, but with my camera. I will not let this process best me. In the end of this giant experiment that I am not quite sure is going, I will be an adventurer in a new form of light.
- Not all White Balances act the same from image to image and every camera treats the IR world differently.
- Some lenses create Hot Spots in the image with IR, like the stock a6000 lens, hence the purchase of the sigma lenses.
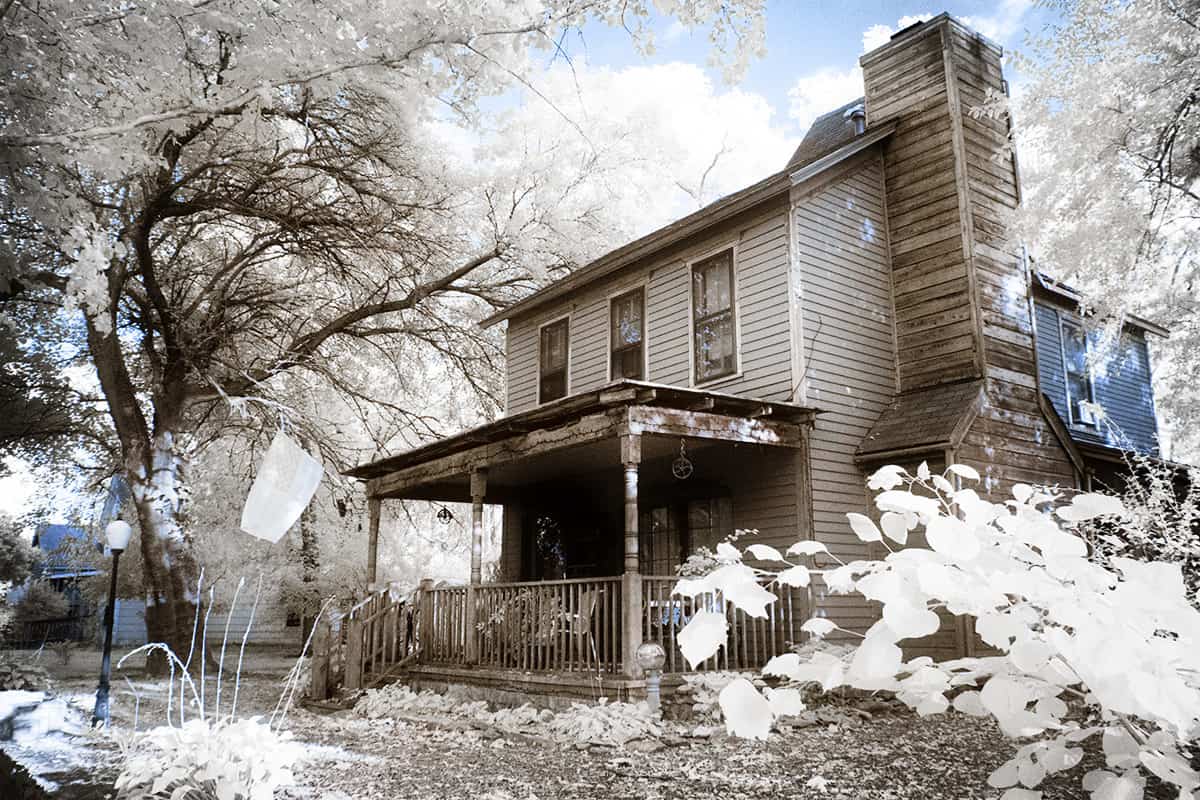
Infrared compared to Visible Light. My first real comparison shot.
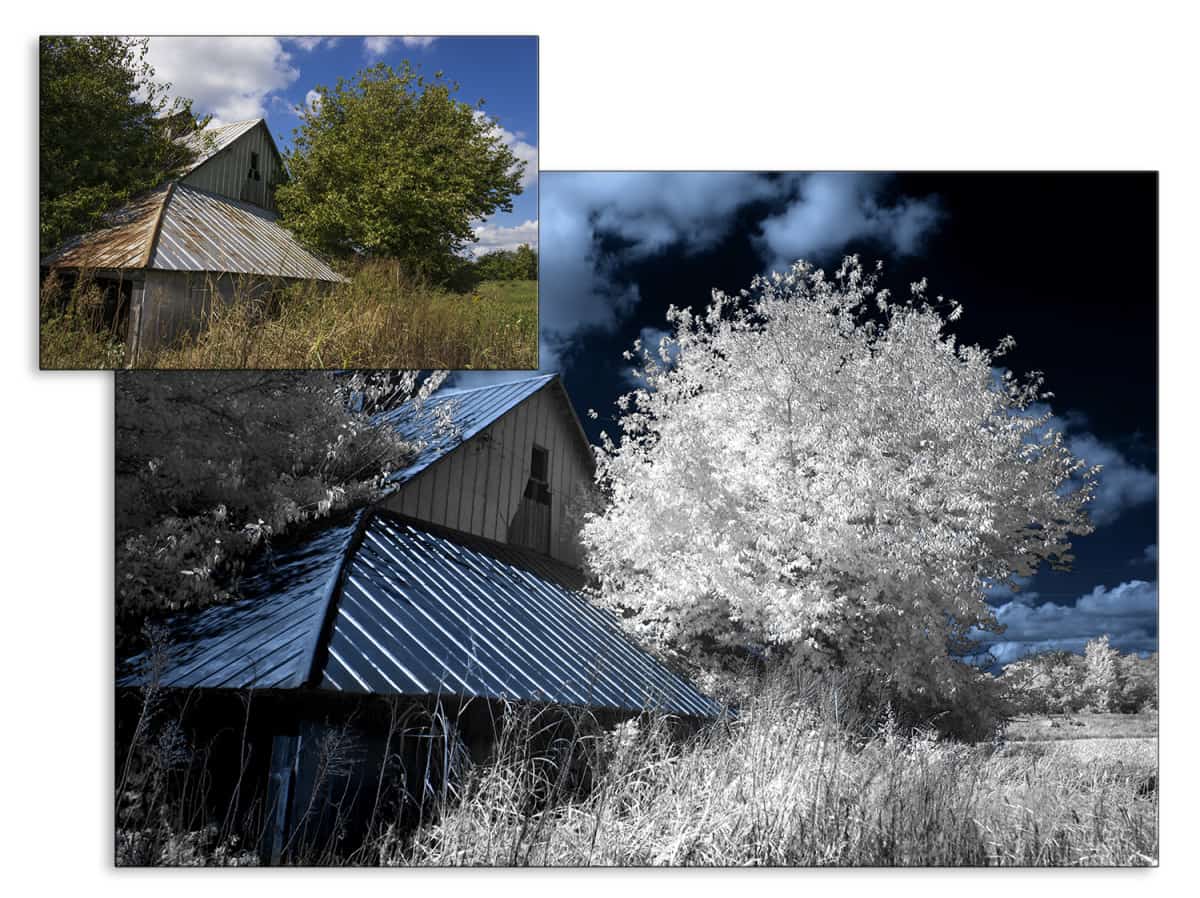
One benefit I have found with Infrared Photography is that it takes kindly to shooting in broad daylight. It tends to like robust greens and bright foliage. I shot in poor lighting conditions and the results were not flattering at all. I also tend to be very partial to the painted look I received from the IR image above after running it through Topaz Impression.
I am far from done with this experiment. Stay tuned, as I get better results I will be sure to keep you posted.
Do you shoot for IR?
Do you have any advice for me?

For Blake, it's all about the art and process synergy. He dives deep into complex topics and makes them easy to understand through his outside-the-box thinking so that you can use these tricks in your workflow today!


I find the NIK plugin Viveza invaluable in my IR work
Thanks John, this may sound like a shameless plug, but the Digital Zone System crushes IR images! I have been having a lot of fun editing IR images with the Zone Systems.
Thanks again for the suggestion. I’ll look into that.
When I bought the a6000 as a backup to my a7 I had my previous backup, the NEX6 converted by Lifepixel. It replaced a 3 megapixel Nikon 990 that I had them convert many years ago. My conversion is B&W as I don’t care for color IR. As you have found the best time to shoot is the middle of the day when all the other photographers have put their cameras away. I don’t do anything as complicated as swapping channels inPs, I just process the RAW files in Lr then open them inPs as smart objects, run them through NIK Color Effects Tonal Contrast and finish them inSilver Effects. Sometimes I add a bit of glow to the highlights so they look more like the IR film I used to shoot. Being able to see what you are getting before you shoot is so wonderful. Have fun with your new kit.
PS. I would like to send you a couple of my images, but it will have to be in a separare email.
Excellent images you sent. I too bought the a6000 as a Backup to my 6D. I couldn’t part with it to sacrifice it for HDR so I bought another one.
Thank you for your IR suggestions too. I’ll put those into practice as I continue to experiment.
very awesome, I never knew infrared could be also-contain blue before…I love to see more of your Infrared photos-very inspiring-unique-creative-innovative
Thanks Bob! It is an extensive process, you have to make a DNG profile to remove the red, then go into Photoshop and swap the Red and Blue channels. That way a blue and gold type of image results and you can manipulate saturation from there. It is a lot of fun in another worldly type of way!
If you haven’t tried channel swapping to get faux color, you should. Especially looks good with the 590nm filter. The advantage of using a mirrorless over a converted DSLR is that you can use different wavelength filters and see much different effects. 850nm is another one to try. It gives high contrast B&W results. I have a D70 that is converted to 720nm and an Olympus PM-1 that is full spectrum so I can use it with the different filters.
Thanks Gordon. I do the Color Swap on here. I am a huge fan of the color IR work. I find it almost more intriguing than Black and White. I did buy a 720 filter to go along with it and have been experimenting with that as well. I may attend a lifepixel workshop here in the next month or so.
Hey Blake, how did you come to the decision to convert the camera to the Super Color IR Filter? Aren’t there several choices? Now I want to do IR! Thanks
Hi Blake,
Nice to see you are having a go at infrared photography. I had a Canon D5 converted about 2 years ago to infrared… fitted with a 630nm filter. I have used the adobe DNG profile Editor to create about 20 different camera profiles for my camera. All images are hdr. For these images I merge to hdr in ACR and apply the custom camera profiles there. I also have custom settings in colour mixer where I can also manipulate the colours, and also like Topaz Restyle for switching the colurs around. If you look on my Flickr site you can see many examples of color and B&W images
https://www.flickr.com/photos/ramigrafx
Hi Richard,
I have seen you gallery in flickr and completely amazing and stunning.
May I know what kind of post processing application you use to convert the color? Because I saw in your gallery there are some color style of your IR picture. Actually I really curious to see the camera result before post processing because you mentioned that you have 20 different camera profiles as well. Thanks