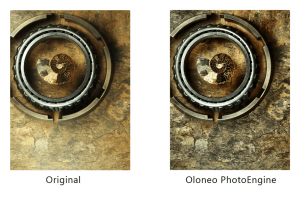
I recently reviewed Oloneo’s PhotoEngine last week. Since then, I have had more opportunities to experience it. I must say, the more I play, the more it amazes me. Oloneo has it all figured out over there and if you haven’t played around with it yet, you should. Download the 30 day trial and give it a taste for yourself. I must say, 150 dollars is a very small price to pay for such a powerful HDR program. My fellow HDRtist’s, welcome to the Photoshop equivalent of HDR software.


Fab tutorial! Thanks for creating this excellent Oloneo HDR tutorial. I have embedded it on my HDR info site. Nice job Blake!
Great article – as software selection combined with photo skills together most impact end results. We are constantly exploring best solutions for hotel photography where window views must be perfect with rich interior details – wall with no noticeable HDR effects. Hotels want Architectural Digest cover shot quality done at minimal time/cost??? We now wonder if mixing flash lighting as a highly diffused flash fill while taking a 7 frame (5 sec. per frame delay) will yield our best starting point?? Then determining what HDR software will work best – then carefully blending the final HDR image selectively with one or two of the sequenced framed shots??
Please share any ideas / comments you may have?
Hmm, that is a tricky one. What I would do in that case, because you want the clean look of the room without the HDR walls, is shoot the room with a fill flash or two depending on the room. I would then switch off the flash and shoot a 5 Exposure HDR, with extra attention to what is outside of the windows, you may have to stop up for that. During post processing you could place the HDR image on top of the fill flash image in Photoshop and mask out the walls on the HDR shot, but leave the carpet/furniture. Another idea, which I have done before, is to mount the camera on a tripod, select a 5 exposure bracket, turn the flash on for the first shot in the series, and turn the flash off for the last 4 pictures. Make sure you are at +1 EV/ – 1 EV for each shot so you get a wide range of over and under exposure. Then process the 5 images normally in Photomatix or Oloneo and clean it up in Photoshop. For your needs I would suggest Oloneo, it is a much more natural looking HDR final product. I hope that helps. Take care Tom.
Good tutorial. One correction. The saturation curve isn’t actually about controlling the saturation of darks and lights, but rather about controlling the saturation of areas that are already more or less saturated. As the manual explains, “The input is the original saturation of the image (horizontal axis). The output is the edited saturation (vertical axis). The shape of the curve determines how the input saturation is mapped to the output saturation”. It works kind of like a more powerful vibrance control and is a very powerful feature if you want to use selective saturation as an editing tool.
Thanks Ken, that clears things up. I will have to download the manual, I usually download the program and learn as I go. I try to explain things as I see them being adjusted, from my perspective it seemed as if the saturation tone curve was adjusting the saturation in the light and dark areas. It is good to know what is actually being adjusted. Thanks again!