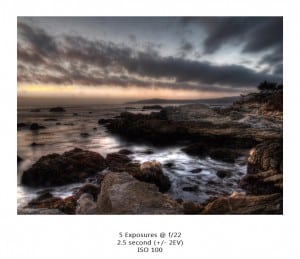
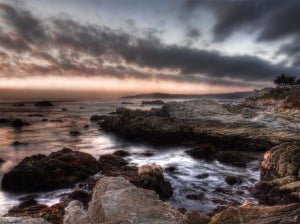
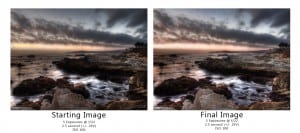
I recently went to the beach where the wifey and I exchanged vows to forever love one another, regardless of the amount of time I spend with my camera and the recent addition of EverydayHDR, that wasn’t really in the vows but it was implied! I took a picture of the sunset on the beach and have had it for months but didn’t really know how to handle it. It looked like it had potential but no matter how I adjusted it I couldn’t get it right. I recently went back to it with a new attitude and perspective on adjustment layers. It is a real gee whiz one but it made stunning results!
Painting With Adjustment Layers
- Open your image in Photoshop.
- Duplicate the layer. Right click the layer in the layers palette and select Duplicate Layer.
- I took a selection of the sky and Gaussian blurred it to push it back a little. That is outlined in Method #2 on this tutorial.
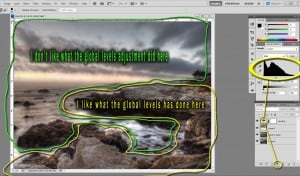
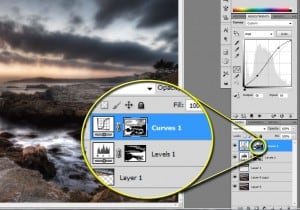
- I would normally add a Levels and Curves Adjustment layer at this time and continue. You have seen this in Method #1 of the same past tutorial, however, the levels in this image are tricky. When I set the global levels to the lightness of the rocks, I lose the magic happening with the water. Here is where a little knowledge of Opacity comes in, and it is great to have a Bamboo Tablet at this point. There are many sizes, I bought the small one as I was skeptical. I love it, should have gone bigger!
- I didn’t like how the global levels treated the entire image, however, I did like the way it treated the lightness of the beach rocks.
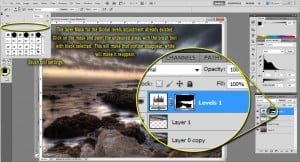
- Select the layer mask (the white block next to the levels icon).
- Paint with black on the areas you want to get rid of with a soft edge brush.
- If you go to far into something you wanted to stay press (x) to switch between white and black, and paint white in the area you want to bring back. I have been playing with masks for a little over 8 years now and I still find them to be magic!
- If I want to bring some of the black areas back but not all, simply adjust the opacity of the brush to 50% and start painting areas back in. This won’t give you 100 percent of the effect of the adjustment layer, it will yield 50%.
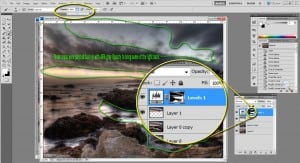
- I repeated the process for curves.
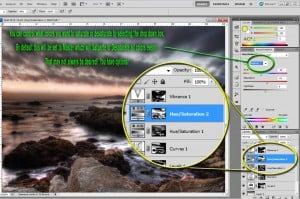
- I repeated the process for Vibrance
- And Saturation and Hue 1 for the Reds.
- And Saturation and Hue 2 for the Blues and Yellows
- I finished it off with a little clone stamp to the blown out yellow cloud in the middle left and a linear light high pass sharpen (this will be another tutorial!) and left it at that!
Next time you are stuck on an image, try painting it up! And don’t forget to check out the Merch site! The new pirate design is up!
Have a HAPPY HDR’ing weekend!

