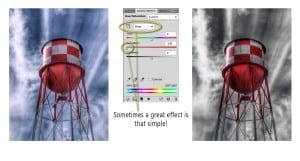
Here’s a quick tip. A really easy Selective Deaturation technique for taking away the sky in an image. Open up a Saturation Adjustment Layer, use the drop down box that says Master as the Default. Switch it to Blues and drop the saturation to Zero. Like magic your sky is gone!
For this image it worked perfect! However, if there is any blue in your focal point it will be desaturated as well. You may want to take advantage of that clever mask next to the desaturation adjustment layer and paint your blues in your focal paint back in with black selected.


That’s a cool trick. Thanks.
No problem! Glad you liked it!