
Creative Spotlights with the Radial Gradient
There are all kinds of tools that you can use in creative ways in Photoshop, but one of my recent favorites is the Radial Gradient. It can be used very subtly to direct the viewer’s eye to the exact spot you want them to go in your photo. It is almost like cheating!
The Radial Gradient is kind of hidden in Photoshop. It is buried in the Adjustment Layers in the Gradient Fill dialog. Once you find it, you can unleash some pretty creative effects so take the time to find it and experiment with it.
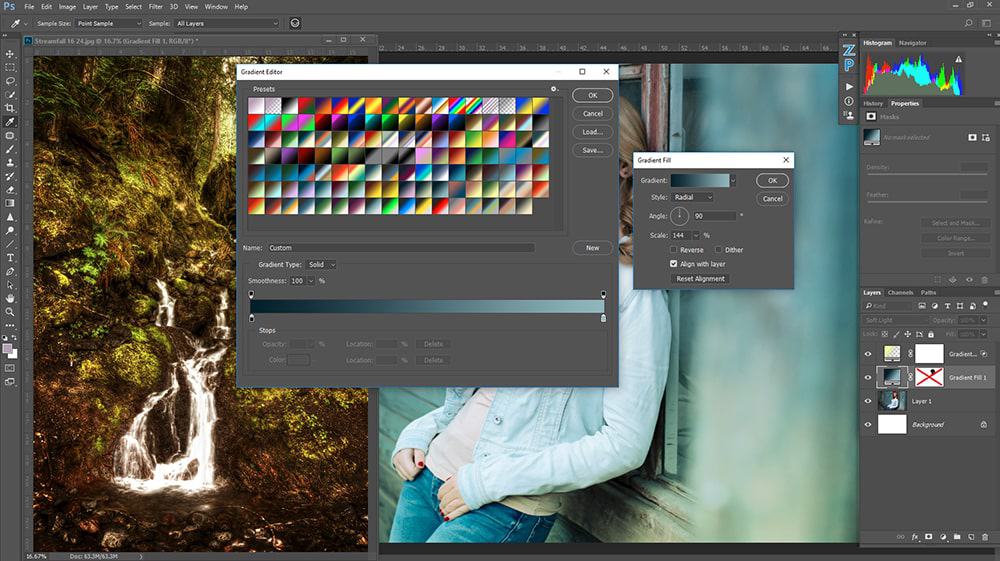
With the radial gradient, you are not restricted to Landscape or Portrait images. You can use this technique on just about any photograph that has colors and tones… that’s every photo. In this tutorial, I will show you how I use it on both a landscape and a portrait to push and pull the viewer’s eye to certain areas of the photo. In the landscape photo, I use it to brighten up the background to draw your eye away from the foreground. In the portrait, I use it to darken the background and pull you into the foreground.
It is extremely versatile when you use it in harmony with the various tools in Photoshop. I will show you how to change the blend mode (Soft Light and/or Color), how to use it with Blend If, and various Opacities to control the effect. It is not a difficult technique, but it does require some know-how and experimentation. Enjoy!

For Blake, it's all about the art and process synergy. He dives deep into complex topics and makes them easy to understand through his outside-the-box thinking so that you can use these tricks in your workflow today!


Love It. I’m learning so mutch from your tutorials.
Awesome! That makes me pretty darn happy!
joining your f64 academy is the best progress I have made with photoshop. I would be interested in seeing vidios on say the same subjects but with your zone system and pallet system. Thank you for the time and effort in producing the vidios.
kennethleon
I am subscribed to your newsletter and got a link to this tutorial. But there is NO video – the screen is blank. Whats up with that?? I can’t see the tutorial?
That is odd. It is embedded from YouTube, not sure if your browser has embedded things disabled. No worries, here is the YouTube video link: https://youtu.be/SYVvChotk1o
Your tutorials are master classes!
Awesome! Thank you so much!
Thanks, Blake! I love your tutorials.
🙂 My pleasure, thanks for watching.
Great Tutorial
Thanks, Jay!
Great tutorial Blake. I learn so much from you and I love your presentations, always short and to the point.
Really, short? haha, I say that because someone cussed me out on YouTube this week for being too long. I guess they took it very personally, haha!
I appreciate your feedback, much nicer than this week’s YouTubers 🙂
Hi, Blake! I love all your tutorials, but this one is particularly timely as I will be teaching in the Cuesta College for Kids program starting Monday and one of my classes is “Photo Editing with Photoshop and On1 Photo RAW.” I already printed the course syllabus but I will surprise the kids with this cool radial gradient spotlight (spot dark?!). I think they will love it!
Awesome! They will love it! I am sure you will hit a home run.
Blake – please do a SERIES on the mixer brush. Most tutorials I have found are for PS painting but this brush is much more versatile. I am only able to toy with it because I need some expert hand-holding.
Working on it, as I stated in my email. I can only do so much and I do not teach anything I do not know well. When I get the hang of it, I will teach it.
great video, thanks for sharing
No problem! Thanks for watching!
Thank you for another excellent tutorial, Blake.
This is very cool. Thank you for sharing your insights every week. Helps me understand the power of PS.
Again thank you Blake… Yet again another arrow in the quiver… 🙂
Great video. Thanks Blake.
This is brilliant Blake! Thank you so much! I’ve never used gradients that way and this tutorial is awesome. I always look forward to Fridays!
Amazing tutorial. I am a big fan of your tutorials. you are a great teacher!
You amaze me every week with your fantastic tutorials. Always something to learn from you. Like the gadrient fill, totally awesome
Thanks Blake for yet again making my many of my 3rd party plugins over the years continue to gather virtual dust! Haha! I also use the Reflected Gradient with sunrises/sunsets (letting my secret out) to warm the colors in the red/orange/yellow bands and cool the foreground and upper sky. The radial is my favorite for drawing attention to particular areas and only Photoshop allows multiple colors whereas some of this is possible in Lightroom or ACR using a single color tint for the radial or standard gradient. Photoshop gives us the raw power but you, my friend, show us how to get the most from that power.
Hi Blake, Awesome tutorial. Since Jeff just posted a comment, I have to keep the McPheeters chain going. Yes, we all own too many plugins, but it’s the creative person, like yourself, and each photographer’s creative desire to take a technique and blend it to his/her own personal style that keeps us all moving forward. Thanks for your good work!
Excellent tutorial, as always. Thanks, Blake!
It is almost magical how that little gradient of color can effect how, and where, the eye is drawn to an image! I love the use of “Blend If”! I had learned to ‘highlight’ the feature in an image, but, not with the radial gradient! I WILL be using this method now!
Thank you so much!
Su
PS I share some of your posts and some, well, I feel like they are my ‘dirty little secret’! LOL I keep them to myself!
well done
Blake, you’re awesome. I really like your delivery and the content is always useful. Keep these coming.
Appreciate the creative way you have used the gradients to improve an image.