
The Soft Light Sky Replacement Technique
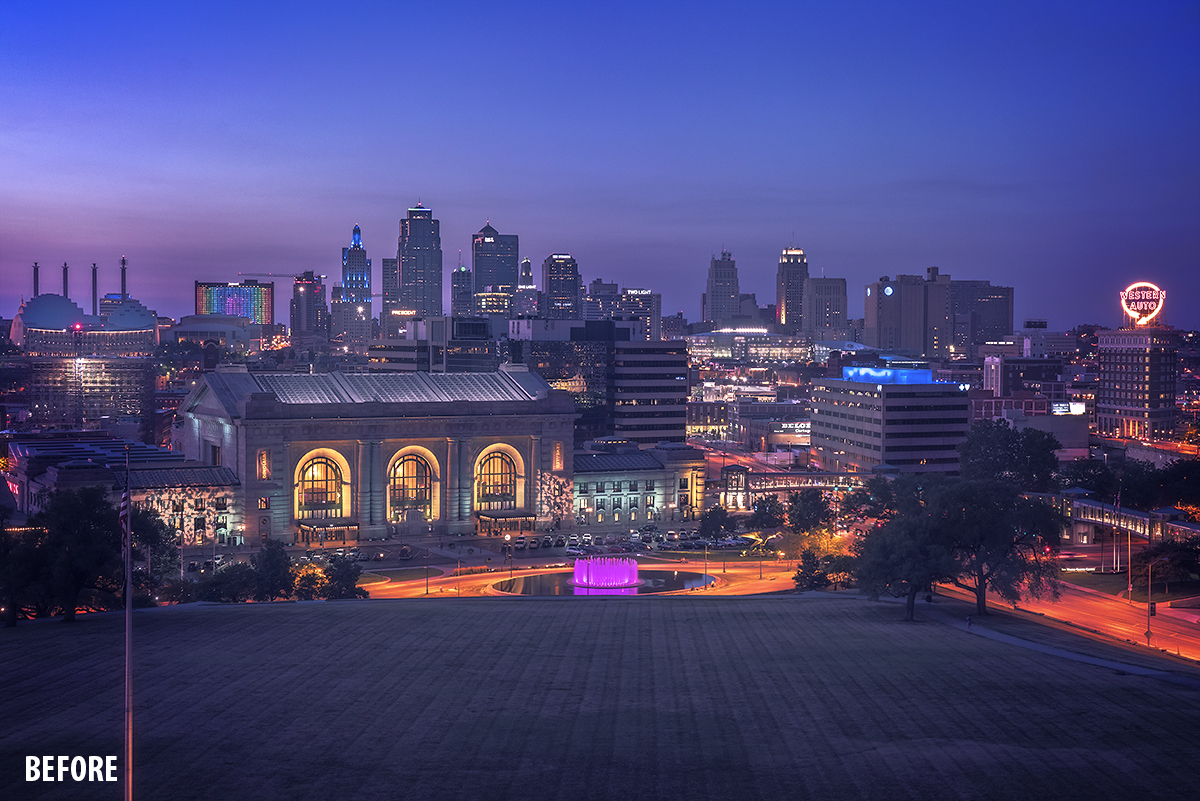
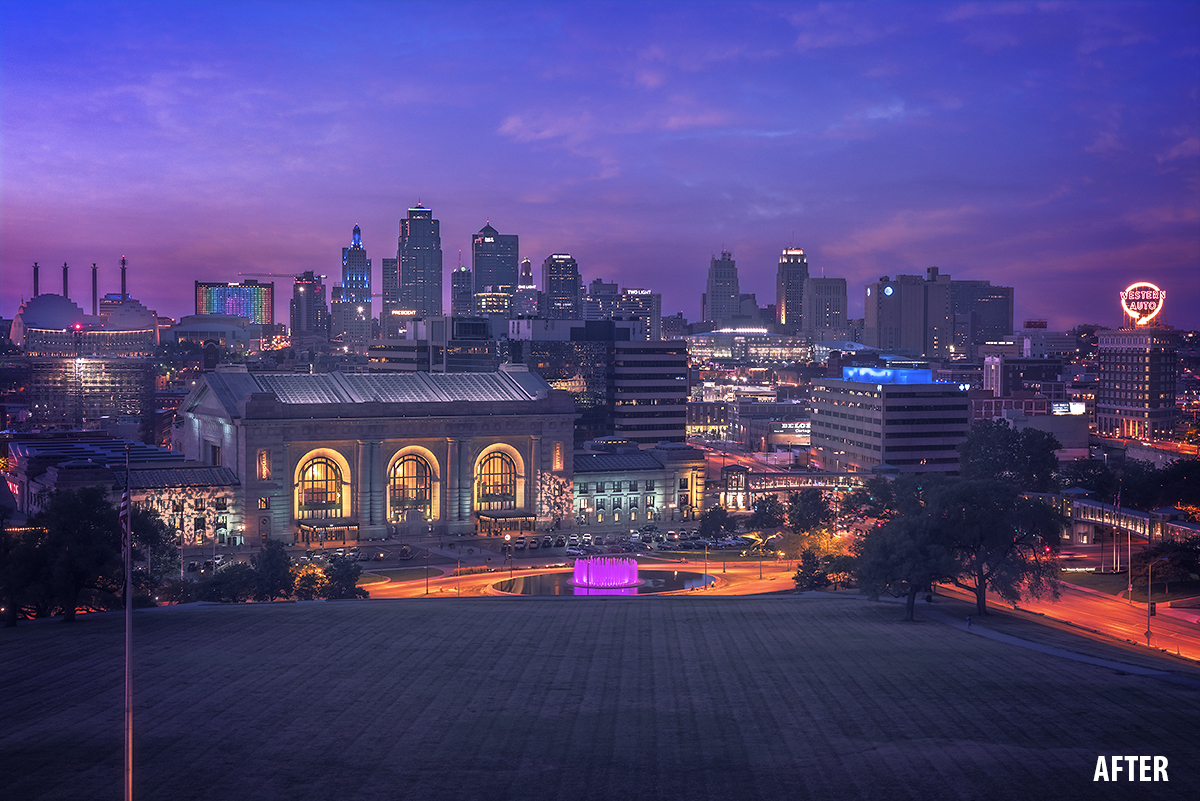
On my way out to Kansas City the other night, I was praying for a beautiful sunset. I would venture to say that’s what most of us do when we take the time to go out with our cameras. To my surprise when I got there I did have some beautiful clouds, but they were on the other side of the city!
I, however, wasn’t too concerned about their position because I knew I could move them with my powers of telepathy, ermm, I mean Photoshop 🙂
In today’s tutorial, I am going to show you how to use the clouds from one image and put them into the image where they should have been. It is a pretty simple task. This tutorial will show you in under 7 minutes!
Things to consider with this technique:
- Your Primary image has to have some detail in the sky or color. A dull white dull blown out sky will not work for this one.
- Try to use clouds that match the time of day of your image. These clouds came from the same night, so they are much more believable.
- Photograph skies often. Even if you don’t have a decent foreground, just grab those skies. They can be used on other photos at any time!
- The mask doesn’t have to be perfect. Seriously, the Soft Light Blend Mode will make most things believable. It is very forgiving in this technique.
Get the Practice Images Blake discussed in this tutorial.

f.64 Academy and f.64 Elite are the brainchildren of Blake Rudis. While he is a landscape photographer, he is most passionate about post-processing images in Photoshop and mentoring others.
For Blake, it's all about the art and process synergy. He dives deep into complex topics and makes them easy to understand through his outside-the-box thinking so that you can use these tricks in your workflow today!
For Blake, it's all about the art and process synergy. He dives deep into complex topics and makes them easy to understand through his outside-the-box thinking so that you can use these tricks in your workflow today!


Blake that was awesome great tip!
Since I live in KC I really liked that shot.
Well, sky are so important in most of my images and finding a quick way to drop in an interesting one by starting with soft light blend will definitely speed up my work and make it realistic.
All I can say is WOW.
Thanks. I will use this often.
Great thanks!
Blake, thanks for continuing to expand our photographic knowledge!
Thanks very intructive!
Great technique, Blake. Thank you very much for ALL you do for us.
Vinny
I would like to be signed up for your newsletter.
Thank You
You say to photograph skies often…Is there a technique to photographing just skies?
As usual – an awesome tutorial! Thanks.
Just what I need. Thanks a lot Blake
That is awesome. I am a recent student of f.64 Academy. Learning lots of cool stuff. Great program.
Thanks
Thank you Blake. It’s a nice one.
Living in a country , like Namibia, with a lot of blue skies, your technique will help making my skies more endearing.
Very helpful – will use this technique myself.
Blake, thanks.
I wish you slowed down. I had to replay it many times to get it.
I need to see every step, I am learning photoshop, what is easy for you, it is not so easy for me. ☹️
Like Marcela, I needed to see every step… (though your expert users might consider them a waste of time}. I ran the video 15-20 times getting a little farther each time. But I couldn’t do the the last step, create the clipping mask. I hit the Alt key on multiple tries, but it just wouldn’t work !! Finally, I went elsewhere on the web to learn how to do a clipping mask. Such an easy solution for so much pain !!! Why didn’t you just say, “Hit the Alt key while the cursor if over the line between the two layers”????? Anyway, I love that “softlight” (and the clipping mask).
Honestly, sometimes I just forget. You have to understand that there is a lot of stuff running through my head when I do a tutorial and sometimes things slip. I apologize.
Excellent!