
A Beast of a Wide Angle Lens
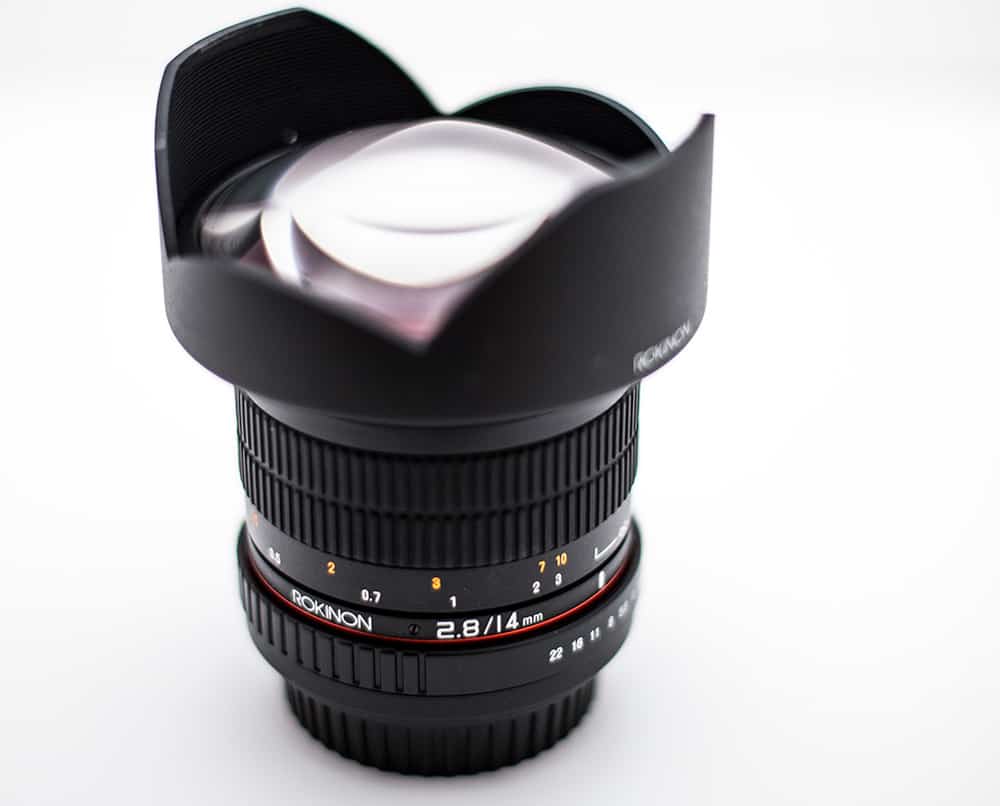
I recently purchased the Rokinon (also called Samyang) 14mm Wide Angle Lens for my Canon 6D. I had previously owned the 8mm Fish Eye for my Olympus and loved it so I knew I couldn’t go wrong with its big brother for the Canon Cameras. When I purchased this lens I had a few thoughts in mind that I would like to share with you prior to the review.
- I already owned the Canon 17-40 mm lens and was looking to trade it in and up for the 16-35 mm lens. In the end this would have cost me about $1000. My whole reasoning was not for the extra 1mm, but for the f/2.8 as I would like to shoot some Milky Way photography in the near future and that 2.8 is critical for getting the shot.
- The Rokinon 14mm is an f/2.8 lens which would satisfy the need for the 2.8 and give me an extra 3mm on my Wide Angle.
- I new I only wanted this lens for a very specific purpose, wide landscape and Milky Way shots. This lens @ $297 when I purchased it would save me the hassle of finding a buyer for the 17mm, buying the 16mm, and in the end saving me $700.
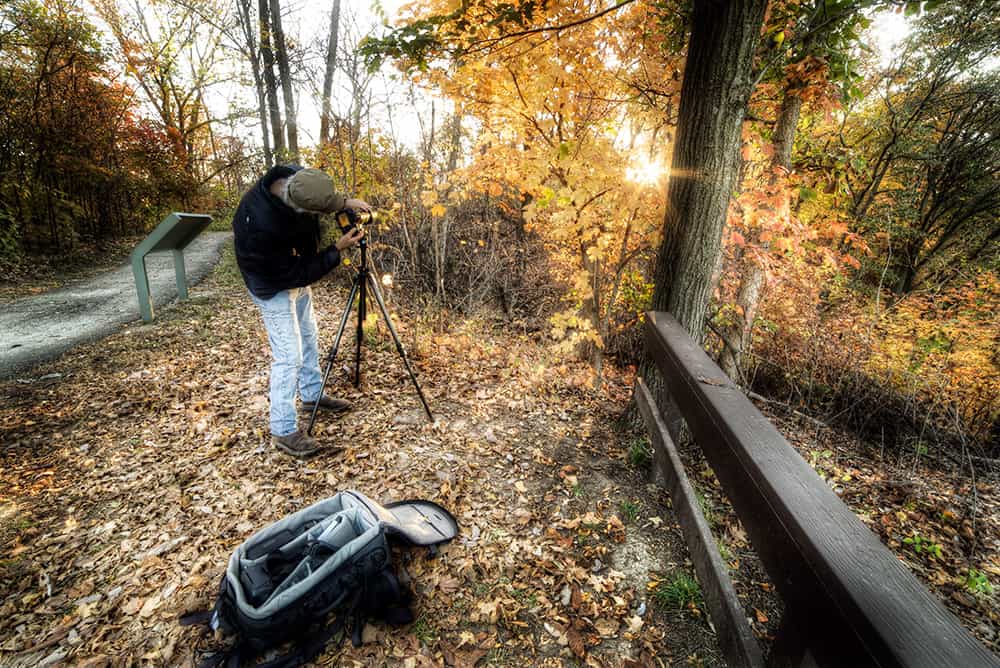
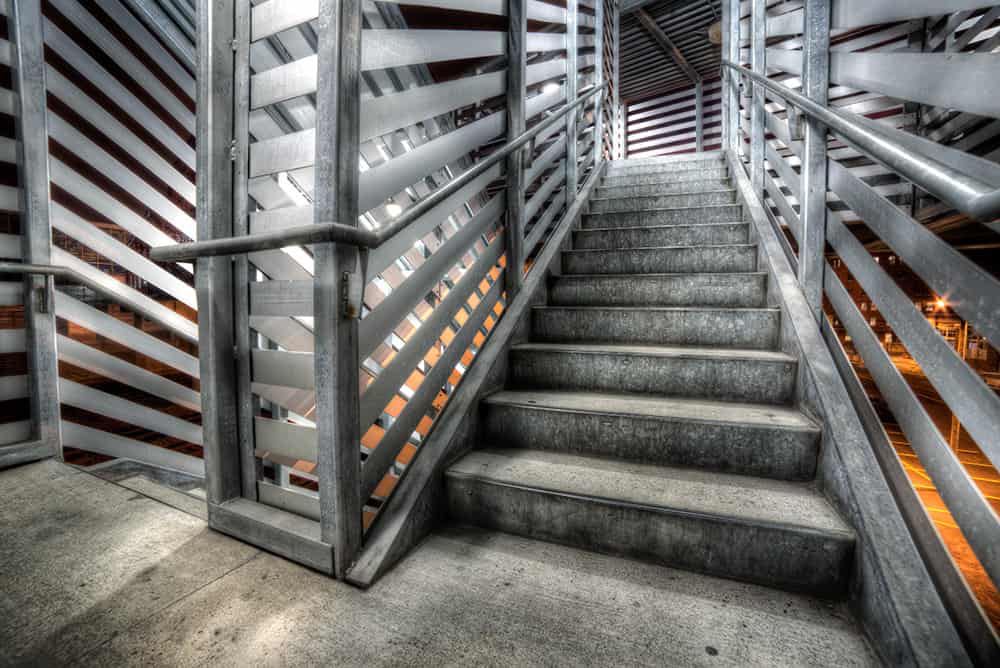
My buddy, Leon, a great photographer and an inspiration to us on HDR Insider. I wanted to see if the camera bag and the whole scene would make it in the frame with the 14mm, they did!
What you need to know about this lens…The Review:
It Is All Manual…
The biggest deal breaker for those looking to purchase this lens is that it is all manual. However, before you go running for the hills, this lens is a BLAST to use!
I come from the old days of film, my first camera was a Canon AE-1 that I still love dearly. 35mm Cameras operate very similarly to Digital cameras with a few exceptions. The aperture is dictated by a ring on the lens not by digital numbers on a screen. In many cases there was no auto focus, you had to do that all manually with the focus ring on the front of the lens.
Aperture
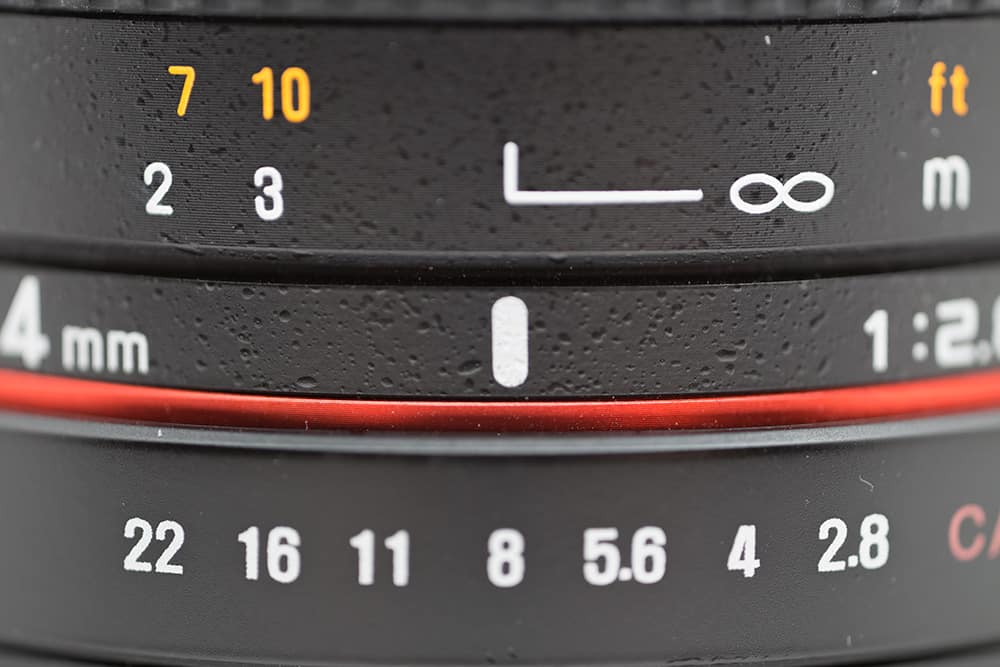
The Rokinon 14mm functions the same as a 35mm film lens, you set the Aperture on the lens itself. You can still use settings like Aperture Priority Mode to shoot for HDR, however, your Aperture will not show up on the screen or in the exif data of the photo (at least it does not on the Canon 6D). This makes it critical to know what aperture you have set on the lens. If you are an exif data junkie, you may need to carry a notepad with you to take notes on the apertures you were using as well as a description of the scene. It will show up as f/0 with a Focal Length of 0mm!

Focusing
Focus is very much the same as the Aperture, it is manual. This can be tricky to get used to since we are all about hitting auto focus these days and letting our cameras do the hard work. With Wide Angle lenses it is especially difficult to get crisp focusing using your eye manually. This is because the scene is so vast and while the image may look in-focus in the viewfinder, you have to remember that view finder is very small. When you open that image up on the big screen you will see very quickly how out of focus it is if you didn’t get it right in the camera.
So what do you do?
With this lens I prefer to use Live View Focusing. It goes a little something like this:
- Place your camera on a tripod.
- Switch from Viewfinder to Live View Mode
- Press the Zoom button on the back of the camera. Sometimes you can press this twice, once for 5 times and another for 10 times (this depends on your camera model).
- You should be seeing everything really close-up now.
- Use the focus ring to ensure the image is tack sharp.
- You should be able to depress the shutter button while zoomed in and the camera will take your pictures (it does on the 6D and Sony a6000).
While this live view method is generally the best method for tack sharp images on many lenses, it confines you to a tripod. This is not a problem for avid HDR shooters like myself, but try photographing a child on a bicycle with this lens. You have to be really quick and spot on with the focusing. Even with him sitting still (which is an anomaly) it took several shots to get him even remotely in-focus.
One problem that is common with this lens is that the focus measurements are off. On my copy Infinity focusing is achieved at the 2-3 meters (8-9 ft) mark instead of the intended infinity mark. This is not much of a problem for me as Live-View focusing is my main go-to for this lenses primary application; landscape photography.
Focal Length
This lens is a 14mm Lens, it is not considered a Fish Eye, it is an Ultra Wide Angle lens. On a full frame camera this lens is a true 14mm, however, on an APS-C (1.6x crop factor) camera this would be ~22mm and on a 4/3rds camera (i.e. Olympus, 2x crop factor) it would be 28mm.
Camera Sensor |
Focal Length Equivalent |
Full Frame |
14 mm |
1.6x Crop (APS-C) |
approx. 22 mm |
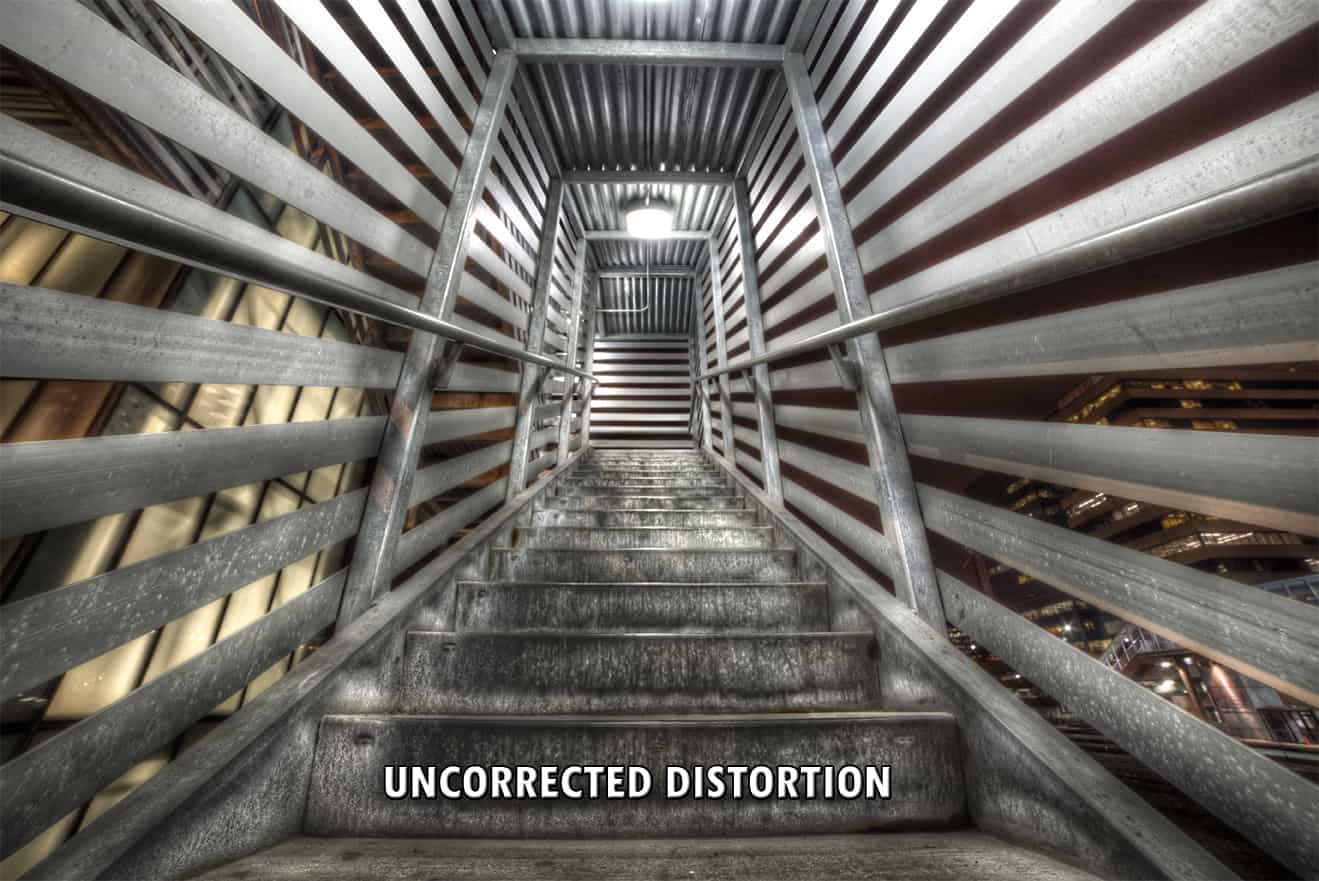
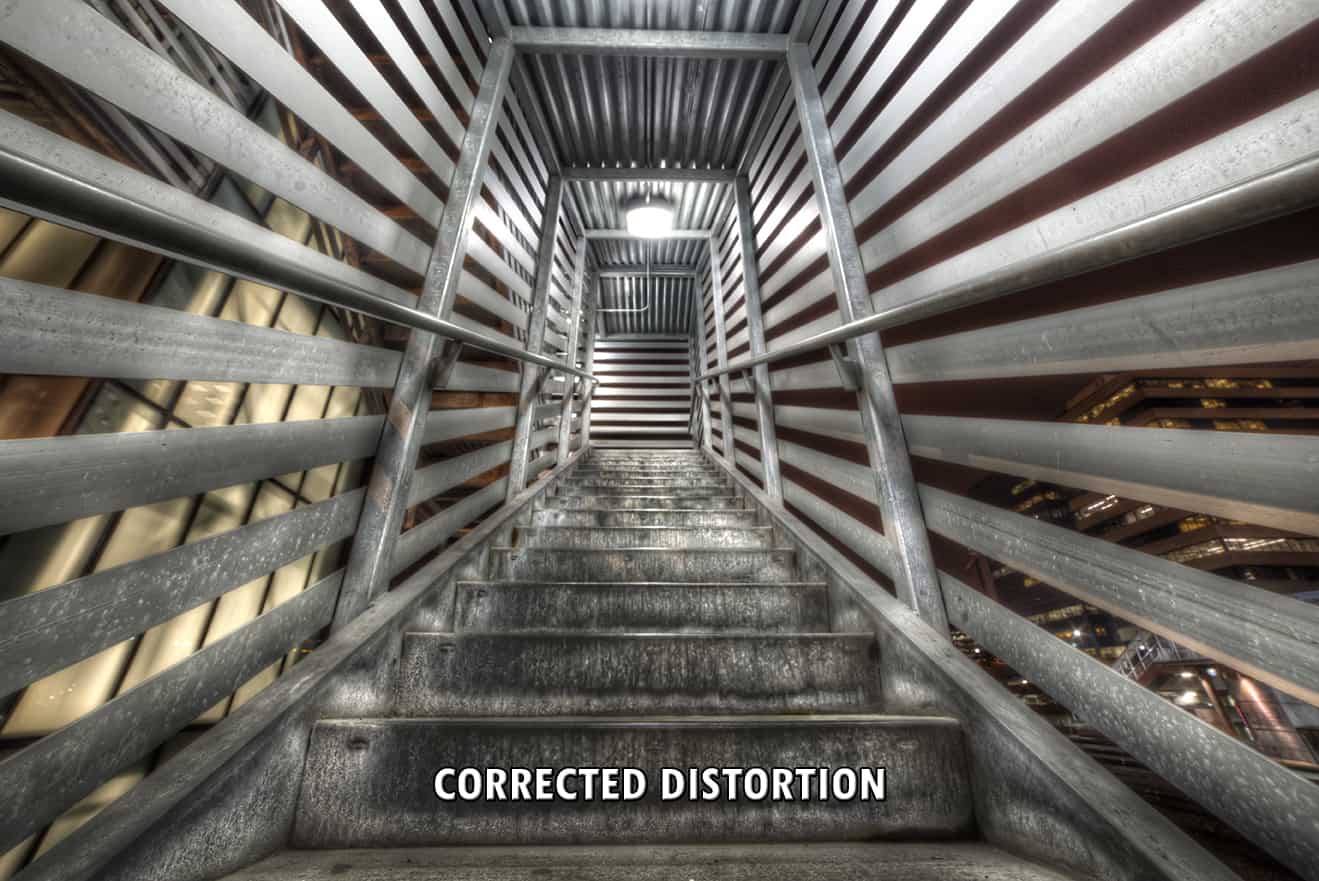
This lens at 14mm will cause some distortion in your images, this is to be expected with any extreme wide angle lens. It is easy enough to fix in post-processing using either the Lens Correction in ACR or Lightroom or the Lens Correction Filter in Photoshop. I prefer the look of a wide angle shot with no correction, but that is a personal preference.
Chromatic Aberration
Typically, wide angle lenses can be littered with Chromatic Aberration (CA) especially at f/2.8. Chromatic Aberrations manifest themselves as Cyan and Magenta or Purple and Green lines around areas of high to low contrast in your photos. I despise CA! With wide angle zooms. CA can destroy a great photograph if not handled appropriately in post.
Luckily, this lens is a prime 14mm focal length, it boasts much less CA than the 17-40mm Canon L lens. Below is an example of a 400% zoomed in area where CA would normally run rampant. This image has not been altered in any way and is from the unedited original RAW capture.
I am thoroughly impressed by this lenses ability to capture a sharp RAW image with very little sign of CA.

Use of Filters
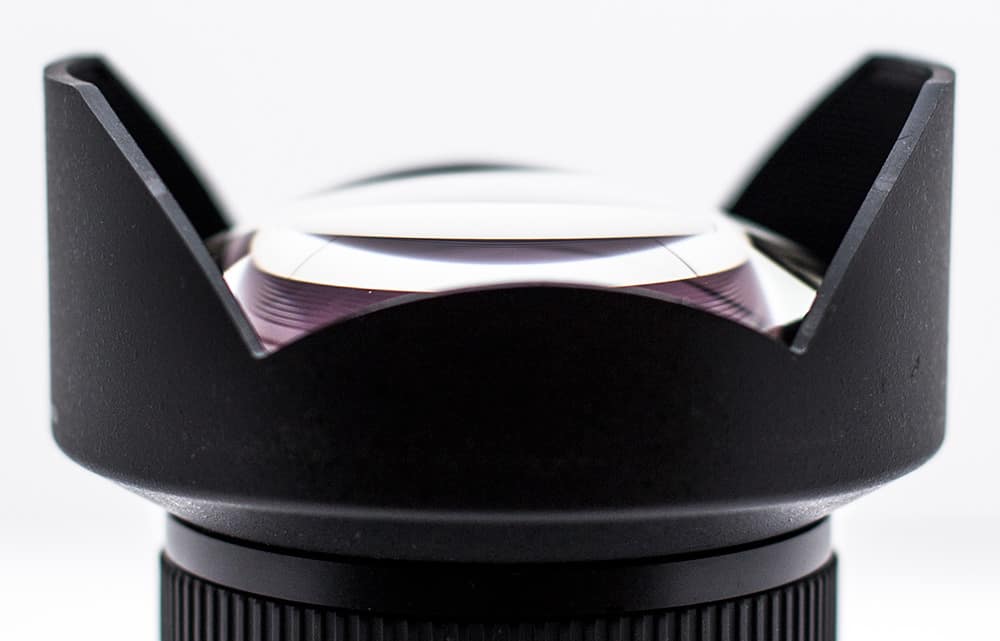
So you have a bad-ass 10 Stop ND “Big Stopper” or, even better, a 16 Stop ND filter and you want to throw them on the front for some amazing waterfall images… Good luck getting them to work on this lens unless you know an engineer of some sort that can rig one up to a spare Rokinon Lens cap. Looking at the shape of the lens you can see it is a very large-bulbous shaped piece of glass with a built-in lens hood to reduce flare. Many filters either screw directly onto the lens or they have an adapter that screws onto the lens and the glass slides into the adapter. With this lens neither option is possible right out of the box.
There is a company called Fotodiox that makes a filter holder system for this lens. I do not have one, therefore I cannot discuss how well it works, but here is a link provided by Frank in the comments below. Thanks, Frank!
Blake’s Bottom Line
Pros:
- Tack sharp with good Manual Focus Practices
- A sweet Ultra Wide Angle Lens that causes minimal distortion to the scene and allows A LOT of image into one frame.
- Very little sign of Chromatic Aberration in the final images.
- f/2.8 Maximum Aperture, great for those Milky Way shots!
- The price!!! Only 300 shells, wow!
- Apparently it holds its own against the Canon 14mm 2.8 L lens that costs roughly 6 times more! Read More here
Cons:
- All manual may be a deterrent for many beginners.
- No way to protect the bulbous lens.
- All Focusing measurements are off by quite a bit, on my copy infinity focus is achieved at ~2.5 meters or 8-9 ft.
If you are looking for an awesome budget Wide Angle Lens, this is it! With some practice with the proper focusing techniques with this lens you can achieve some amazingly tack sharp images for a fraction of the cost of many L series lenses. I think this lens @ ~$300 is a win-win all around. It feels well-constructed and solidly built, it is sharper than all get out, and can handle chromatic aberrations like a boss all while satisfying the Ultra Wide Angle obsession. I do enjoy this lens and can’t wait to get out and shoot some Milky Way shots (I am waiting on a New Moon). I am sure I will have more on this lens as I use it on my HDR images.
Don’t let the words ‘Manual Lens’ stand in between you and this lens. Manual practices WILL make you a better photographer as you will begin to understand the functions of the lens and just how important it is to have good focusing and aperture settings.
[hcshort id=”5″]

For Blake, it's all about the art and process synergy. He dives deep into complex topics and makes them easy to understand through his outside-the-box thinking so that you can use these tricks in your workflow today!


I have the 24 mm Ronikon and when I shoot the Milky way I first during the day focus on an object 20-30 feet away then use gaffer tape to take the focus ring into position Give me sharp photos http://photobee1.blogspot.com/2014/10/night-sky-preview-at-gooseberry.html
Awesome! Thanks for sharing your images. I like the idea of the tape on the lens too to keep it from shifting, most times you will be focusing on infinity anyway so that is a good piece of advice.
Manual you say. No problem, I don’t know how to shoot in Auto. Great review, thanks Blake!
I love the Samyang / Rokinon 35mm that I have. With the benefit of the Nikon version having the Focus Confirm Chip .
Will be ordering the 14mm after your review now .
Blake!
Great article.
There is a filter/lens cap system for this lens. It is made by Fotodiox and sells for $225!
I have attached a link:
http://www.bhphotovideo.com/c/product/1055226-REG/fotodiox_wpab_kr14_core_wonderpana_absolute_core_filter.html
Thanks Frank!
That is awesome! I will update the tutorial to reflect that information. That is almost the price of the lens, haha!
IMO if I’m going to buy a Professional Camera, Canon 1Ds, 1D Mark III or IV, a Canon 5D Mark II or any of the Nikon top of the line cameras, why would I buy an off brand, cheap lens.
You are only be as good as your experience & knowledge.
Your images will only be as good as your weakest link, whether it’s a lack of education, experience or you purchase low end, off brand, cheap equipment.
A true professional knows the difference, will see the difference & would not worry about the price of the piece of equipment.
Like the saying goes, if you
buy a boat then complain about the cost of gas, you shouldn’t have bought the boat in the 1st place.
If you want to be a Professional Photographer then be one, spend the money on the best equipment, get an education in Photography, obtain all of the Professional Photographers of America Degrees, become a Certified Professional Photographer & become a working Professional Photographer.
If you don’t see a noticeable difference now using cheap low end equipment, hopefully, after more experience you will. If you don’t you’re in the wrong biz.
Would you buy an exotic car & put cheap low end tires on it?
People reading your blog think you know better, giving them this advice tells me you should find a new career till you get more experience.
Btw do most of your readers know your background, are they aware you receive free or discounted merchandise for a review or tutorial.
Do they know you receive 10-50% commission on software & plugins sold using your discount code?
I understand where you are coming from, but to answer your question, I did not receive this piece of equipment for free. Do you know that receiving free equipment is few and far between in this industry? Sure software is most of the time a given, but equipment is hard to come by like that.
When it comes to my gear, I tend to buy the best of the best, but when it comes to this piece of equipment I did my research, a lot of research. If you are someone who is going to use the 14mm lens every day for every assignment, then sure, buy the Canon 14mm L Series lens. However, if you are like me and only see a purpose for it every once in a while then this lens is perfect.
On another note, the camera and gear don’t necessarily matter. It is your knowledge about the gear and the processes afterward that are going to take you to the next level. You can throw jabs all day long at my professionalism in this industry and my gear, but at the end of the day, when a viewer looks at my images they have never said, “Wow I can’t believe he took that with a 14mm Rokinon lens on a Canon 6D”.
And yes I do tell people that I receive an affiliate commission on sales, however, I would never do a tutorial on a piece of software I did not think was going to be helpful to their photographic workflow. As for equipment, do you see a link to the lens here? Nope, even if there were an Amazon link, I wouldn’t receive a dime due to Missouri Law… I cannot be an affiliate of Amazon in Missouri.
Here is a supporting article showing the differences between the ‘Professional’ Canon 14mm f2.8 L and the Rokinon 14mm. It holds its own against the Canon and actually beats it in many categories. http://www.extremeinstability.com/lens14mm.html
John, please point out the horrible flaws of this lens by giving a critique of the provided photos. You’re obviously a very wise professional and can point them out in a moment. Also, do you expect your clients to pay you for your time, effort and equipment cost to run your professional business? I mean, you do it for the love of making the shot, don’t you?
Thanks Blake for your review of the lens. Unlike John, I (and I am sure a multitude of others)appreciate your views. When people like me are NOT professionals and DO NOT want to become one we look to you for your opinion to guide us. I have chosen to join HDR Insider for the education I receive. I wonder why, if John is such an expert (professional)does he need any advice/education from anyone?
Thanks Julie. He does make a valid point, however, I feel like it is not the expense of the gear that makes you a photographer it is your wealth of knowledge. In many respects he alludes to that with the thought on photography education. I don’t drive an exotic car, I drive a Scion XD and I bought cheap tires 🙂
I’m so glad John has opened my eyes to the scam you are running here. How dare you receive a commission for saving me money? I demand the right to pay full price for my software!
Haha! I gotta buy diapers for the kids somehow!
I think the review is great and thank you for that. John needs to grow a few manners. I have learned so much from you. As Julie, I joined HDR Insider to further my knowledge of photography and post processing…And again, I agree with Julie, if John is really a professional, why is he here?
There is one in every bunch. No sweat really, he makes a valid point for some reasons.
John-0 Blake-1
Blake Wins!!!
Professional or not, who cares….it’s the passion we all have to do what we do. Expensive or cheap, again who cares…as long as it does what what we need it to.
When I look at anyone’s photograph the last thing on my mind is “I wonder what camera and lens was used to make that picture”?
Again who cares…Beauty is in the eye of the beholder!
I have learned more about photography and photoshop since I have joined HDRInsider than I have in the last 20 years! Keep doing what you’re doing Blake…we are all grateful for your knowledge and for sharing everything you do.
Couldn’t have said it better myself…
Blake,
You are a great teacher. It is easy to learn from you. As, you has stated before. It is not the equipment but your talent. I see some great photos taking with an Iphone. Keep up the good work.
Thank you for the feedback! I couldn’t agree more with you on the equipment! Thanks Bigted!
Blake,
This Len cannot be use with the ring aperture using Nikon camera. You will get error message. fEE. You then must set the aperture to f22. Also. How do you deal with the wide angle distortion in the field?
Interesting on the Nikon, I thought it was chipper for Nikon. Good to know.
In the field there isn’t much you can do except keep your horizon centered (crop later). Most of the wide angle distortion correction would have to happen after the fact in post.
I have been a pro shooter for over 35 years. I bought the Rokinon 14mm lens to shoot with and I love it. Within reason. It takes a little bit of practice to get used to but it works fine once I practiced with it a bit. Blake is right in many thi ngs. The focus at 2.8 is about 8-9 feet. This gives a depth of field of approx. 7′ to infinity. (When you buy one run some tests because we have found that each one focus’s a little differently.) I use it to shoot Milky Way shots.
There are always going to pixel peepers and people who get their shorts in a tizzy. Pros use the equipment that works. If it is cheaper and works……all the better.
I go out shooting with a good friend and fellow pro. We have known each other for over 35 years. He also uses the Rokinon 14mm. He also has the 24mm. I think they also go by the Bower name. We both have the Canon 16-35mm and we always choose the Rokinon for Milky Way shots because of the wide field of view.
By the way, my friends name is “Royce Bair” and he is one of the leaders in Milky Way photography. And a great teacher just like Blake. Both of who rate the Rokinon very high.
So listen to your pro friends folks. Not the wanna be’s who have not lived and worked in the trenches as a pro for years and years.
Thanks Blake for a great blog and great instructions. I recommend you a lot and will continue to in the future. Keep up the “great” work.
Awesome! That is so great to hear. I researched a lot of pro Milky Way guys out there before purchasing this lens and from what I found almost all of them have used this lens or currently use this lens for their Milky Way shots. I am glad you bring this experience to the table. I will keep it up, I can’t stop now 🙂 Take care and thanks for the feedback and adding to the discussion!
Blake,
My copy of this lens does not allow me to adjust the aperture to match the numbers on the lens. Since my Sony does not show me an aperture, Ikm flying blind, other than to see the image lighten and darken as I move the aperture dial. It adjusts from below the scale to no further than f/5.6. Am I crazy or what gives?