
Dynamic Contrast with the Texture Slider in ACR and LR
The new Texture Slider in ACR and LR is really making an impact it seems as it should! Anytime Adobe adds a slider to either program it means they felt it was necessary to be in there. Otherwise, they would have left it out or changed how other sliders worked to achieve the effect.
The new Texture Slider was added with the most recent update to Photoshop (Adobe Camera Raw) and Lightroom CC 2019. It is just above the Clarity adjustment in both the basic adjustments (global) and the Adjustment Brushes (Local). I feel this slider is fantastic, but it almost certainly should be used as a Local adjustment with very few exceptions.
Here is what Adobe says about the new Texture Slider on their blog:
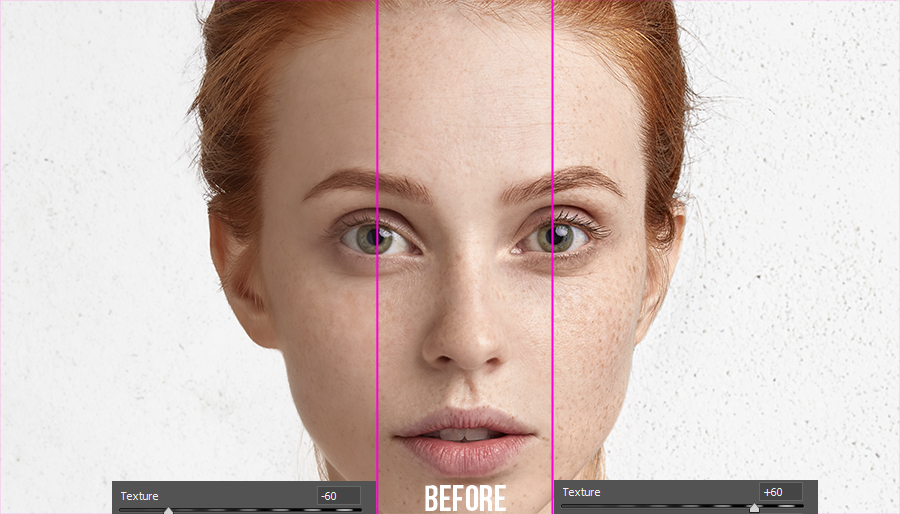
You can now smoothen or accentuate details such as skin, bark, and hair with the new Texture slider. You can adjust the Texture slider negatively to smooth skin and retain fine pore details to ensure natural-looking skin. You can increase the Texture amount to accentuate details such as bark or hair without affecting less detailed areas, like the out of focus areas in a photograph. Adjusting the Texture slider does not change the color or tonality in your photograph.
You can apply texture to your photos both as a global adjustment and to specific parts of the photo as a local adjustment. To apply texture, select a photo and switch to the Develop module.
The thing about the Texture slider is that it is a micro-contrast adjustment that heightens the relationship between highlight in shadow in the detail areas of your photo. Sounds awesome right? Well, it is until you see what it does to areas that don’t have too much highlight or shadow too close together.
In today’s tutorial, I will show you how to use the Texture Slider with most of my attention on using it locally. I think you will find the results pretty impressive for a simple little slider. This tool is excellent for all kinds of images; here are just a few ideas:
- Landscapes: Used Locally on areas that have texture, Rocks, Foliage, Sand, Mountains
- Portraits (Female and Babies): Used Locally to smooth the skin. Not entirely professional quality, but great for the novice.
- Macro: Local for images with heavy bokeh or globally for soft focus macro shots.
- Street: Locally on buildings, clothing, beards, etc
- Architecture: Best used locally on areas of interest, but globally for gothic church interiors (mild increase).

For Blake, it's all about the art and process synergy. He dives deep into complex topics and makes them easy to understand through his outside-the-box thinking so that you can use these tricks in your workflow today!


Is there a typo in the first sentence of your intro that ends “heightens the relationship between highlight in shadow in the detail areas of your photo.” Should it be “heightens the relationship between highlight AND shadow in the detail areas of your photo”?
More than likely a typo, humans make mistakes… argh mistakes!!!
Yep, that’s been well documented about humans!!
The texture slider is a much needed addition to ACR/LR. It allows me to reduce the over reliance on the clarity slider and reduce the use of add in software for skin softening. Only question is why it took Adobe so long to make this add.
Probably VERY calculated on their part. They are pretty smart about how and what they use to make their software sing!
Blake, thank you.
My pleasure!
Blake, thanks for the explanation of how the new Texture slider compares to Clarity and Dehaze. A micro contrast adjustment, finally. I agree that it would work the best locally after watching your examples. Good work.
Hi Blake,
Great stuff as always. Can I do local texture moves in LR like you showed in ACR? I don’t recall seeing a masking tool in LR.
Yep, theres a brush in Lightroom that works just like this one.
Thanks for the great tutorial. My question is would you use this in the workflow in ACR/LR and still use Advanced Contrast 2 (my preferred sharpening approach as of now) in ZSE? It seems to me even if you used the ‘gentle’hand’ approach doing both may end up being too much.
Admirably clear and informative as ever, Blake. Great tutorial.
Funny how whenever I see something new and want more info I think, “has Blake done a video?”
And Tada! Here it is. Thank you!
How do I get the texture slider under the Camera Raw going through the bridge app? I can open up Lightroom and see it. When I open photos going through the Bridge and then opening them up to Camera Raw the Texture Slider isn’t there. However if I open up Lightroom the slider is there but I do most of my edits using Camera Raw to Photoshop. I hope you can help.
Thank you!!
Make sure you go into the Adobe Creative Cloud App and update Camera Raw. It may not be on auto.